The blackworked half smock

The blackwork

In sixteenth century Europe, blackwork was the most fashionable and go-to style of embroidery for linens. The relatively simple materials required – linen, a contrasting fine fiber, and the ability to count threads – saw a veritable blooming of this intricate style of embroidery. Surviving examples include smocks, sleeves, coifs, forehead cloths, the occasional cushion, at least one skirt1, and many, many portraits.

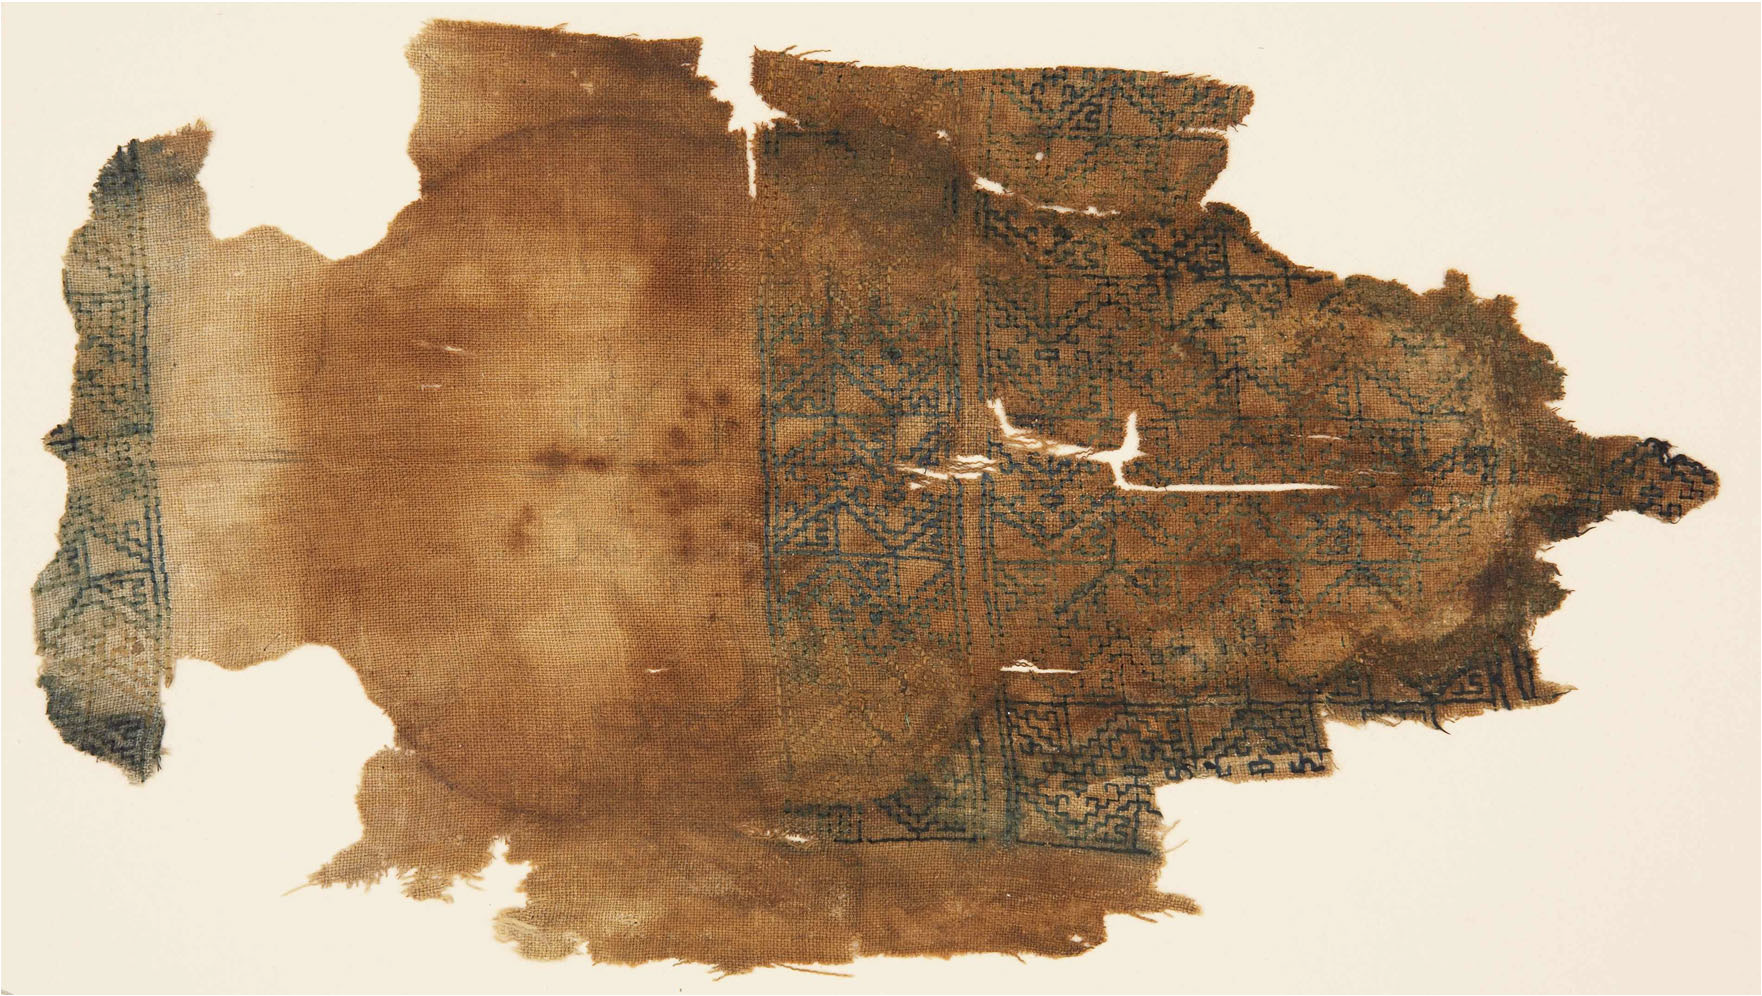
Remaining examples of early medieval designs are highly geometric. There’s a strong resemblance between blackwork and a monochrome Middle Eastern embroidery technique which may have migrated to Europe from Egypt via Moorish Spain.

The example below is 13th-15th century, from Egypt2.

It was once thought that blackwork came to England with Catherine of Aragon, who arrived there in 1501. However, it was in use much earlier. One of the earliest literary appearances of blackwork can be found in Chaucer’s Canterbury Tales, written between 1387 and 1400. His description of the miller’s wife’s smock sounds like the classic double running stitch used in blackwork, where the pattern is the same on both sides3 :

Of white, too, was the dainty smock she wore, embroidered at the collar all about with coalblack silk, alike within and out.

Blackwork evolved rapidly to include a wide range of patterns; from intricate geometric repeats to an almost freeform style, lively with critters and fanciful flora.

Like the collar of the miller’s wife’s smock, the geometric motifs are sometimes reversible. A double running stitch and thread counting can permit the pattern to be the same on both sides. This method of blackwork embroidery is also known as Holbein stitch4 because of its frequent appearance in his portraits. It’s one of the few kinds of embroidery that follows the (totally unrealistic) Victorian conceit that embroidery should be as tidy on the back as on the front!

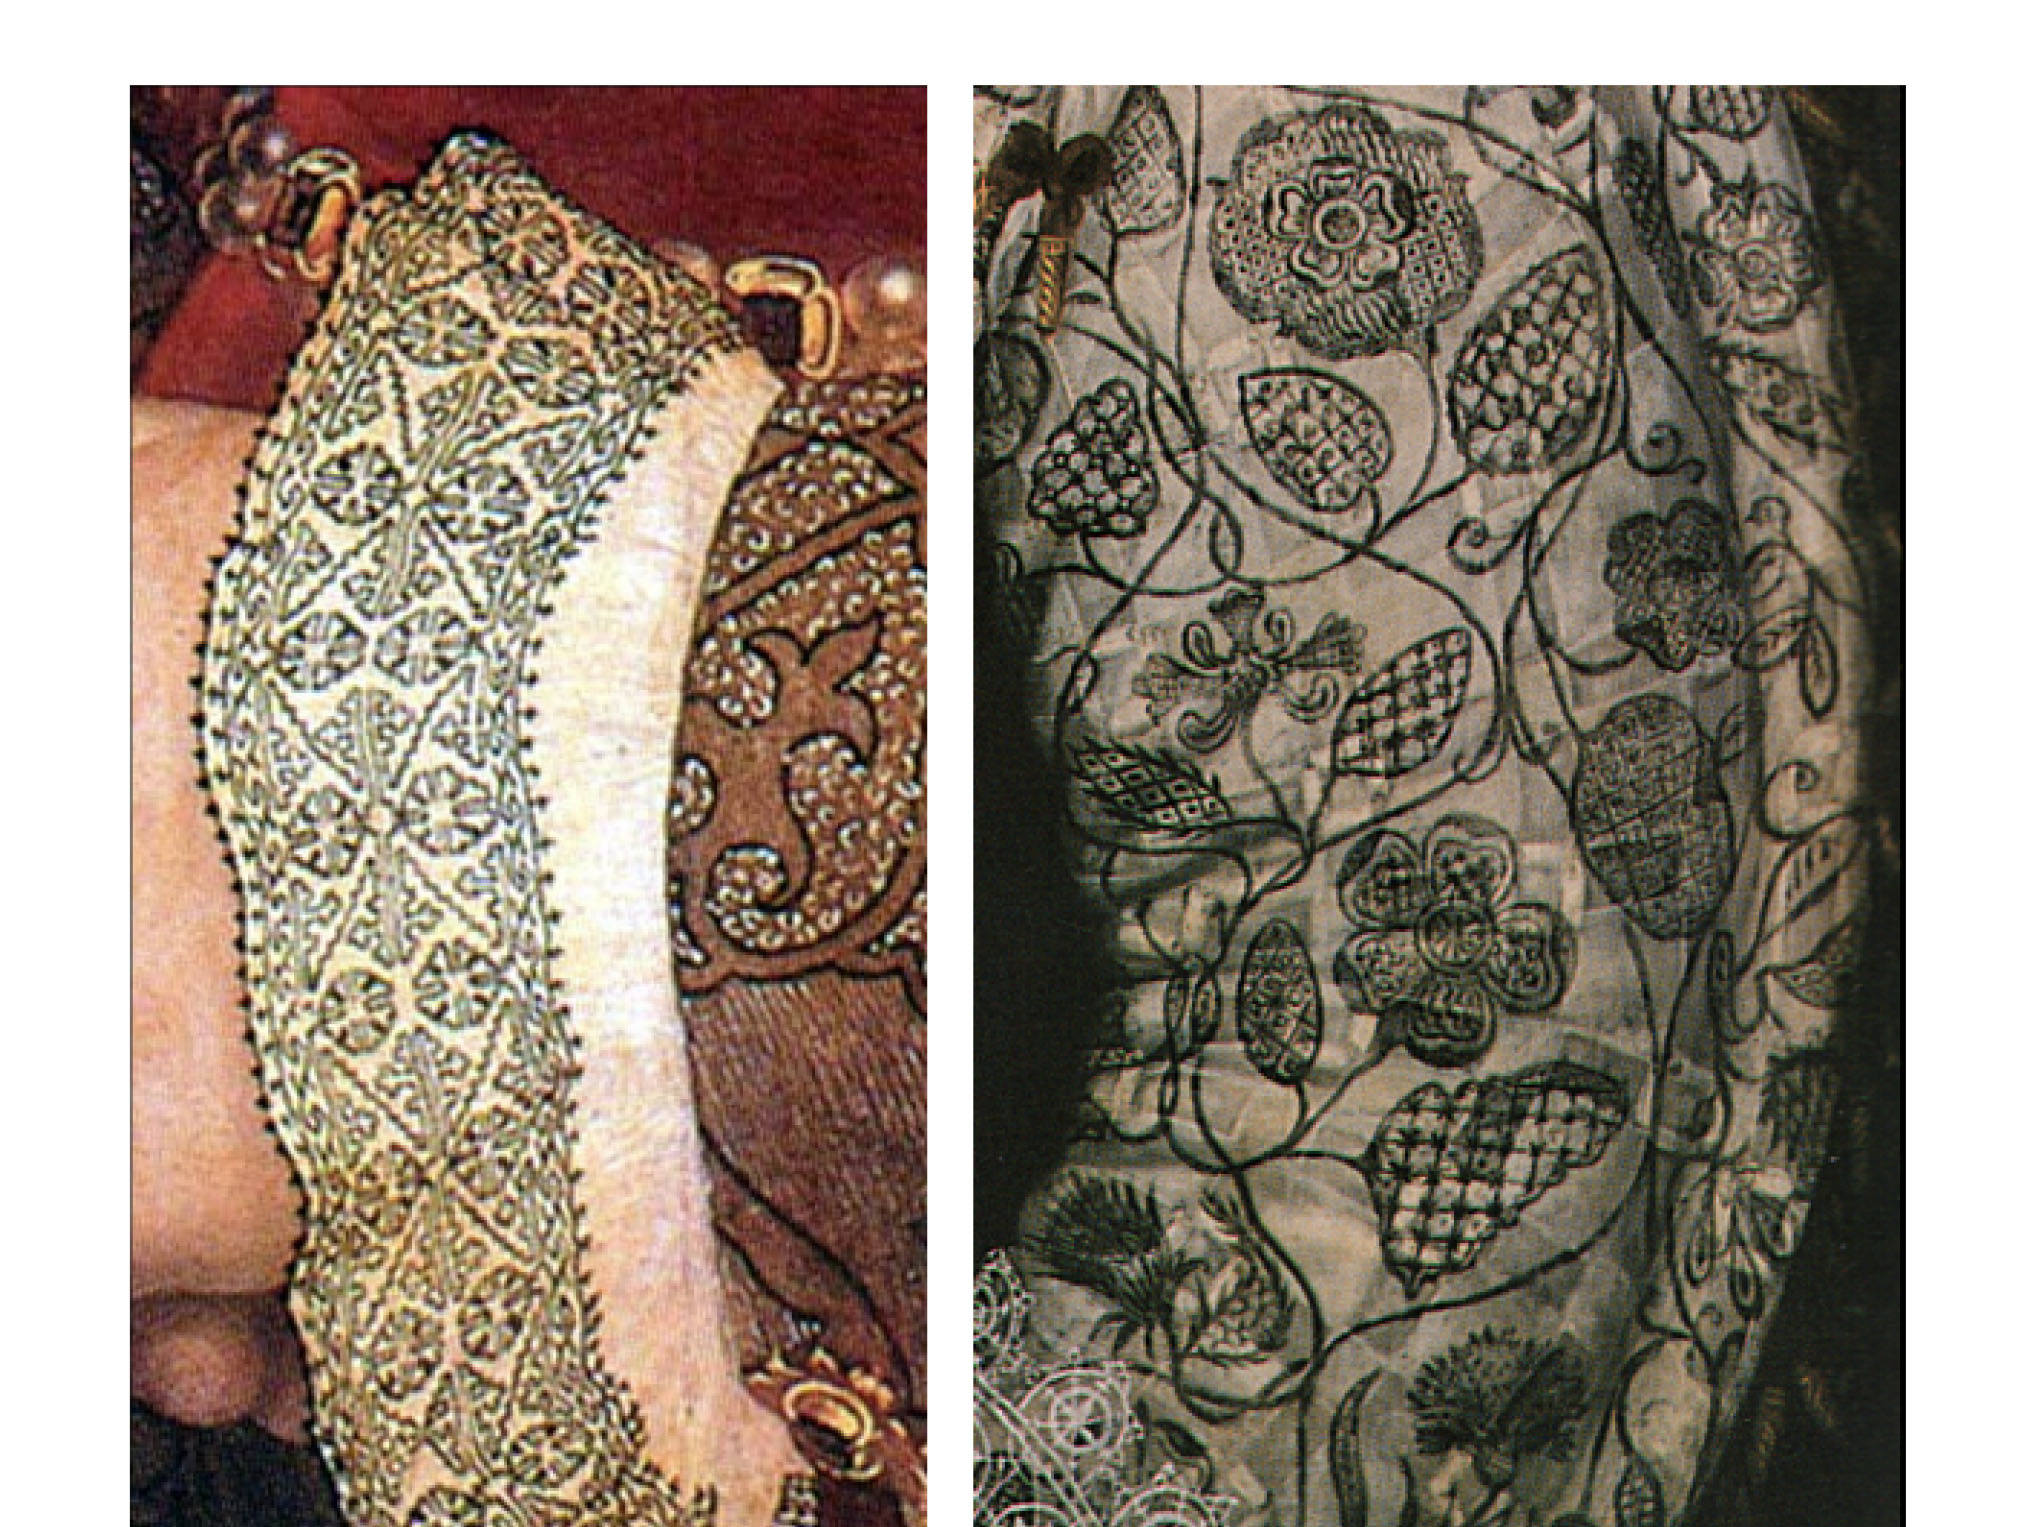
The cuff on the left in the image below5 is from the 1530 Holbein portrait of Jane Seymour. The embroidery painstakingly painted illustrates counted stitch blackwork being used to produce an intricate and delicate geometric pattern.

On the right is the slightly later portrait of Queen Elizabeth’s sleeve (from an unknown artist in 1590). Compared to the cuff, the sleeve demonstrates the evolution of blackwork from the early geometric style to the later freeform style.

The design

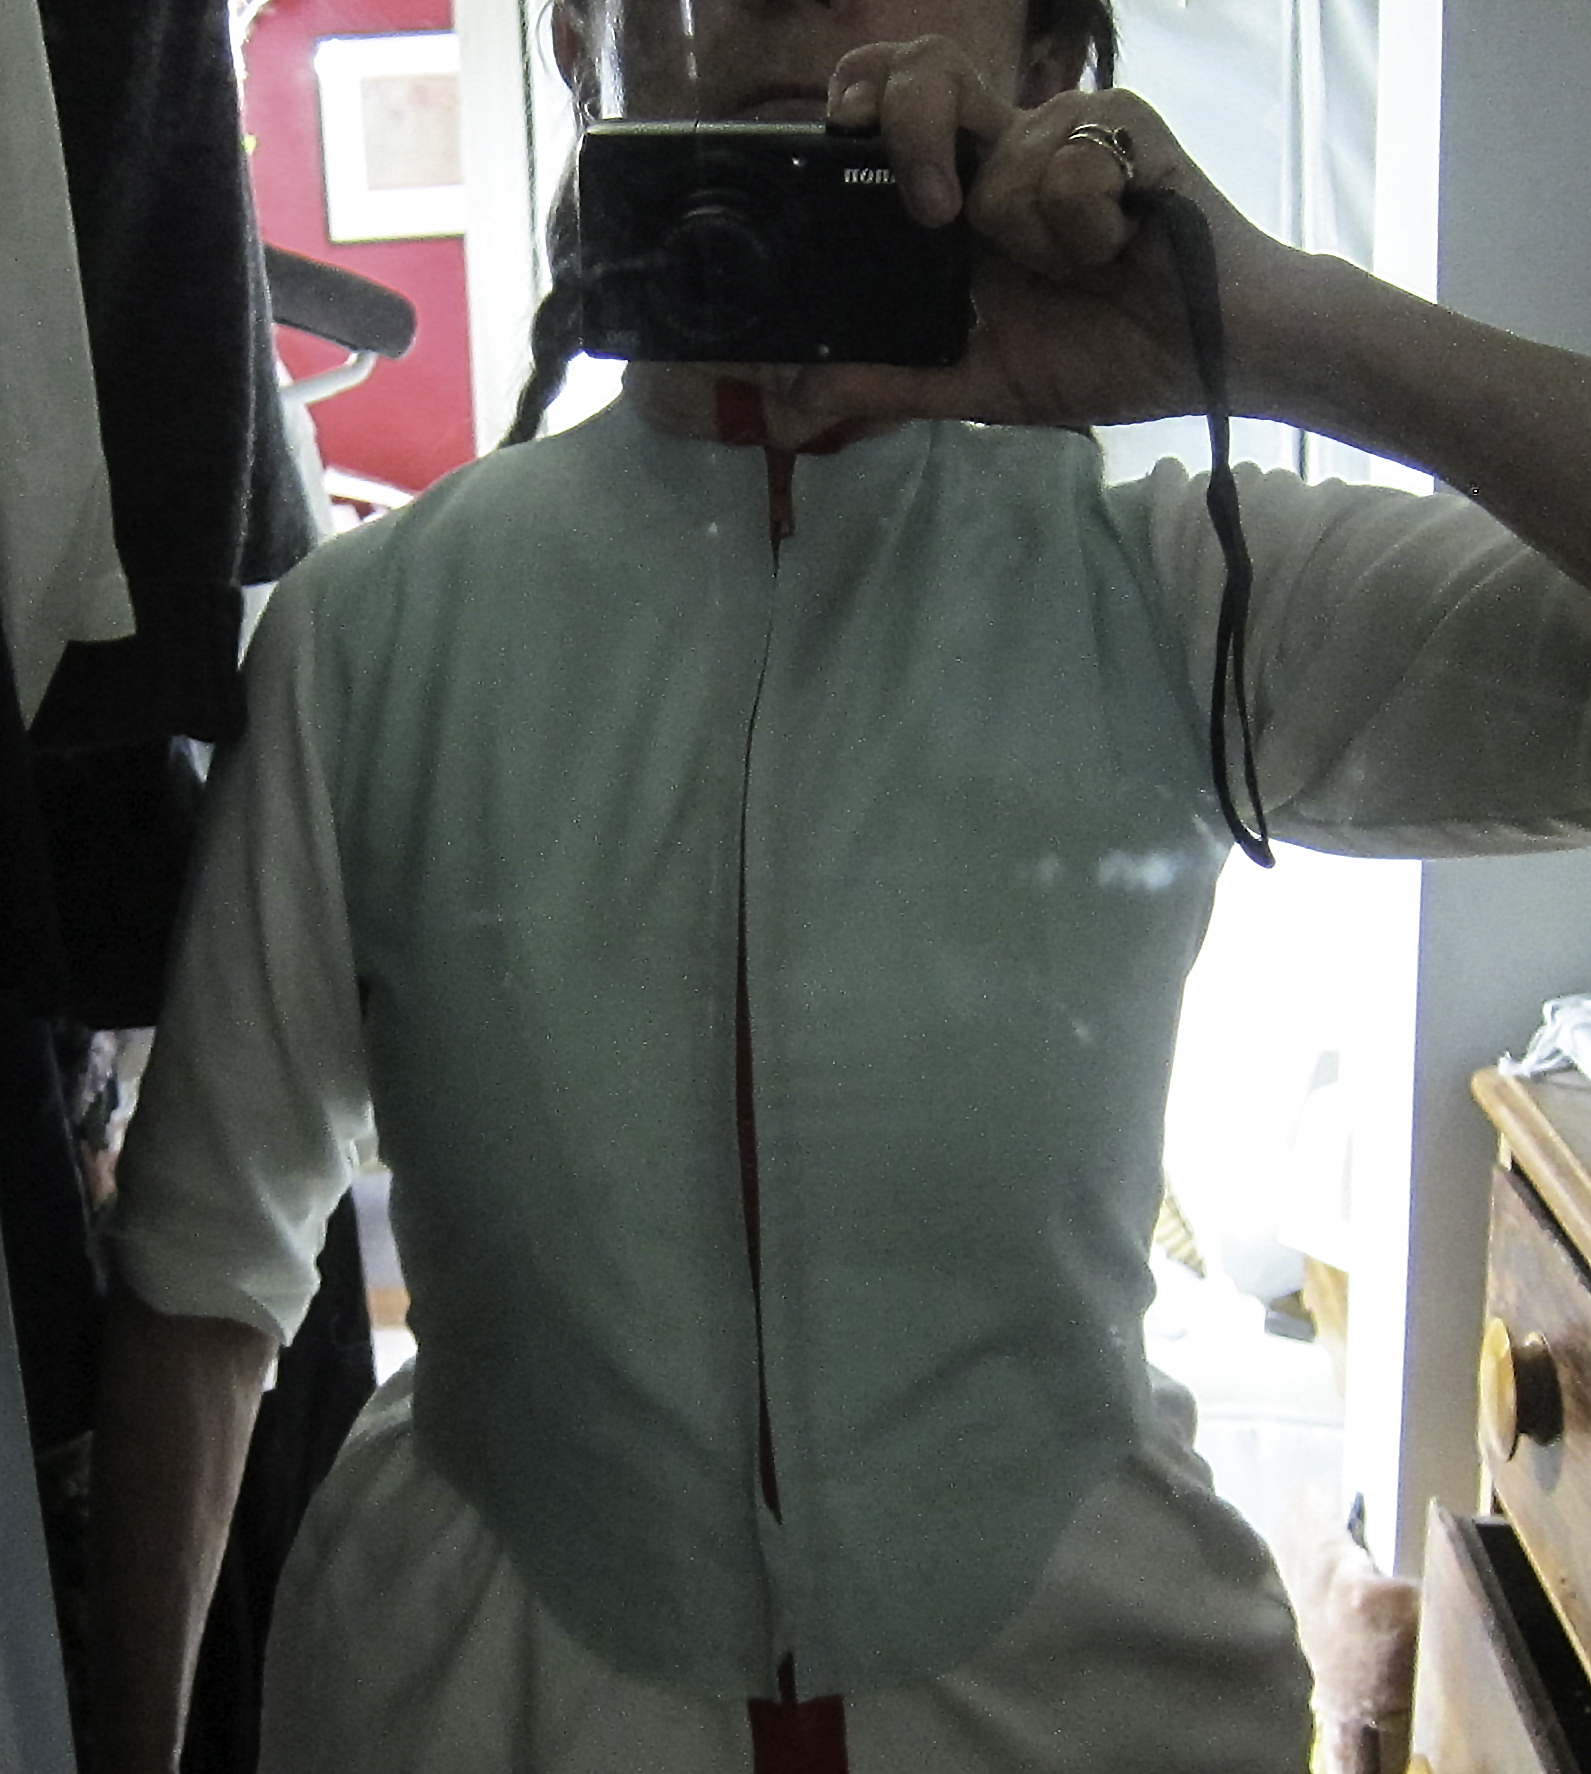
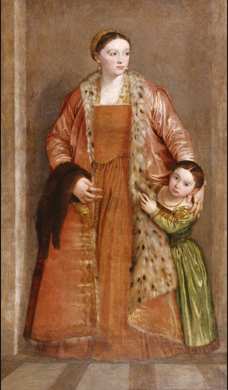
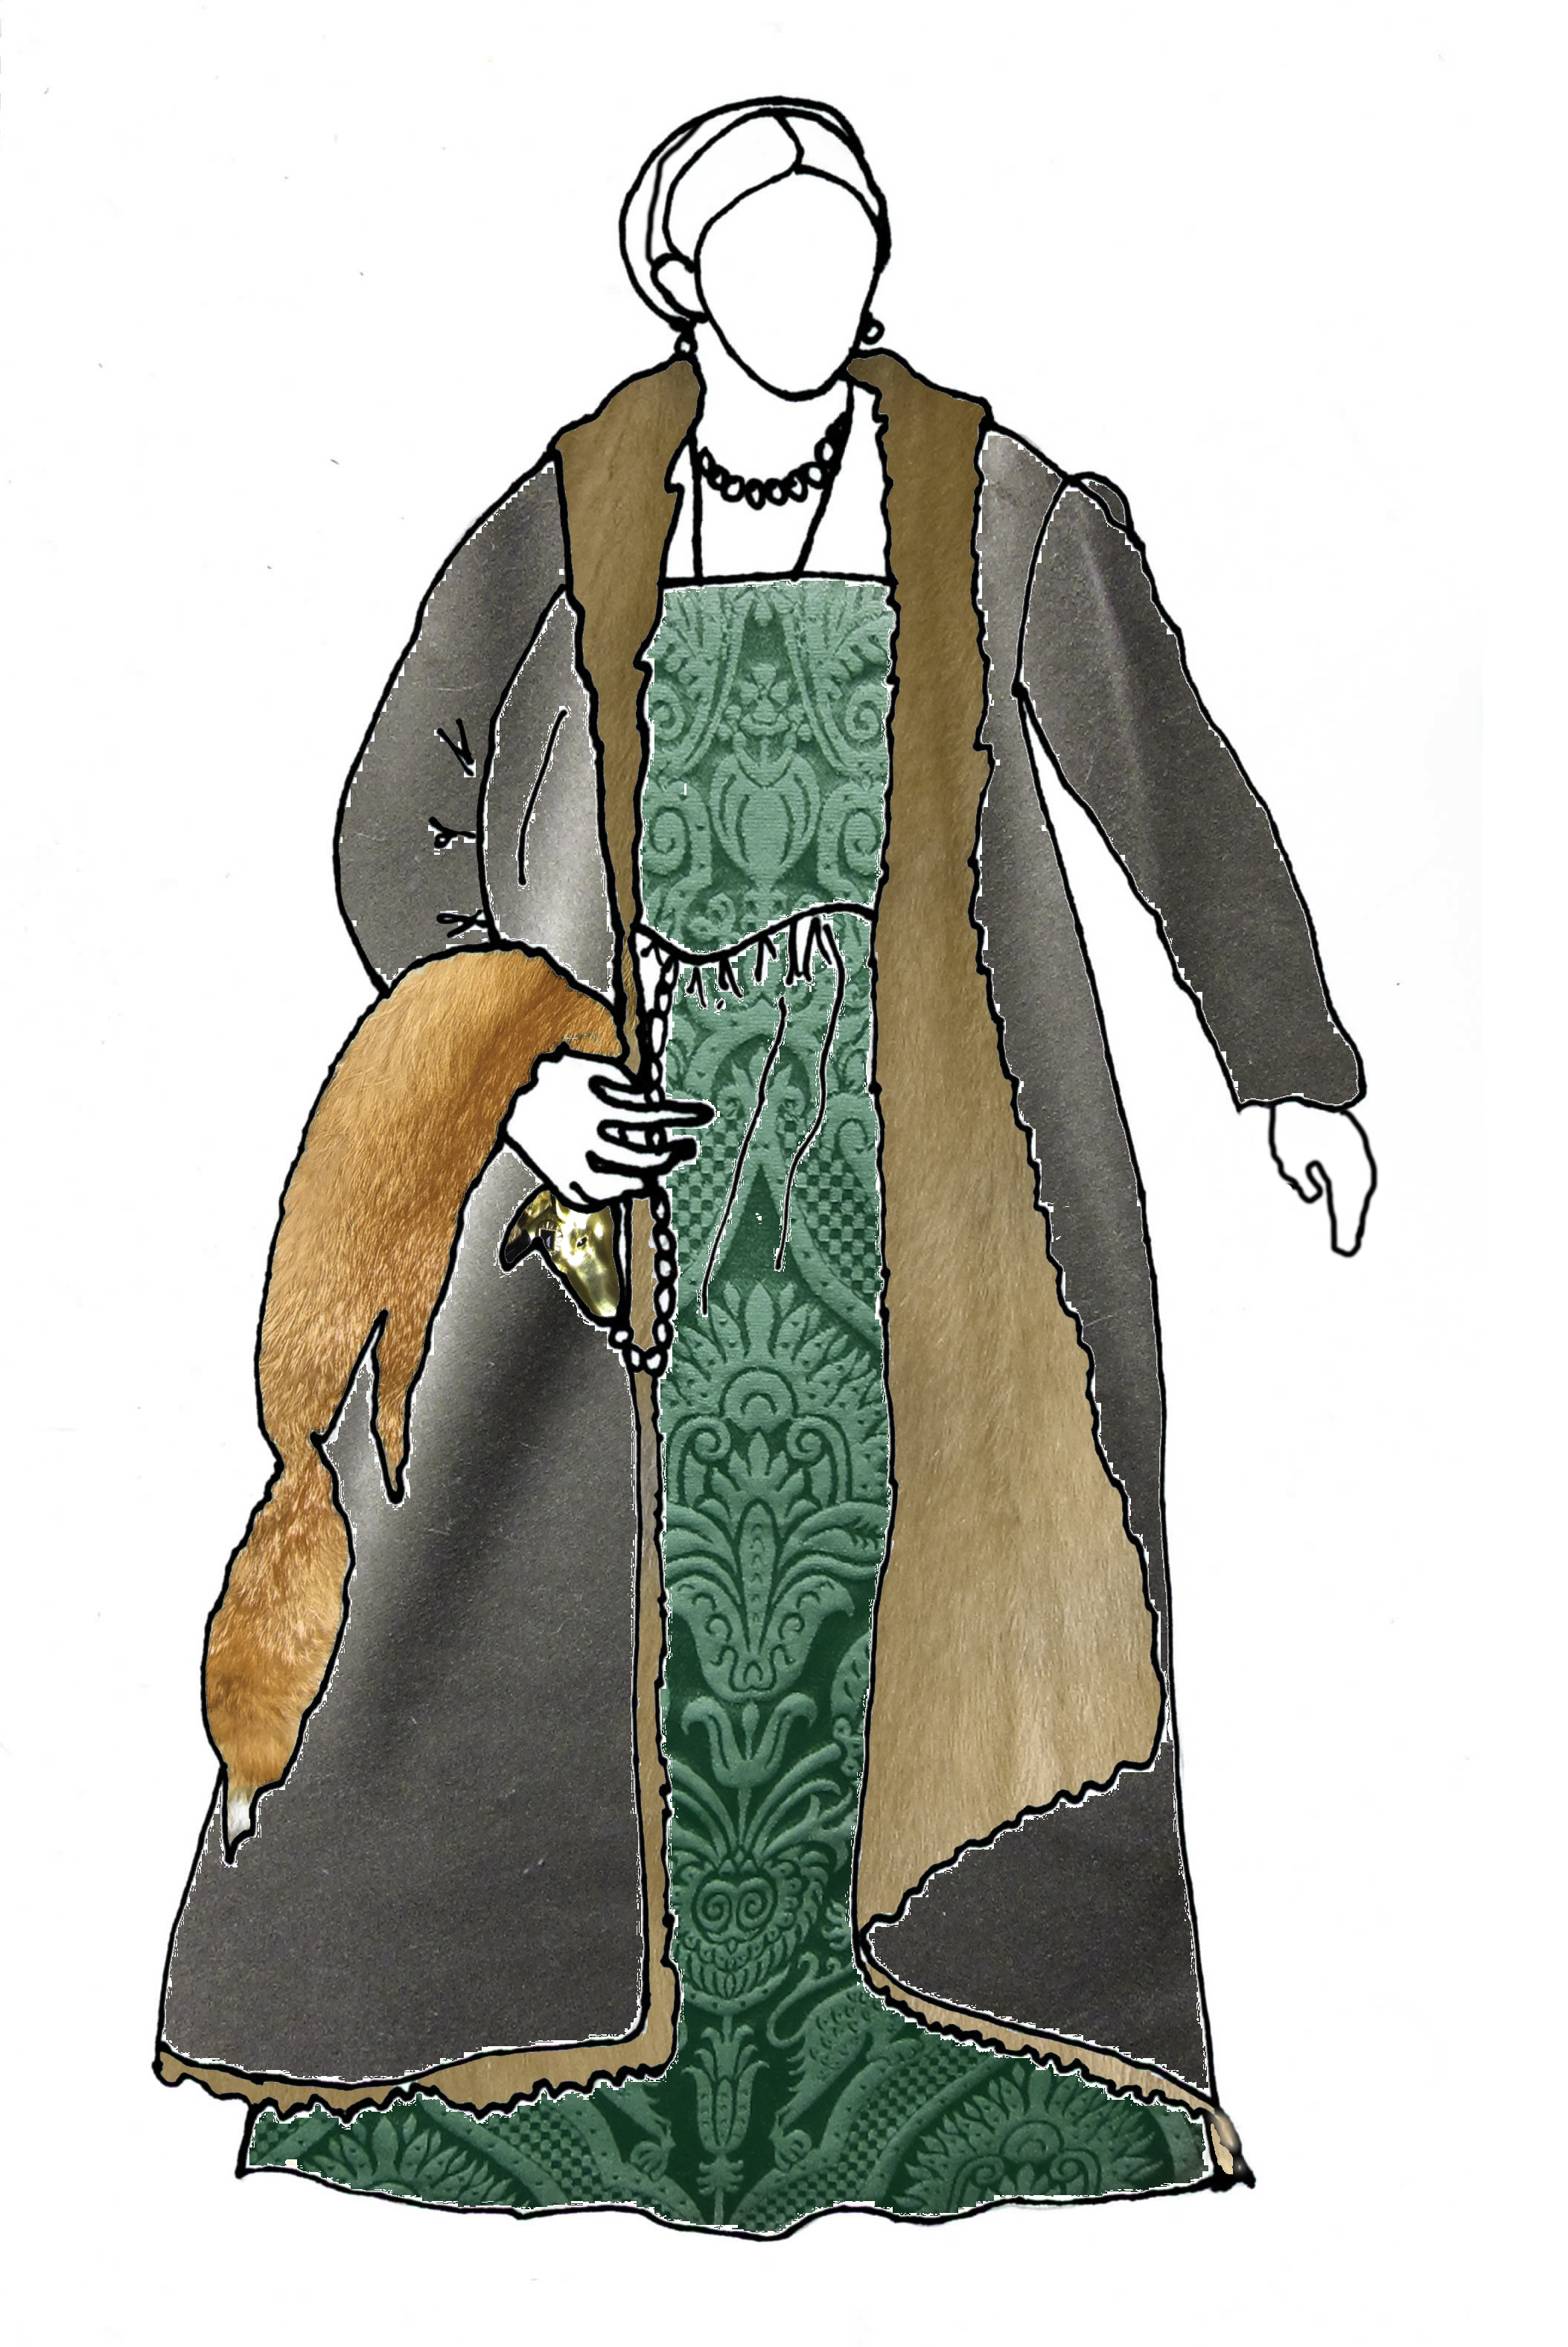
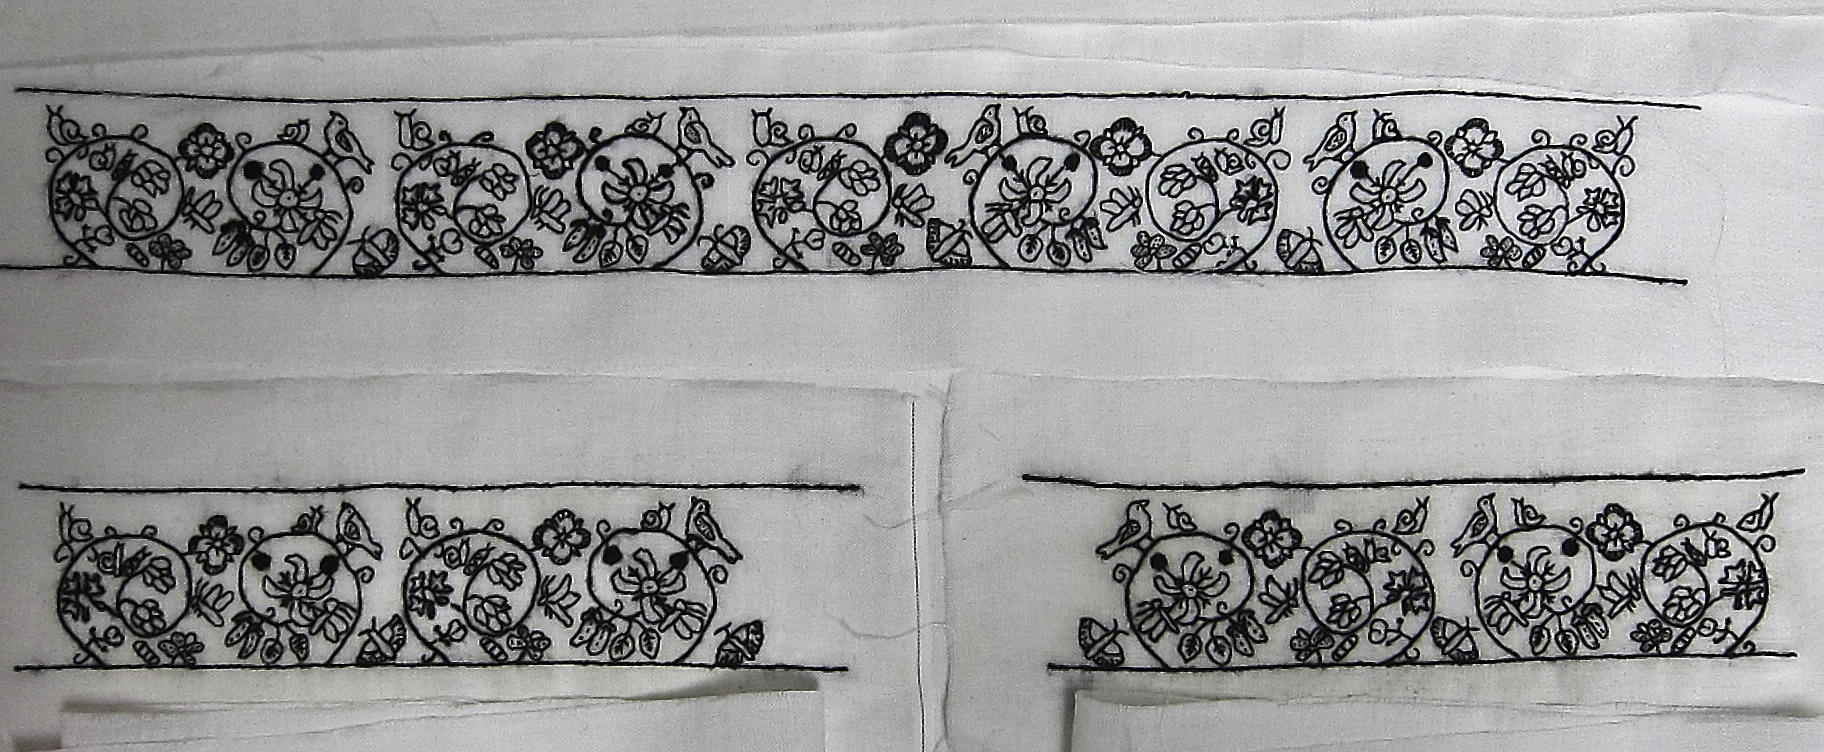
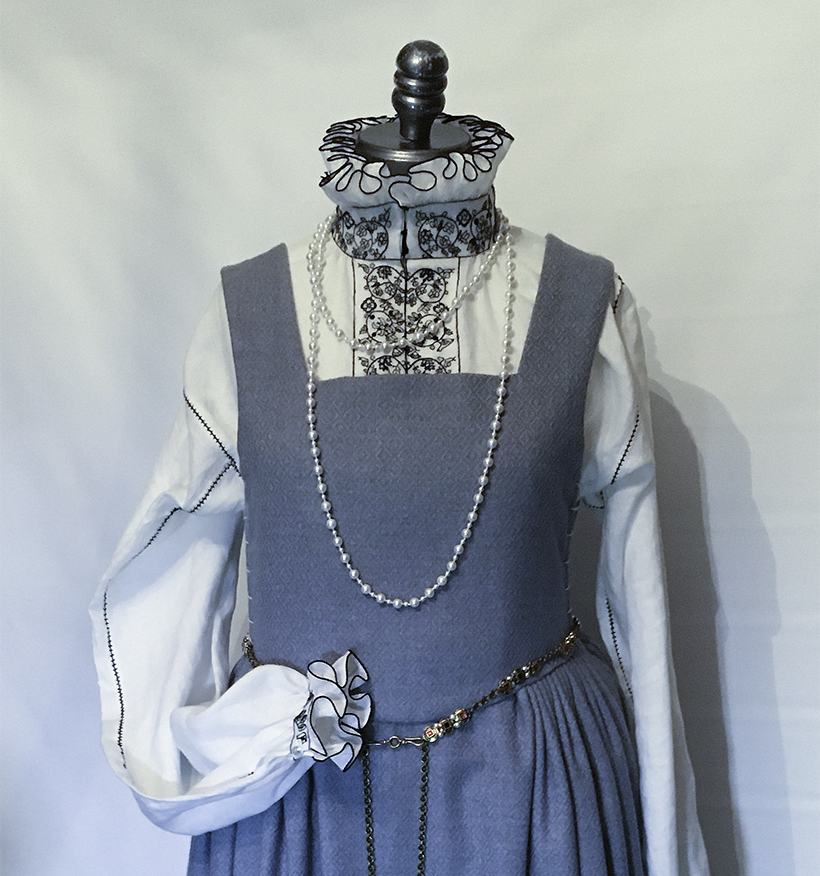
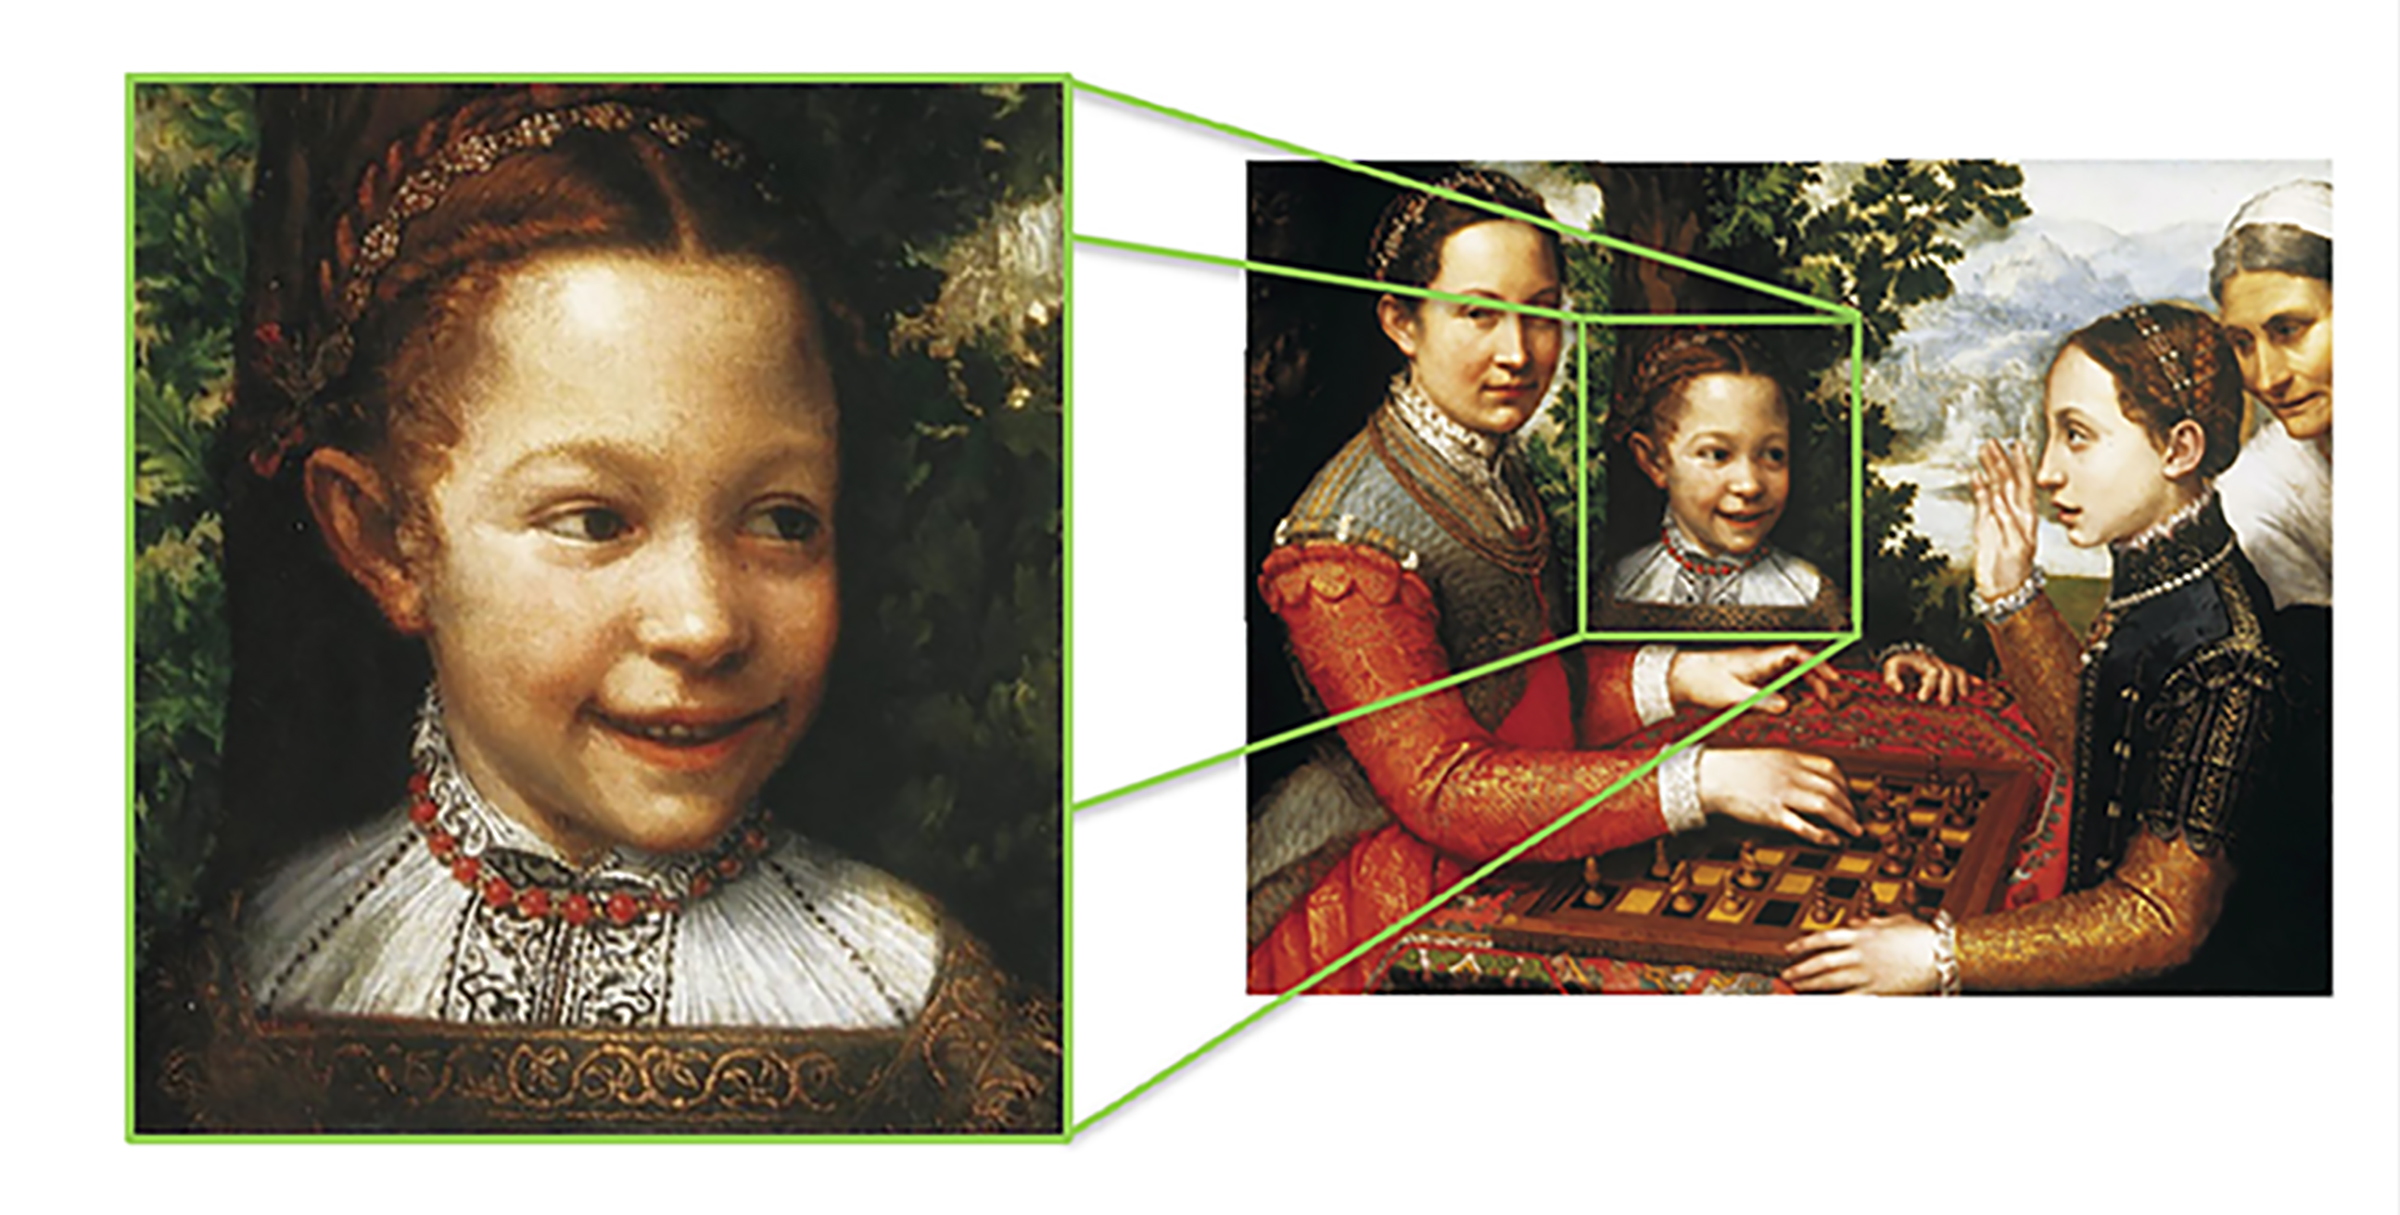
The collar, plackets, and cuffs of my linen waist smock are embroidered in the later, freeform style. The design was inspired by the front panels of the smock worn by Europa Anguissola in her sister Sofonisba’s painting The Chess Game6:

The motifs are an adaptation of those on this coif in the collection of the Museum of Fine Arts, Boston7:

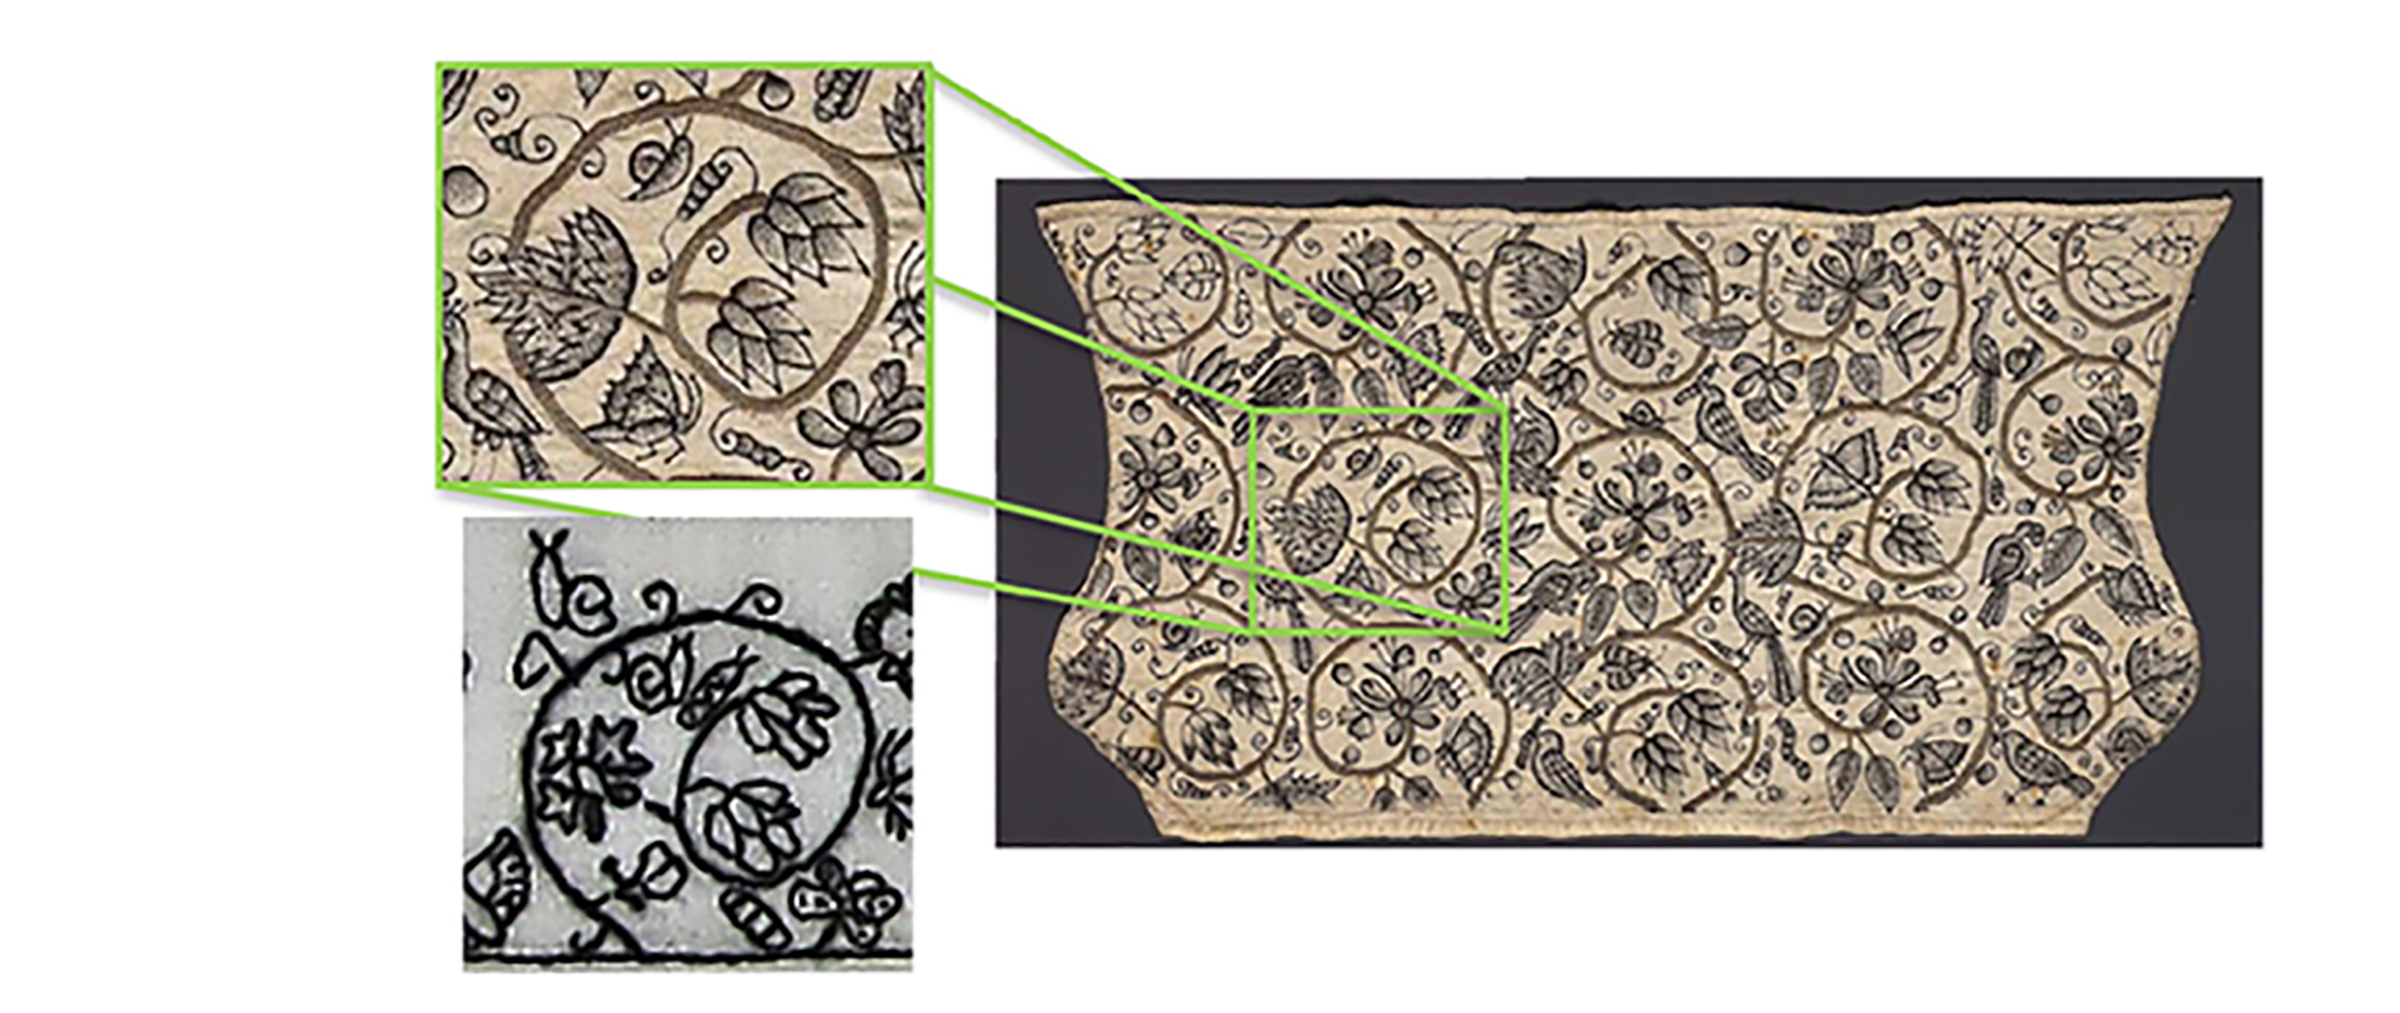
I adapted the design, adjusted the scale, redrew it, and added pea pods & snails for whimsy.

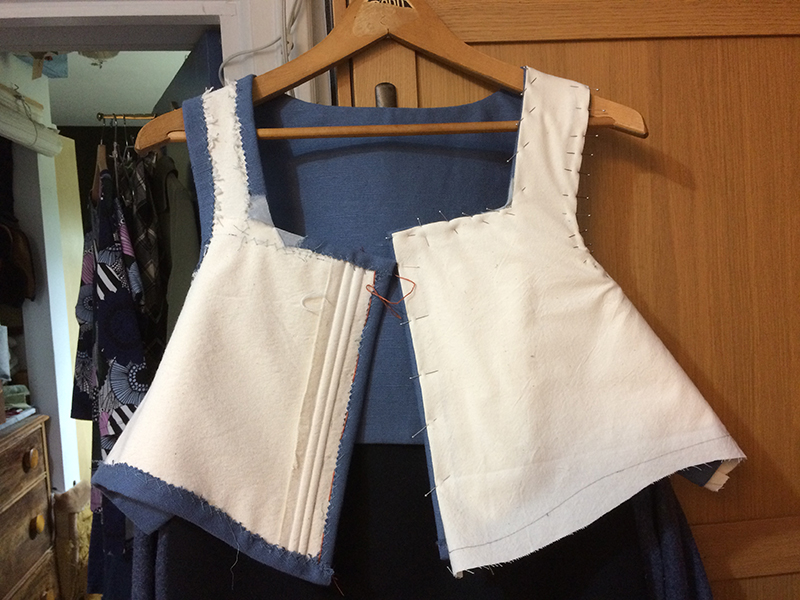
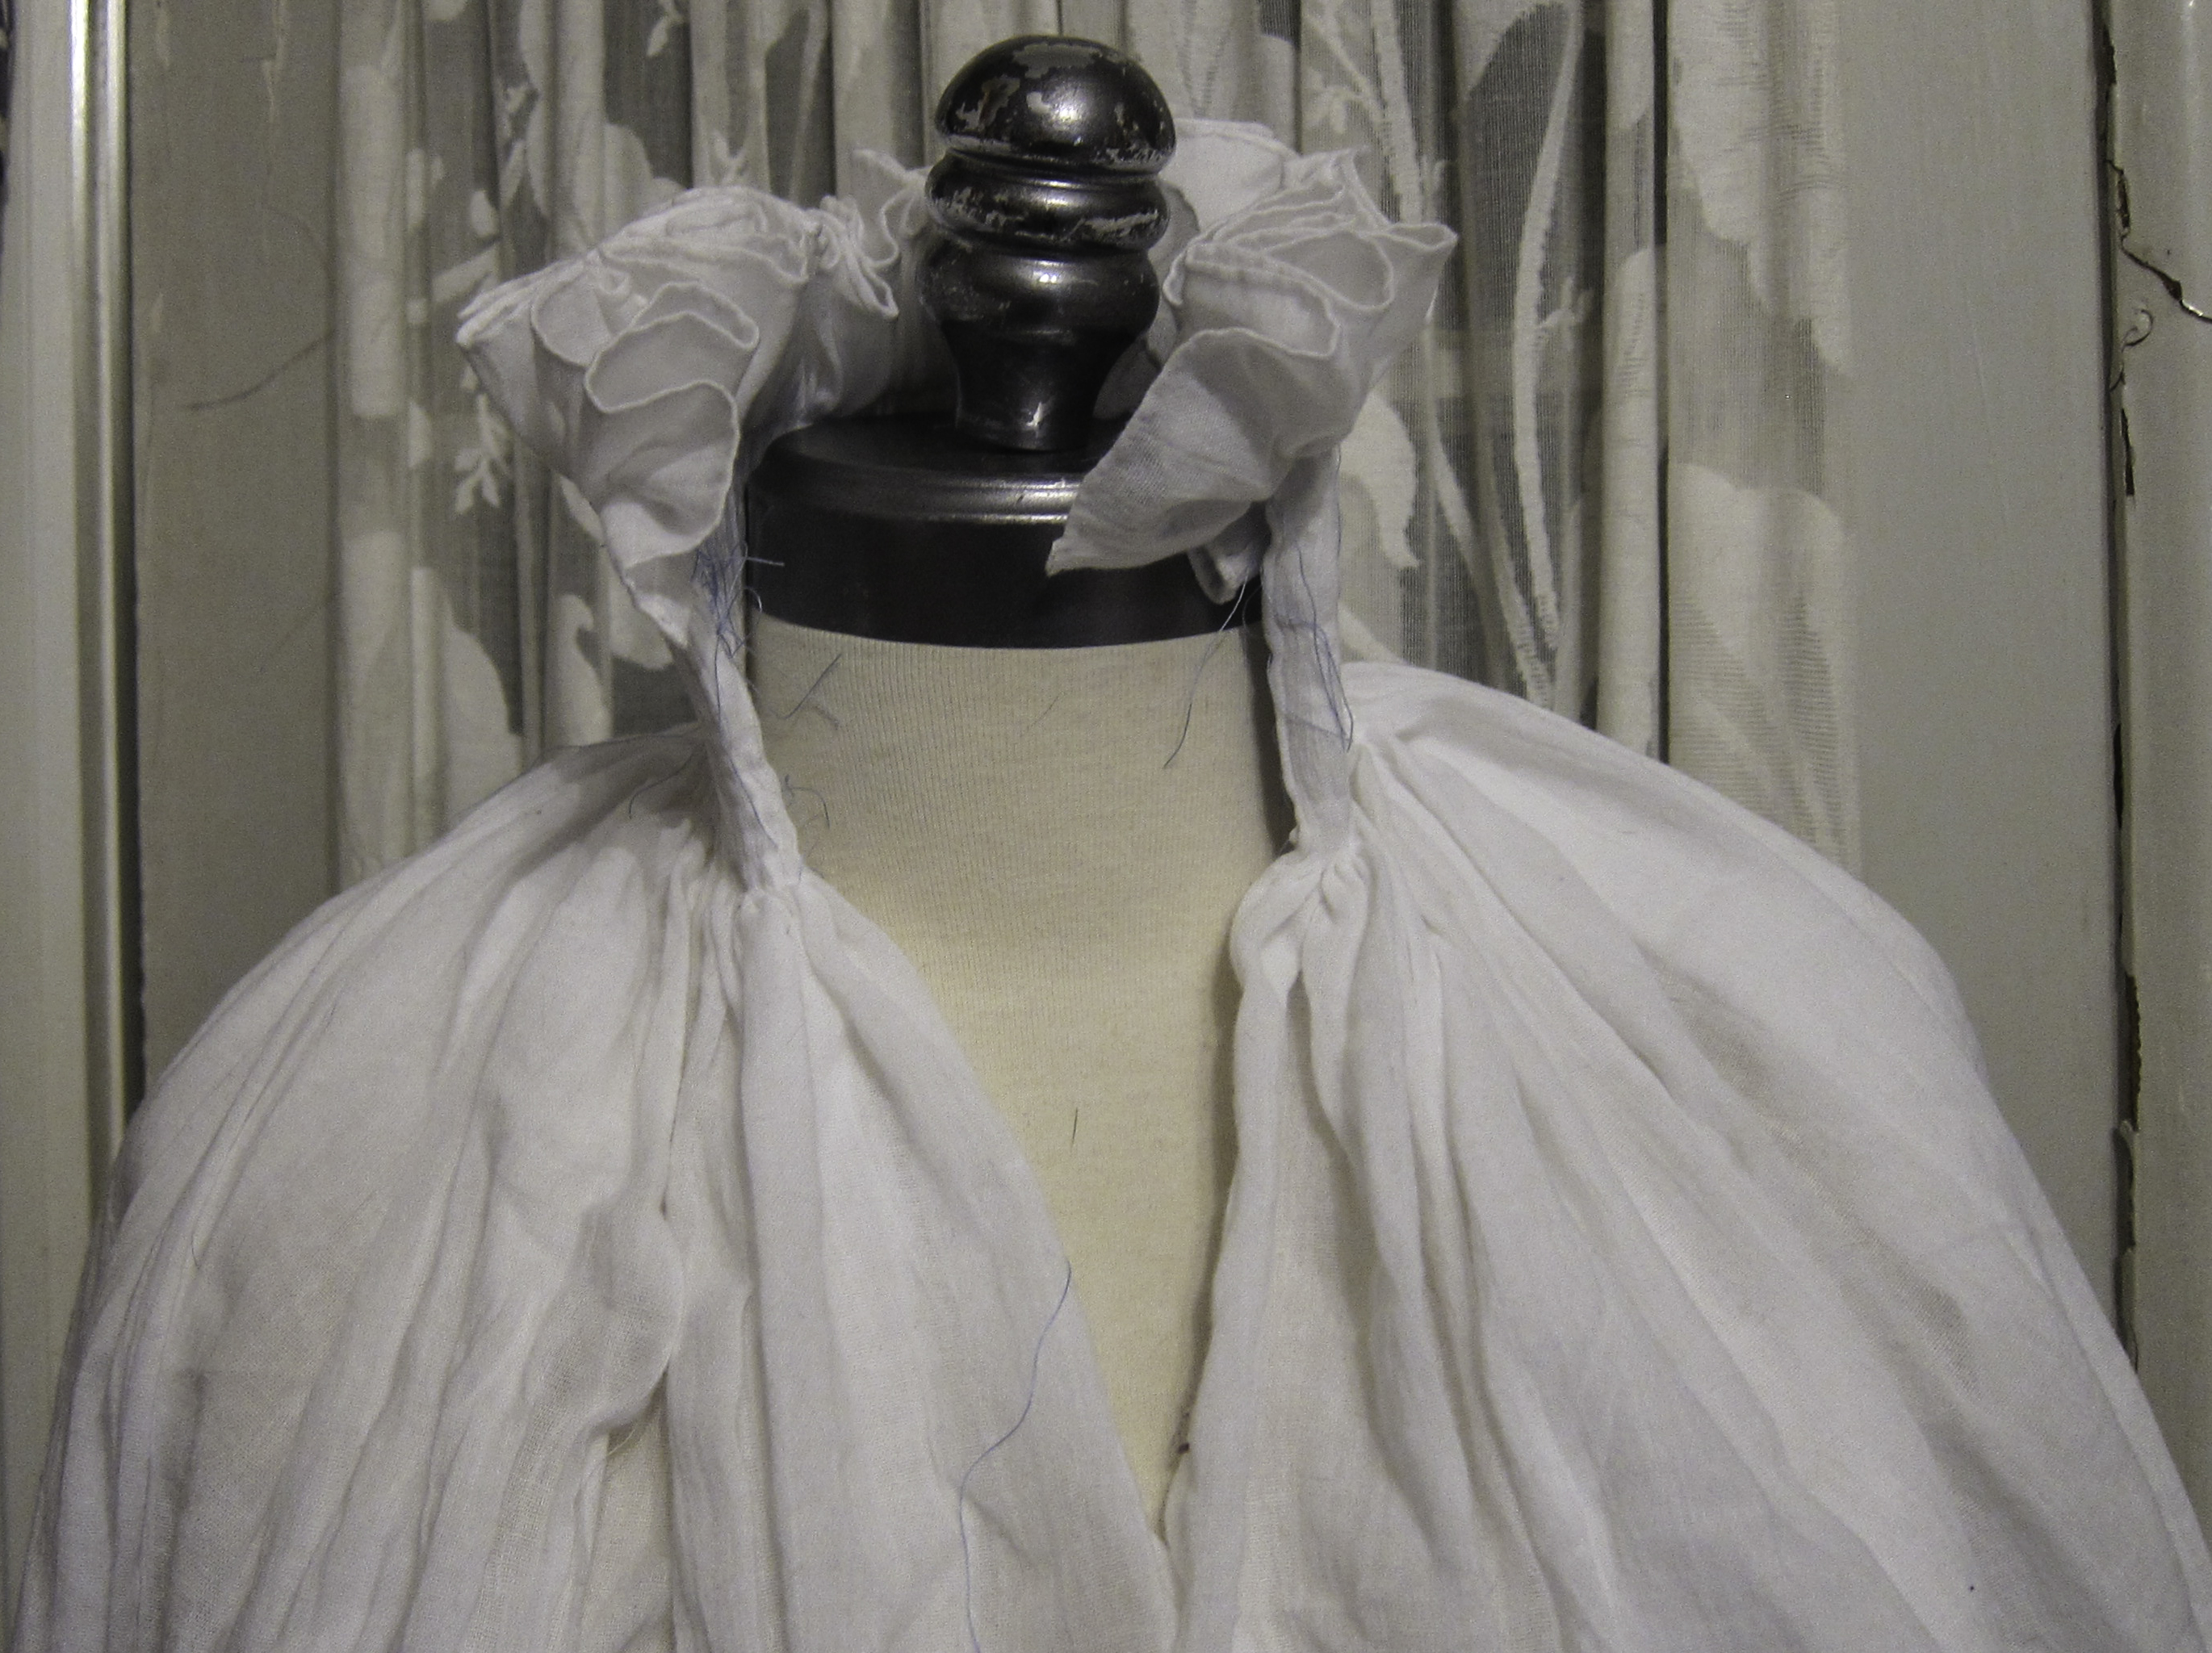
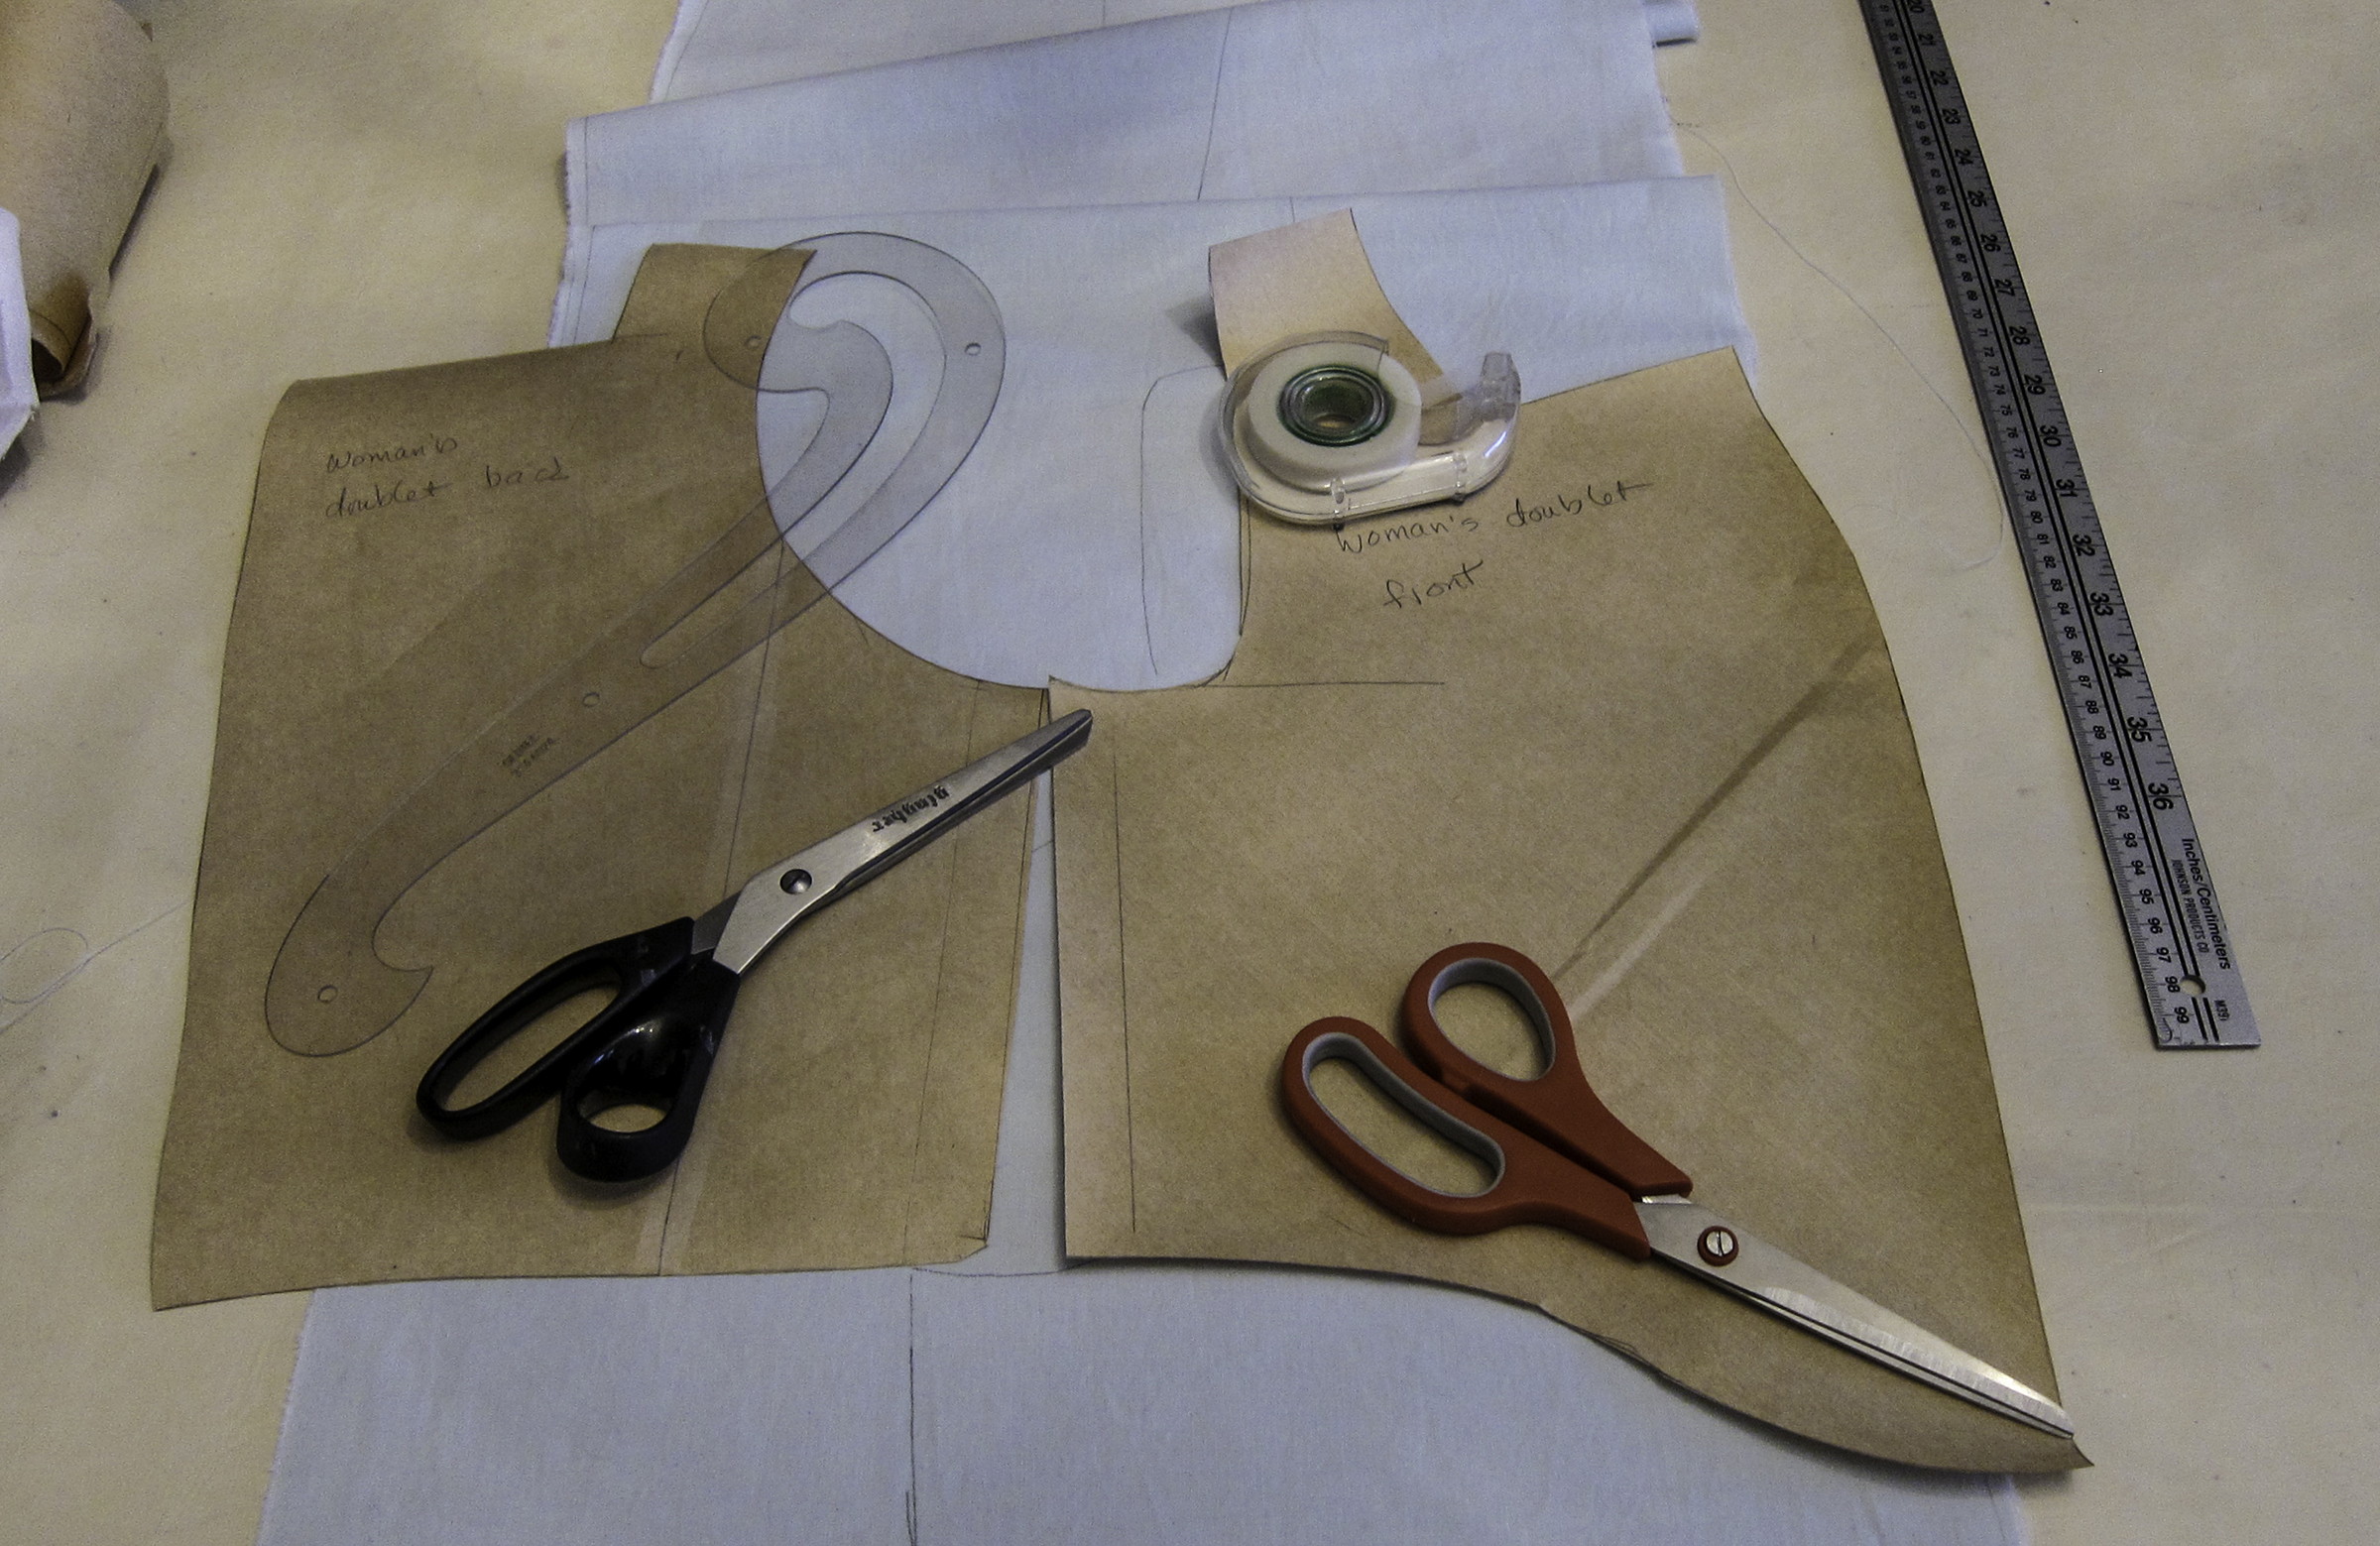
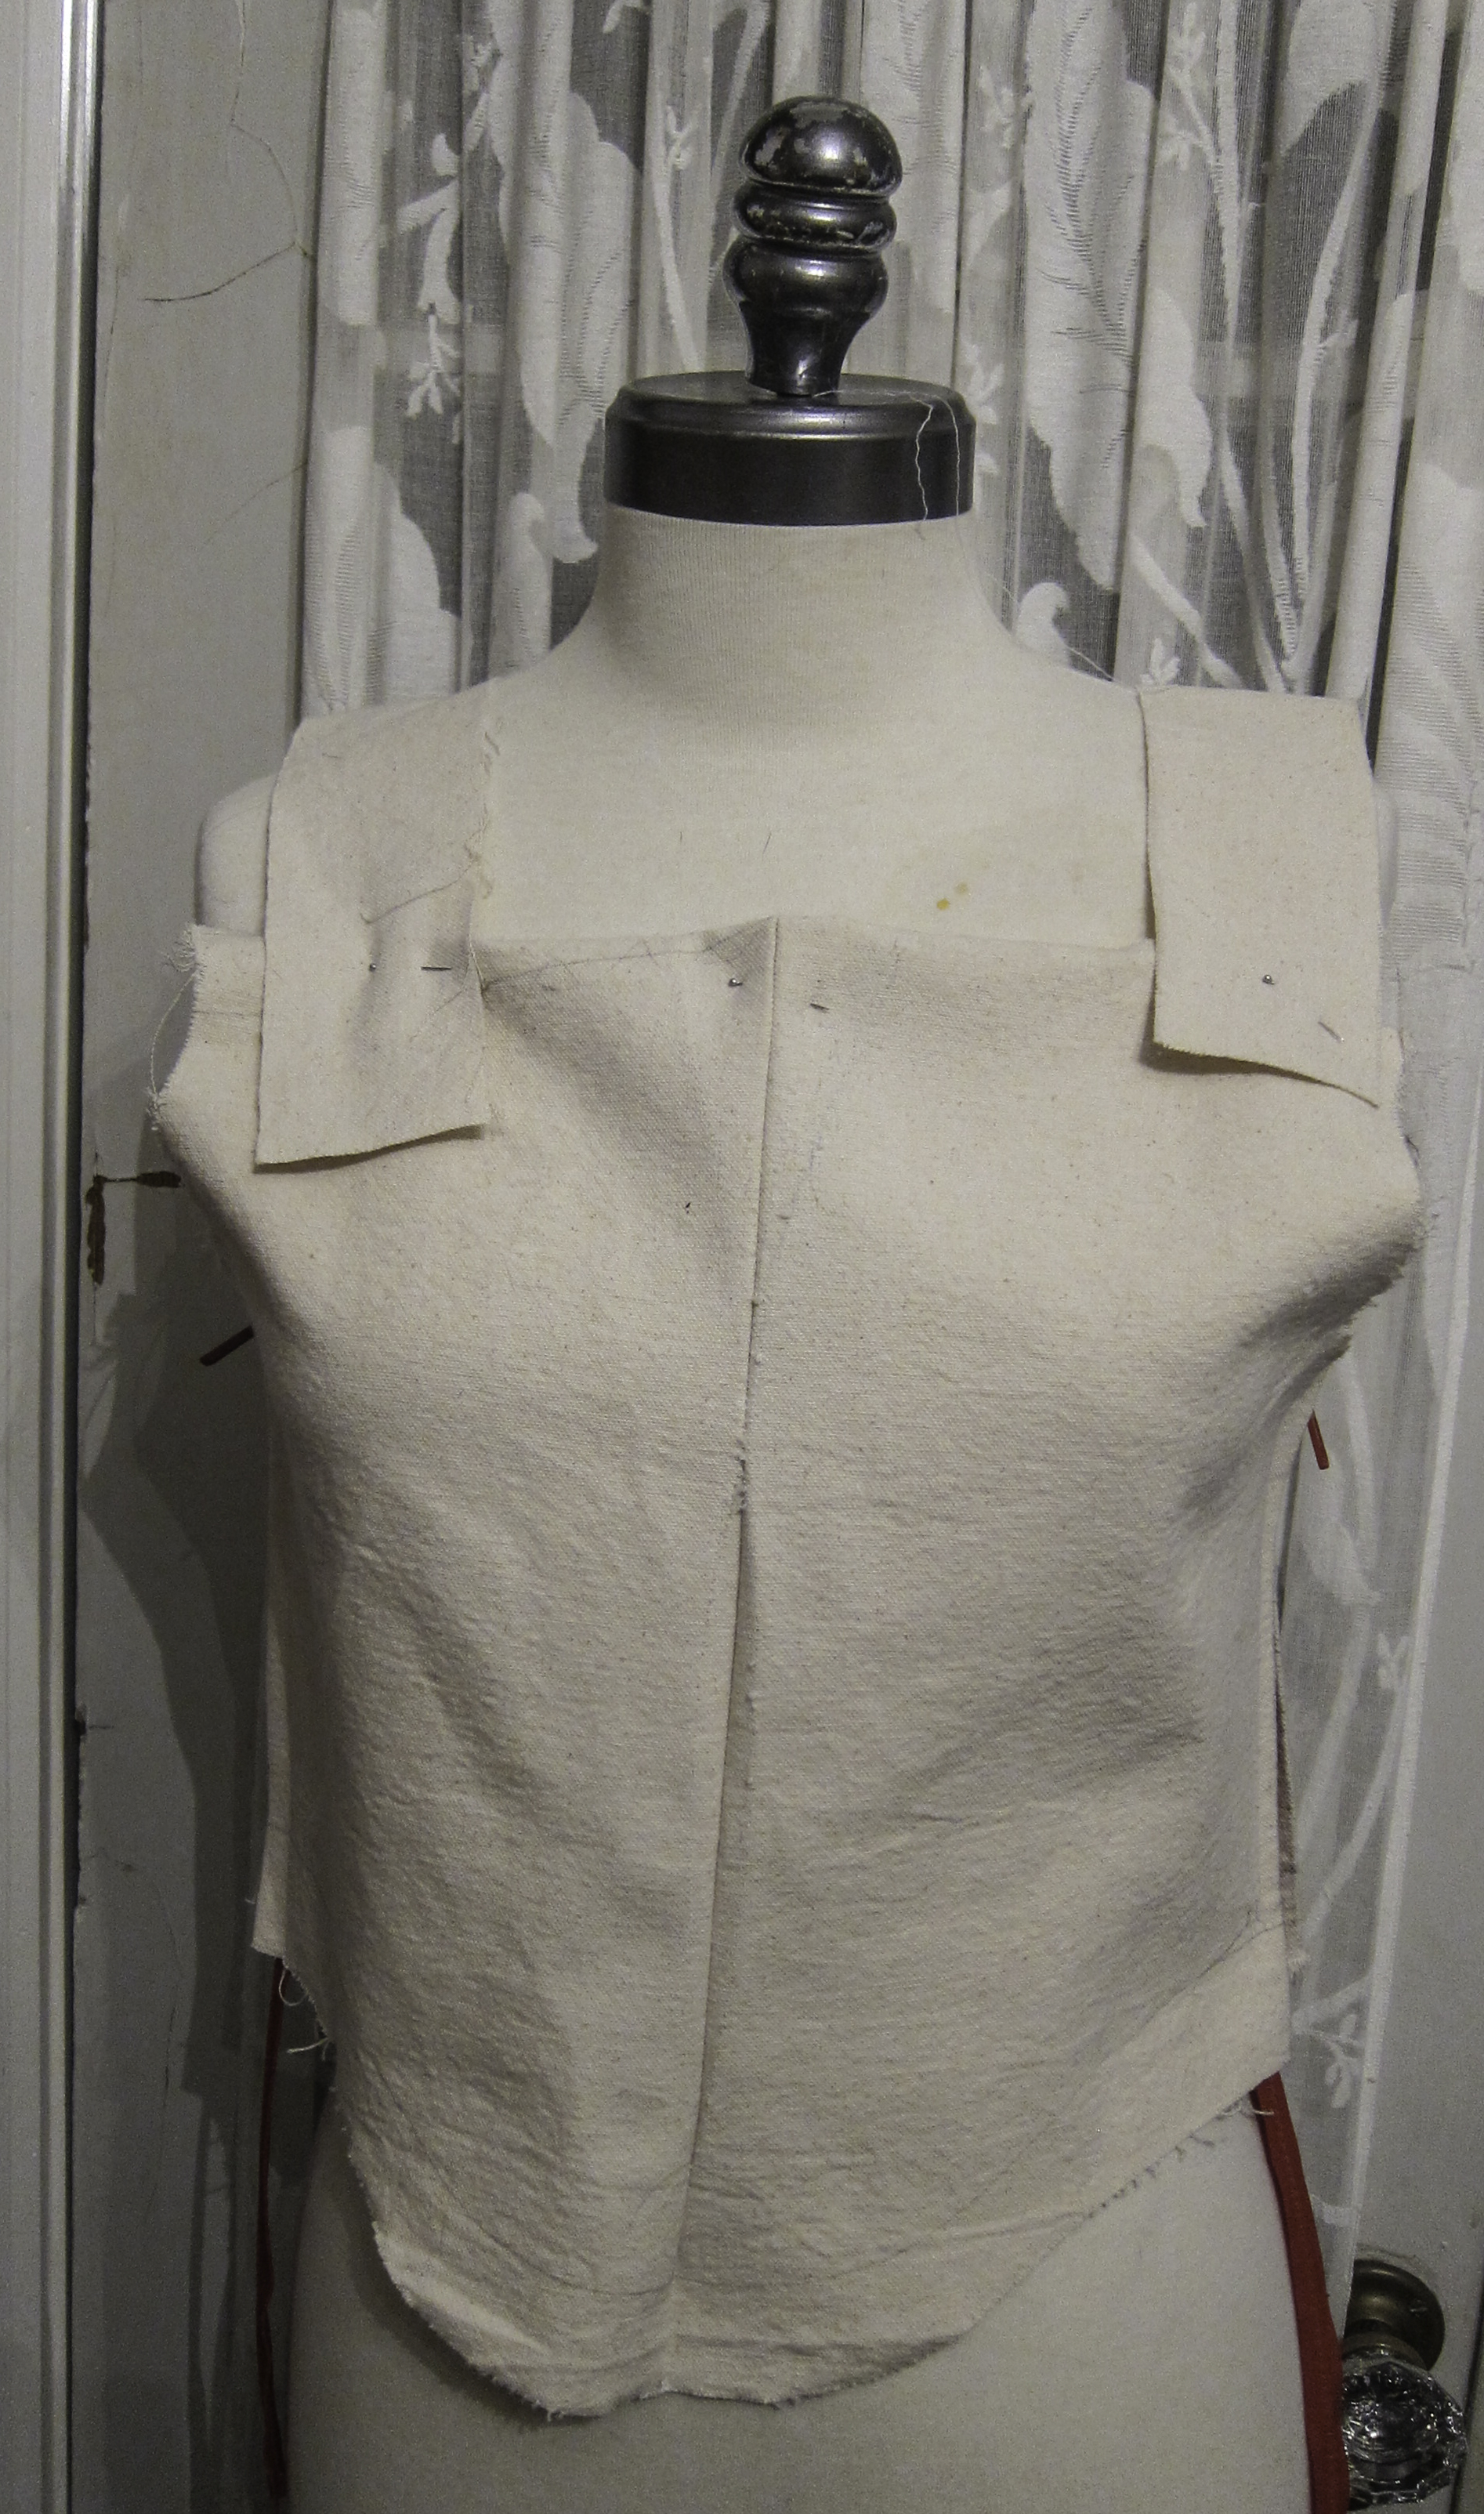
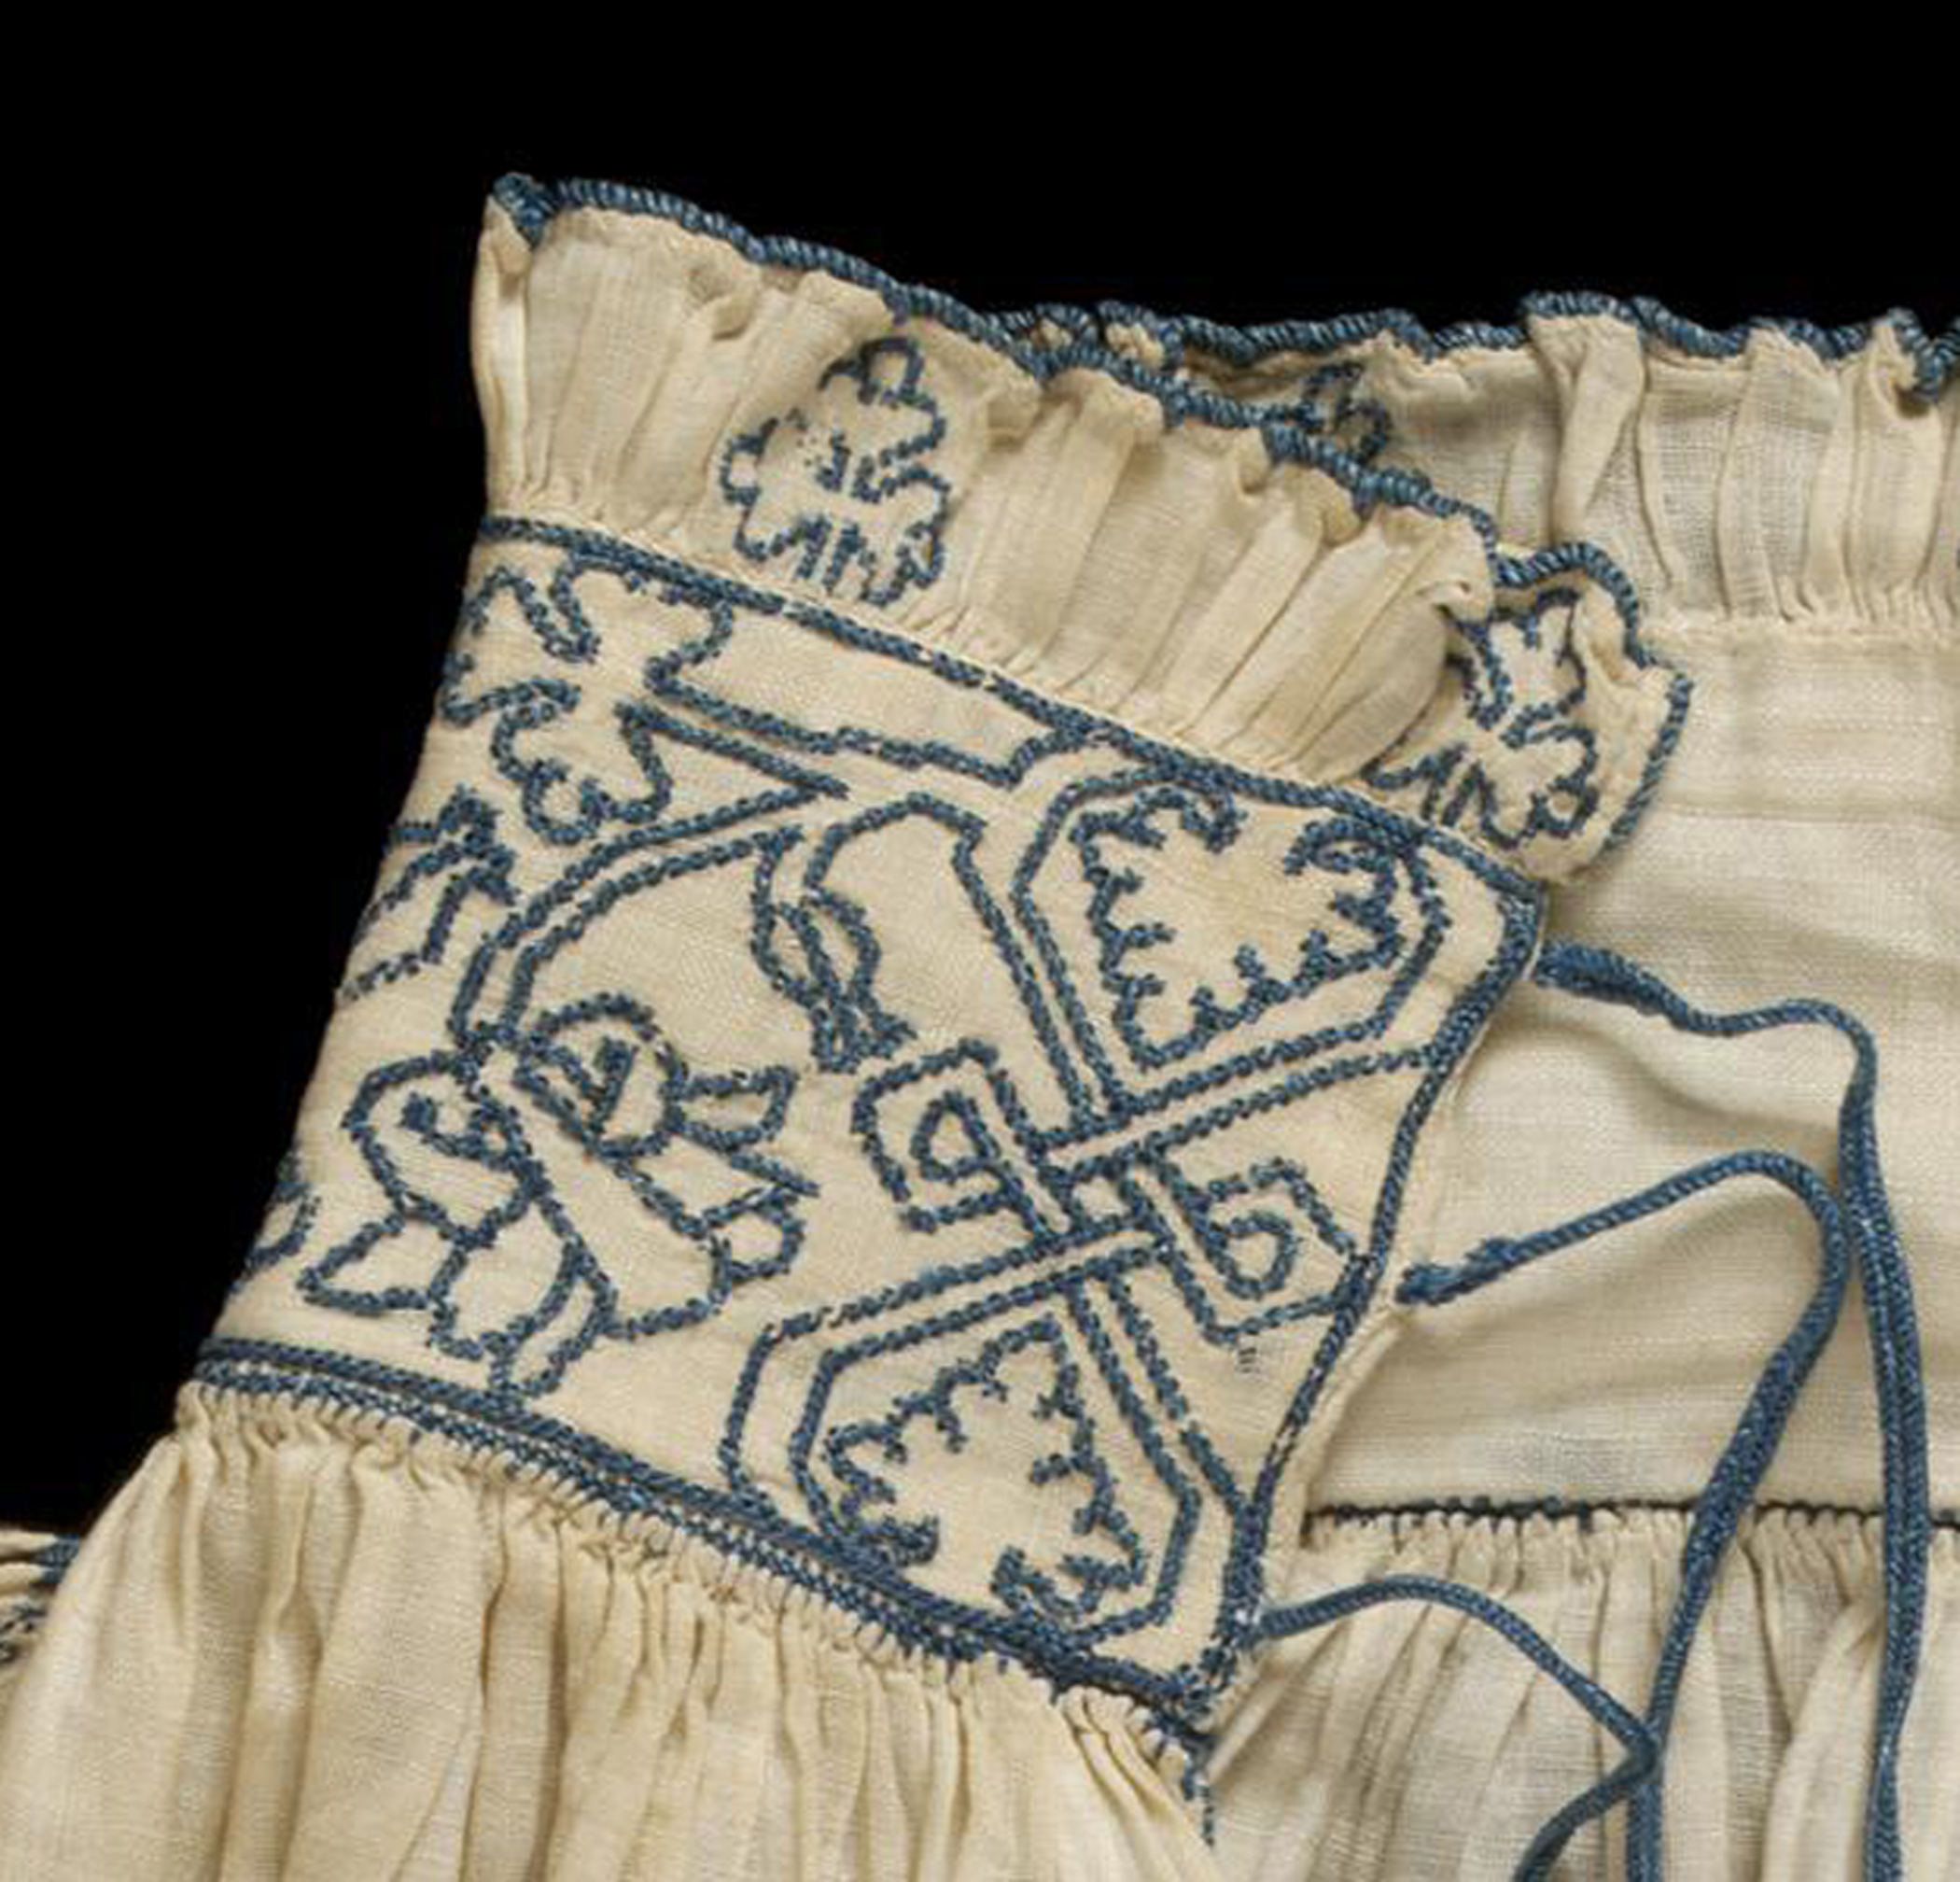
The finishing trim and ties are an adaptation in black of the crisp whipstitched cord edging and ties on the collar of this shirt from the collection of the Victoria & Albert Museum, which I also used as a model for the cut. I have used the rectangular cut8 of a shirt because, as the half smock only goes to the waist, it doesn’t need the hip width provided by the triangular gores that are used in women’s full-length smocks. The shirt is also shown in the well-loved Janet Arnold tome: Patterns of Fashion 4.9

For my half smock, the ground fabric is white handkerchief linen, and the thread is loosely-twisted black filament silk. The embroidery is mostly executed in stem stitch, with a sprinkling of others – such as spiderweb, stippling, blanket stitch, and herringbone – where the motif suggests it.

Assembly

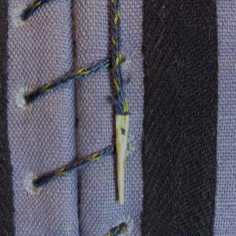
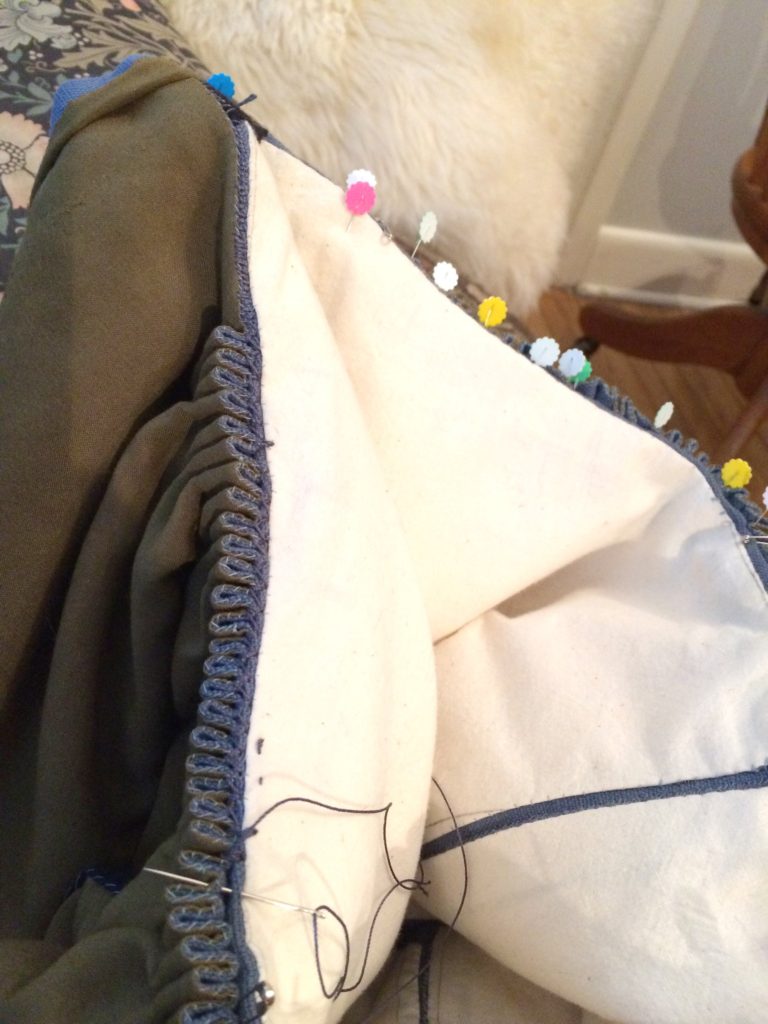
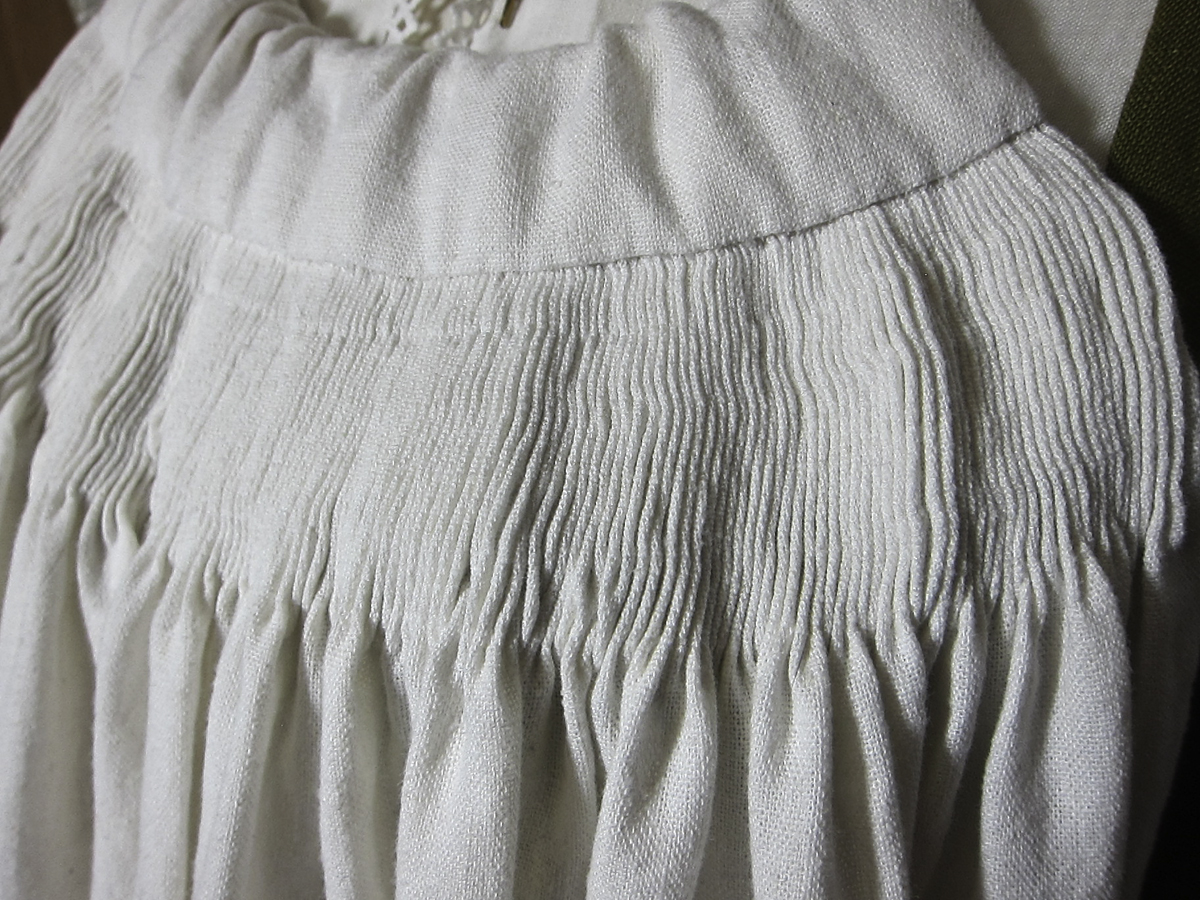
For the main seams, the individual pieces are hemmed and assembled with a faggoting stitch. The other seams are clean-finished using whip stitch, slip stitch, or flat felled, where appropriate.

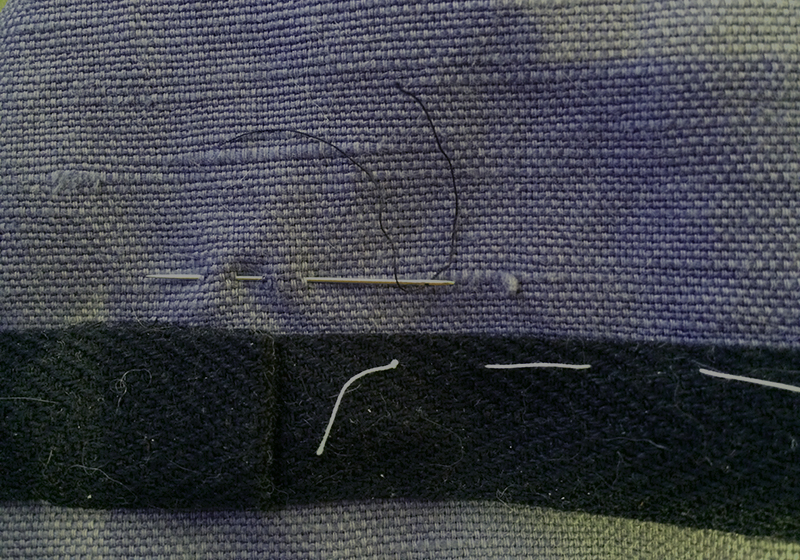
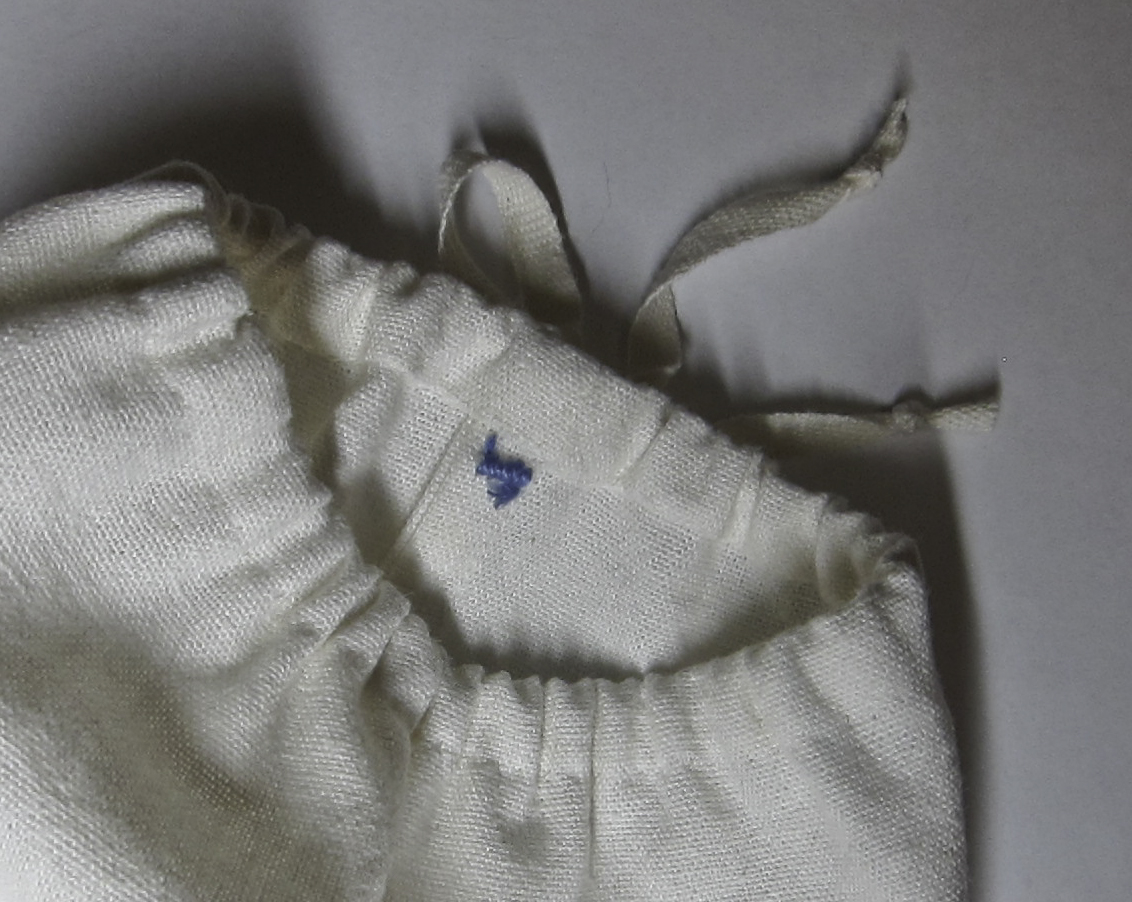
The strings at the neck and cuffs are fingerloop braided from buttonhole-weight spun silk. To keep the front panels in line, I made a hook and sewed it in below the placket. It’s made of 18 gauge brass wire, formed with pliers, and work hardened in a tumbler. It fastens with a thread loop, which is less likely to unhook than a matching metal one would be.

Comments Regarding Blackwork and The Internet

Today, April 13th, 2022, searching for “blackwork embroidery” on the web brought up 2,780,000 hits. I included “embroidery” in the search terms because just “blackwork” brings up a lot of tattoo pages, which are sometimes interesting, but usually irrelevant. Many of the “embroidery” pages are also irrelevant to research: touting clothing, commercial embroidery services, supply sales, kits etc. However, if you have the patience to wade through the distractions, there is a lot of good, solid information and research out there. A very deep rabbit hole – easy to lose an afternoon in.

  1. The Museum of London, accession # 59.77b. []
  2. Textile Museum of Canada, accession # T88.0029, retrieved from https://collections.textilemuseum.ca/collection/4957/ []
  3. The Canterbury Tales, 1435, Duke Classics, eBook, ISBN 978-1-62013-113-8, P. 324 []
  4. Eaton, Jan. Mary Thomas’s Dictionary of Embroidery Stitches, Revised by Jan Eaton. London: Hodder&Stoughton, 1989. ISBN 0-340-51075-7 []
  5. Image from Wikimedia Commons; supplied by By PKM – Own work, Public Domain, https://commons.wikimedia.org/w/index.php?curid=5793298 []
  6. Image from Wikimedia Commons; supplied by the National Museum in Poznań, https //en.wikipedia.org/wiki/The_Game_of_Chess_(Sofonisba_Anguissola) []
  7. Museum of Fine Arts, Boston, Accession Number 1996.51 []
  8. Victoria and Albert Museum, Accession Number T.112-1972 []
  9. Arnold, Janet et. al., Patterns of Fashion 4 c. 1540-1660, The cut and construction of linen shirts, smocks, neckwear, headwear and accessories for men and women, Macmillan, London, ISBN 878-0-333-57082-1, 2008, p. 17 []
By | April 13th, 2022|costume, embroidery, linen, Pent, silk|Comments Off on The blackworked half smock

SO much easier…

My pretty blue fustian sottana was sideswiped by Covid. I’ve gained weight, and, if I didn’t alter it, I’d either have had to lace it up excruciatingly tight, or wear a stomacher.

While I could actually get the front edges to meet – for a few seconds  – it was way ridiculously too uncomfortably tight. And stomachers don’t appear to have been a thing in late 16th century Italy. Or, at least, I haven’t found a reference to one, or an image.

So alteration it was. Which is where the beauty of 16th century garment assembly came to the fore.

When I originally made the sottana, I used 16th century techniques, finishing each component – the two fronts, the back, and the skirt – completely before final assembly. I’d catch stitched the seam allowances of the fashion fabric to the canvas interfacings, and slip stitched the bodies linings in. The skirt is flatlined, and I and stitched the raw edges of the skirt lining under to hide the raggedy shuttleless loom selvedges. Then I whip stitched the seams of the bodies, applied the trim, stitched the skirt to the bodies, and, finally, sewed the trim to the bottom of the skirt.

Lots of hand sewing, and a clean finish all around, which made adding the extra SO much easier. (And easily reversible, if I ever lose the weight! )

Rather than having a bunch of raw edges to contend with when I unpicked the seam where I wanted to add the extra fabric, there was a nice, clean, finish, all ready to pop the extensions in.

It needed about 2.5 centimetres/1 inch  width added on each side. I had plenty of fabric left to make the alterations – almost a meter of the fustian, and lots of the washed canvas & muslin that I’d used for the interlining and lining.

Since the added piece was such a simple shape, I didn’t bother with making a pattern – I measured it out on the canvas, cut it out, and cut the fustian around the canvas, adding seam allowances. Then I followed the same process as with the original construction – catch stitching the seam allowances to the canvas interfacing, slip stitching the lining in, and whip stitching the finished extensions into place.

Once that was done, I tried the sottana on just to be sure the alteration fit. It does; and I put it up on my judy to photograph it. Kinda disappointing. It looked OK; just … OK.

So I had a dig through my stash to see if I had some of the original tape that I’d used as trim left to cover the extra seam in the bodies. I did, but not enough, so I went to Mokuba to see if they still carry it. They do – and they have a narrower version, which is in even better proportion. I splurged a kingly $2.49 for a meter.

Because the sottana is made to be washable, and I’d pre-shrunk all the elements, I soaked the tape in hot water, then dried it in the sun. Once it was dry, I ironed it and sewed it on over the extra seams.

Luckily, to sew the skirt back on, I didn’t have to re-gather it – cartridge pleats are flexible, and I’d stabilized them with lots of stitching on the inside. All I had to do was pick back the stitches joining the skirt to the bodies a few centimetres either side of where I added the width, and the cartridge pleats graciously agreed to expand enough to accommodate the extra girth.

All in all, the “finish each part, then assemble the whole” method of construction makes alterations SO much easier. I didn’t have to contend with clipped seam allowances, raw edges, re-gathering the skirt, or the general messiness of tidying the whole thing up. All I had to do was unpick two seams and a bit of a third, make the extensions, sew them in, and re-attach the skirt.

I suspect it also would make repurposing parts of worn-out clothing a lot easier. I haven’t seen any examples, but I wonder if there were some Frankenstein garments out there, with the front from one, the back from another, the sleeves from a third, and so on.

Fabric was precious; people wanted to get as much mileage out of it as possible, so it wouldn’t surprise me! Not at all!

By | September 19th, 2021|alterations, costume, cotton, linen, Renaissance, repairs, the stash|Comments Off on SO much easier…

The Fustian Chronicles – part one

In the late middle ages and Renaissance, “fustian” meant an affordable fabric woven of two kinds of fibre – cotton & linen, or cotton & wool, or linen & wool.[1]

A lot of historical novels I’ve read mentioned fustian. It’s one of those words, like “curricle” or “cotehardie” that writers use to position their work in past time. It’s not something you’ll find in a present-day fabric shop unless it’s one that specializes in textiles for historical reenactors.

Last summer at Pennsic, a reenactment event that features a marketplace full of supplies for reenactors, I found a generous remnant of cotton/linen fustian and decided to make an “everyday” sottana of it, loosely based on what the women in Vincenzo Campi’s  lively kitchen scene are wearing.

All of the materials I used would have been available in the late Renaissance, aside from a package of olive green iDye and a meter or so of synthetic whalebone.[2]

The materials:

  • blue fustian fashion fabric
  • “natural” cotton canvas interlining
  • “natural” cotton muslin bodice lining
  • lightweight linen for the skirt lining, dyed olive green [3]
  • synthetic whalebone to reinforce the front edges of the bodice
  • a small remnant (aka cabbage)[4] of silk for reinforcing the corners of the front neckline
  • 21 brass aiglets. 20 are for the points tying the sleeves on, and the 21st is a tiny one for the lacing cord. I made that one myself . It’s my first attempt at making an aiglet, and I’m quite pleased with it. The lacing holes came out very, very small, and the purchased aiglets I have are too big to pass through them without using pliers
  • a largish piece of cabbage of lightweight olive green wool for the sleeves
  • cotton and linen threads for assembly, and, for touch of luxury, silk threads to make the eyelets and the lacing cord
  • two kinds of black cotton braid – herringbone-patterned for the trim, and plain tabby weave for the sleeve points. Sewing the herringbone braid on, I discovered it has a tendency to pick up dust & cat hair. Luckily, it cleans up easily with a lint roller!

Except for the fustian and the braids for trim, all of the materials, including the packet of iDye, were from my stash! (Though I did have to buy some salt to add to the dye.)

For the bodice pattern, I used one that I had drafted a while ago. It was designed to side lace, but that was an easy fix – I turned the lacing edges into seams and created a centre-front opening. Then I made a muslin out of sturdy cotton canvas, tweaked the fit, and used the muslin as the underlining of the bodice.

Instead of bag-lining the bodice, I assembled it Renaissance-style. To minimize bulk at the shoulders, I sewed the shoulder straps in position and trimmed the excess fabric. Then I catch stitched the seam allowances over the canvas underlining, and slip stitched the lining in.

Once that was done, I whip stitched the pieces together and made the eyelets.

There’s no pattern for the skirt – it’s two full widths of the fustian, flat-lined, seamed at the centre front and back, and with the front seam left open for about thirty centimeters at the top so that I can get into the garment.

On the right hand side of the skirt I’ve made a fitchet – an opening so that I can reach my tie-on pocket. The edges of the fitchet are bound with a piece of navy blue linen from my cabbage basket.

To gather the skirt to fit the bodice, I used cartridge pleats. I like cartridge pleats a lot, and use them whenever they’re appropriate.

For the hem, I tried an experiment. I like padded hems; I like the way they make a skirt hang & move. For padding, I usually use wool felt. This time, because I want this sottana to be washable, and wool felt shrinks and gets lumpy, I used multiple layers of the fustian – seven if I remember correctly. It works as well as the felt!

The sottana is fully lined, and, aside from the long seams on the skirt and sleeves, it’s hand-sewn. Up to and including flat-felling the sleeve seams and the skirt seams where the raggedy shuttleless loom selvedges showed.

Between catch stitching the seam allowances, sewing in the linings, whip stitching the pieces together, clean-finishing the seams, hemming the top&bottom of the sleeves, making the eyelets, making the points, and sewing on the trim, it was a LOT of hand sewing!

Luckily, I enjoy hand sewing, and, all in all, I’m satisfied with how this project turned out!


[1]the meaning of “fustian” has changed with time – in the late middle ages/Renaissance it meant a fabric woven of two kinds of fibre. By the nineteenth century, “fustian” meant cotton fabrics with a short, brushed pile, like corduroy. By the late 20th century, the word had become an archaism.

[2] I’m ignoring the fact that the materials were made with present-day processes rather than being organically grown, hand-harvested, plant dyed, etc. etc. And, though I’m not against all use of animal products, hunting whales is inexcusable in today’s world – therefore the synthetic whalebone.

[3] originally, this lining linen was bright egg yolk yellow. Linen is heavy, so when I found this cheap & lightweight linen, I bought a lot of it even though it’s a colour I wouldn’t usually choose – yellow is easy to overdye. Which I did. With iDye. In the washing machine.

[4] “cabbage” was the medieval/renaissance term for the fabric left over from making a garment, and the tailor got to keep it!

By | March 27th, 2020|costume, cotton, Italy, linen, Renaissance, SCA, the stash|1 Comment

IRCC 2019

I had hoped that, buy taking along what materials I could when I went to Italy, I could finish in time. Didn’t happen. Life intervened – I didn’t even manage to get my post on the Turin Egyptian museum up until September – so I withdrew from the competition.

Sigh.

By | May 28th, 2019|costume, IRCC, Italy|Comments Off on IRCC 2019

Italian Renaissance Costume Challenge – April report

A change of plans

When I entered IRCC 9 I had no idea that I would be spending most of the month of May in Italy! Specifically, on my sister’s farm in Piedmonte, near Cisterna d’Asti. I’m delighted & looking forward eagerly to the trip – and scrambling to finish non-IRCC work scheduled for May before I leave.

This has also reshuffled my sewing plans; initially I had planned to make the gown, based on the Pisa half-gown, first, then the camicia based on the one worn by Laura Battiferri in the Bronzino portrait (the images above), followed by the underskirt, while working on the lace and jewellery when not sewing.

So, as I’m going to be in Italy instead of my studio, I’m focusing instead on what I can take along in a carry-on suitcase. This includes the materials/components for

  • the camicia
  • the lace (or lace-edged) cap
  • the pearl necklace
  • the belt

All of these involve a lot of handwork and minimal volumes of materials – even the camicia which, though it’s lots of yardage, is fine cotton & folds up small

So far,

Camicia smock pleating & collar hem

  • I made progress with the preliminary steps for cutting & fitting the bodice of the gown before the trip to Italy came up
  • completed the assembly of the camicia components, hemming & pleating its collar & cuffs preparatory to smocking
    Pearls, chain and tools for jewellery & belt for IRCC 9 submission
  • assembled the materials & tools for the other items I’m planning to take along


April working notes

1 April 2019

Muslin for gown bodice:

The bara system pattern pieces

  • drafted a basic doublet pattern using the Modern Maker[1] bara technique


2 April 2019

Trying on the first cut of the bodice made with the Modern Maker bara system

  • made a muslin from the Modern Maker pattern draft & found some issues with the fit:
    • too tight – needs at least 2cm added to the girth – actual amount tbd, depending on the thickness of the fabrics
    • the armhole is too high
    • the upper chest has a peculiar outward curve as if designed for a pigeon chest. Not sure where that came from – it’s over the sternum, too high to be intended to accommodate the fashionable 16th century flatten-the-girls-upward look. I’ll need to take out 2 or 3cm.

3 April 2019

  • tried the muslin on again & made the adjustments
  • drafted a new version of the pattern with the adjustments, a square neckline and side back lacing opening. (Side lacing makes dressing without help possible!)
  • cut new muslin

5 April 2019

  • sewed & fitted new muslin

10 – 18 April 2019

Canvas underling for bodice prior to final fitting

    • tweaked the bodice fit
    • lowered the armhole
    • raised the front neck 2cm; the extant garment is described as having a “scollo molto alto” (a very high neckline). This may account for why there is a centre front seam. Without the shaping this seam makes possible the front would stand out from the upper chest unless I took a deep dart or two at the top & one in each armscye, which solution does not appear to be supported by evidence from surviving garments or pattern books.
    • made the straps a separate piece as on the extant garment
  • drafted new pattern from adjusted muslin
  • cut the canvas for bodice interlining ready for final fitting


19-24 April 2019

Smocked camicia:

  • made a second smocking test swatch
  • calculated width of fabric needed to gather to a neck circumference of 33cm (~ 13 inches). It needs to be 304 cm (~ 120 inches) wide
  • cut out camicia pieces (front, back, 2 sleeves, 2 square gussets) by pulled-thread method to ensure all pieces are on the straight of grain. Cut a 30cm (~ 12 inches) neckline opening at the centre front.
  • narrow-hemmed 30cm of the top edges of the front, back & sleeves sewed them together. I’ve left the bulk of the sewing until the collar embroidery/smocking is complete because it’s hard to tell beforehand how deep/shallow the armholes will need to be.
  • did a fine rolled hem around the top edge, then narrow-hemmed the neckline opening and the edges of where the cuffs will be

25 – 28 April 2019

  • discovered that, in spite of being thin & fine, the full width of the camicia is too big to fit in my smocking pleater. Unpicked the seams far enough down to handle each panel separately.
  • pleated the collar & cuffs of the camicia
  • re-stitched the seams & bits of the rolled hem where I’d had to open them for pleating.

30 April 2019

  • photographed & packed handwork items

[1] Mathew Gnagy, The Modern Maker Vol. 2: Pattern Manual 1580 – 1640, self-published

By | April 30th, 2019|costume, embroidery, IRCC, Italy, jewellery, smocking, tools|Comments Off on Italian Renaissance Costume Challenge – April report

Italian Renaissance Costume Challenge – Day 1

This year I’ve entered the Realm of Venus’s Italian Renaissance Costume Challenge (IRCC). The start date is the first of April – today.

The rules: the IRCC is a four-month long challenge to create a complete man’s, woman’s or child’s late Italian Renaissance outfit, from the skin out, of a style circa 1480 to 1600. The outfit can be of any social class and needs to include at least one accessory, with a maximum of four accessories allowed.

What I’ve proposed to make is:

  • a camicia
  • an underskirt
  • a gown based on the extant diamond twill half-gown held in Pisa
  • a headdress or cap

Depending on how things go, I may add one or two of the following

  • an apron
  • a belt
  • a pearl necklace with matching earrings
  • a vest or short cape

Entries started a month ago. That first month was to be dedicated to deciding on what to make and gathering materials.

Deciding what to make was easy; ever since I found out about the wool/linen diamond twill half dress that’s in Pisa, I’ve wanted to make a gown based on it, using the diamond twill I found when King Textiles – one of our local fabric shops – had to move when their building was sold to a condo developer.

I’ve also wanted to try needle lace, so, if all goes well, the “headdress” will be a needle lace cap.

And my current White Wolf Fian challenge is a carved busk. So far all I’ve done on it is taking a carving class at Lee Valley and assembling the tools & materials, so, since I haven’t started on the actual busk, it works with the timing rules. Though, since it’s woodwork rather than textile, I’m not sure it fits in the criteria – I’ll have to check before adding it to the entry.

As for gathering materials, that’s pretty much done:


The materials for my IRCC 9 entry

The fabrics:

The right stack:

  • white lightweight cotton for the camicia
  • blue wool/linen diamond twill for the gown
  • black wool twill for the gown’s guards

The left stack:

  • red lightweight wool for the petticote
  • lightweight yellow linen for the linings (lightweight linen is usually expensive, so when I found this one cheap at Pennsic*, I bought lots of it even though it’s not a colour I’d usually choose for linings)
  • cotton canvas, heavy linen & various interfacings for the bodice

The odds & ends:

  • 50/3 linen thread for my super-ambitious lace cap plus the images & plastic to cover them (it might wind up as a lace-edged cap)
  • Mathew Gnagy’s Modern Maker volumes and the bara tapes I made following his instructions
  • a sample of the smocking for the camicia
  • my faithful roll of butcher paper that’s seen me through many patterning adventures
  • a piece of basswood and some carving tools for the busk
  • and, of course, the obligatory furry assistant.

I’m not sure I’ll use all of this, and will probably find I’m missing some odds & ends.

Today’s project: drafting the basic bodice pattern:

Pattern draft for 16th century woman's bodice

…to be continued


  • Pennsic is an annual Society for Creative Anachronism event that’s held in Pennsylvania and usually draws 10,000 or more attendees. One of its features is a market with lots of merchants who specialize in reenactment-related stuff.
By | April 1st, 2019|cat, costume, IRCC, Italy, Renaissance, SCA, smocking|Comments Off on Italian Renaissance Costume Challenge – Day 1

The Viking coat – Part 1

My Viking coat is finished!

Blue Viking coat with green bordersIt’s been a journey; I’ve been working on the coat since spring. It came together from three sources: weather, a stalled project, and a pattern I bought so long ago that it now turns up in listings of vintage patterns on Etsy and eBay.

The weather:

Several years ago I was horribly cold at an SCA * camping event. There was frost overnight and, while daytime was warmer, it was still crisp.

It wasn’t the first time I had been cold at an event, just the worst, and I thought it would be nice to have a seriously warm Viking-style coat.

The stalled project:

During the years people were donating their furs to Goodwill, I got a full-length black mink coat that I intended to use to line a cloth winter coat. I found the ideal tweed for the coat shell, got the interlining fabric and studied much information on how to sew furs. And stalled there, intimidated by the idea of cutting into a fully-functional mink coat.

That was more than ten years ago. Finally, I figured this was ridiculous and decided to take the indirect route – to make a fur-lined Viking coat to get experience in handling that much fur.

Due largely to the lack of surviving physical evidence, there’s been a lot of discussion on whether the Vikings used much fur and whether they used it for linings. I think they did, and I agree with archaeologist Tuija Kirkinen. In her paper on the ritual use of fur, she stated that “the use of pelts and furs for clothing is self-evident in a region at the edge of the taiga”. ** While I don’t live at the edge of the taiga, the weather, even in southern Canada, can get ridiculously cold, and I’ve found that furs (and I include sheepskin) are best at keeping me warm when the temperature dips below -30C (-22 Fahrenheit).

The pattern:

The Turkish Coat is one of the first patterns Folkwear published. I don’t remember exactly when I bought it – sometime around 1974. And I’ve been meaning to make it ever since.

The Viking coat was the perfect opportunity. From surviving fragments and images, it appears the coats Viking men wore might have been constructed in a similar way.Folkwear Turkish Coat back view drawing

Granted, it’s a “male” garment, and the existing evidence shows women mainly in shawls. Which I’ve tried, and discovered that to keep warm in seriously cold weather, I’d have to wrap myself up in many, many layers.

Nope. For the sake of sanity and mobility, I decided on a coat.

The materials:

The fabrics: since this was going to be an experiment, I wanted to spend as little as possible on it, so I dug through my stash and found two yardages that worked well together – a medium“indigo” blue  and a vivid apple green  wool.

Apple green fulled wool swatch


While they’re both commercially dyed, both are colours that are possible with natural dyes that were available to the Vikings.

The blue is easy – woad, which contains indigotin. Woad seeds were found on the Oseberg ship.

On the other hand, green can be dyed many different ways, so the possible dye sources are guesswork. Maybe woad plus weld or broom – or one of the many other sources of yellow.

Coincidentally, a friend – textile artist Jaclyn Paltanen – just did an experiment on dyeing woad-based greens on wool and got a lovely range, including that apple green!

Both fabrics are pure wool, and they’re fulled. The apple green is a lightly-fulled 2/1 twill; the blue is more heavily fulled so I’m not sure what the weave is.

There’s still occasional discussion about whether Vikings fulled their wools, but apparently archaeologist Inga Hägg has documented the existence of fulled wools in Viking-era finds in Hedeby in her Die Textilfunde aus dem Hafen von Haithabu***.  Fulled wool is not appropriate for every kind of garment – but for a coat intended for Canadian winters it most definitely is!

The lining: this is where I spent some money – $35 if I remember correctly. When I bought the donor coat for the lining, I wasn’t sure what the fur was (and neither was the man who owns the secondhand shop where I bought it). We guessed it was some sort of water critter – maybe beaver or otter – or maybe marten, all of which were available to the Vikings **.

To my surprise, when I took out the lining, I discovered it was fur seal."fur seal" stamp on skin side of fur coat used for lining It’s not at all like what I know as seal!

Turns out the fur seal is a southern hemisphere beastie, so it’s improbable that a Viking-era coat maker would have had access to it. However, I’m taking a pass on “authenticity” here; the furs I thought it might be – beaver or otter or marten – would all have been available. We do the best we can!

Making the coat:

The first step was figuring out how to allow for the thickness of the fur lining. While I got over 48 million hits the last time I googled “fur sewing”, the vast majority handled fur in the present-day convention – as something to show on the outside of the garment. Finding information on working out how to allow for a fur lining took some digging. The clearest I found was on a Threads Magazine forum post from 2010:

“Take a length of the fur and wrap it around your middle with the fur facing inward, safety pinning it closed. Using a tape measure, measure around the outside of the fur. Take off the fur and measure around at the same spot. The difference between the two measurements will be your “fur adjustment.”

So that’s what I did, and it worked!

Viking coat muslinTo check the size and length, I made a muslin ****, trying it on over a wool Viking-style gown and a heavy sweater.

After I cut and assembled the shell fabrics I gathered my courage and started on the fur coat.

Taking it apart, I was reminded of the amazing amount of hand work that goes into furs! Even though the pelts are now sewn together by machine, the garment assembly is largely manual. hand stitching on inside of fur coat used for liningThe edgings and the lining were sewn in by hand, and there was a grid of long, loose hand stitches anchoring the pelts to the underlining throughout the coat.

Once I’d disassembled the coat, I realized I’d been lucky. The body of the coat was very close to the shape & size of the body of the Folkwear pattern, with only one significant difference: the original fur coat had a straight up-and-down overlap, while the pattern’s fronts are at an angle that’s supposed to keep the coat closed without fasteners. All I needed to do was stitch in two triangular sections at the centre fronts to add the overlap – and luckily again, the front facings which I had removed were big enough to cut the triangles from.

The sleeves were another matter. Originally, I intended to use the fur sleeves to line the fabric wool twill sleeve liningssleeve, but I found that the combination of the fur and the fulled wool fabric was too bulky for comfort. So back to the stash, where I found a medium-light woolen twill remnant that worked to line the sleeves.

pocketRegarding authenticity, I made two decisions to be deliberately inauthentic, and the first was pockets. The Folkwear pattern has no pockets – just pocket slits, which are probably Viking-appropriate. But with a fur-lined coat intended for brutally cold weather, making pocket slits that would have been convenient openings for weather to get in seemed self-defeating. So I added pockets. Gotta have somewhere to stash those kleenexes!

My other “inauthentic” decision was to underline the coat with a lightweight cotton, much as the underlinigpresent-day fur coats are. I wanted to make this coat look good and last as long as possible, and the underlining helps with both. It keeps the internal stitching – and there’s a lot of it – from pulling on the outer fabric and showing through to the right side.

If cotton made it to Scandinavia at all during the Viking era it would have been a wildly exotic fibre, and way too expensive to use as an underlining.

I could have used linen, which was available then, but the 3.5oz linen I have in my stash would have added a lot of weight – and the coat is heavy enough as it is. There may be some super-fine linens that wouldn’t have been so heavy, but from what I’ve seen on the web they’re also super-expensive. Which is where reality cuts in – this is a coat to wear, not a museum-quality interpretation.

Final details and a decison:

Once the coat was “finished” and wearable, I decided that, having put so much thought and work into, it would be worth going the extra mile and spending a bit more time and money on trim and fasteners.

Which is another post!

* Society for Creative Anachronism – a world-wide reenactment group that focuses on pre-1700 CE history

** Tuija Kirkinen The role of wild animals in death rituals: furs and animal skins in the late iron age inhumation burials in southeastern Fennoscandia. Fennoscandia archaeologica XXXII, 2015

*** Inga Hägg Textilfunde aus dem Hafen von Haithabu (The textile finds from the harbour of Hedeby) Neumünster, K. Wachholtz, 1984, ©1985

****I use 1/4″ gingham for muslins – the gridded weave of gingham makes the grain lines obvious. (And yes, there’s only one sleeve – I took the other one off to use as a pattern for the sleeve lining.)

By | October 19th, 2018|costume, dyes, fibers, fur, indigo, SCA, the stash, Viking costume, woad, wool|1 Comment

The Apron and the Scoggers – an unexpected project

I’m going to be taking a potentially messy pigments class at Fruits of our Labours (better known as FOOL) a Society for Creative Anachronism event on the May long weekend.

As I’ll be wearing 16th century garb, it struck me that I’ll seriously want to protect my clothes. Which raised the question of aprons.

Almost all the many aprons in 16th century art – and earlier, for that matter – start at the waist and cover the front of the skirt. That’s always puzzled me. I’ve never noticed that splatters and splashes conscientiously restrain themselves to landing below the waist. Surely “women’s work” was just as messy in the middle ages & renaissance as it is now, so where are the full frontal coverage aprons?

I had a faint tickle of memory that I had seen at least one image of such an apron, but I couldn’t pin it down, so I sent out a plea on themedieval washerwoman wearing apron marvelous Elizabethan Costume facebook page. The membership came to my rescue with a number of images, including this one.

Then one of the members had the brilliant suggestion that a pair of scoggers (sleeve protectors) might be a good idea as well. A good idea indeed! Thank you, Tracie!

The construction of the apron is guesswork. From the images, it looks like the aprons were made from two rectangles, and the necklines range from a simple casing with a strap threaded through it to many fine gathers anchored down somehow, with a separate strip sewn on as a casing. I suspect the gathers are the back side of smocking. Even using a very sturdy thread, unsupported gathering lines would eventually break, which would make for a truly annoying mending job.

With the width of fabric needed to cover my skirt & leave enough room to walk freely, the simple-casing design Detail of reverse-smocked yokewould have been ridiculously bunchy & ugly, so I went with the reverse side of smocking. It’s still a serious volume of fabric, but at least it behaves itself!

The scoggers are just sewn & hemmed tubes, with a pair of eyelets at each end for a drawstring.scoggers - eyelets & drawstring

I did cheat a little with the drawstrings – the visible parts are linen tape, but I spliced a piece of elastic into each one blue "this way up" stitchesso that I could get the scoggers on & off by myself. With just the linen tape, I’d have to have had someone tie me into them each time!

I also added a few stitches in blue linen embroidery floss on the inside top so that I wouldn’t have to figure out which way is up each time I put them on!

The is is probably the shortest garb project I’ve ever made. Even with doing everything but the long seams by hand – including felling down the apron seam allowances – I got it done in the few odd corners of time available in two very busy weeks!

Yay rectangles, straight seams and one-size-fits-most!


By | May 10th, 2017|costume, linen, smocking|2 Comments

Knitted silk stockings, first attempt

Raspberry-mousse coloured knit silk stockings - first attempt

My first attempt at knitting the Eleonora stockings in silk was an education! (My first-first attempt was in wool, which I’ve had lots of experience with – and the gauge was way too big, so I abandoned it.)

To get back to the silk: I wanted to dye the yarn a true red with cochineal.

Since cochineal is sensitive to ph – an acidic dyebath pushes it toward red and a basic one towards purple – I used neutral ph distilled water for the dyebath and added vinegar in an attempt to shift the colour towards red.

Though I’ve gotten bright reds with cochineal & vinegar on wool, for some reason the yarn refused to become red no matter how much vinegar I added.

It settled to a raspberry mousse shade and refused to budge, so I worked with that.

When I started to knit the cuff, I discovered that it knit up to significantly fewer rows per vertical inch than the swatch I’d made. This squashed the detail so badly that I could hardly see it, which surprised and puzzled me.

I asked a friend who had knitted in the round with silk, and apparently this was due to the fact that, unlike wool, silk has no “memory”. Wool springs back to its original size; silk stays stretched.

To make the pattern look right, I knit each pattern row twice. This made the pattern a little longer, but that was better than squashed.

For the swatch, I just knit on the needle part of a circular needle, back&forth with very little pulling, so it didn’t stretch. Working in the round on the stocking, I was pulling the piece around the whole needle, so it did stretch.

The other disappointment was that the surface of the yarn scuffed, spawning little balls of purple fluff. If this happened during the knitting, the finished stockings would probably get scuffed & covered with purple fluff when worn, obscuring the pattern.

Which would make knitting so much complicated detail kind of pointless.

So my next attempt will either be in wool or a wool/silk blend, depending on budget & availability, and if it comes out on the purple end of the scale when I dye it, I’ll try overdying it with madder to get a true red.

Live&learn!


Save

Save

Save

Save

By | December 3rd, 2014|costume, dyes, knitting, silk|Comments Off on Knitted silk stockings, first attempt

Mining the stash part 2

LiviaDaPortoThiene&Daughter4webTurns out my Mining the stash project is going to be delayed. For the best of reasons: I’m going to Italy with my sister next spring – and the dates are just too close to do both justice.

Much as I enjoy the annual SCA* Arts & Science comptetition, it’s no contest – I’m off to Italy!

A great opportunity to look at lots of art and at any historical textiles I can find.

With luck, I’ll be able to see stuff I’ve never met before and gather lots of information on colour, details and those visual elements that translate poorly at a resolution of 72dpi, or even in book-size photos.

In the meantime, I’ve gone through the stash & chosen the main fabrics for the gown and coat and the fur for the lining and the zibellino (the furpiece the countess is holding over her arm).

fabrics & furs for the Livia di Porto Thiene outfit project


  • The coat fabric is a grey/taupe cotton velveteen – apparently cotton velveteen is closer to what Renaissance velvets were than 21st century velvets. I’m hoping to be able to check this out while in Italy!
  • The gown fabric is dark green silk damask – to show the detail, I’ve made the scale bigger in the sketch than it is in real life
  • The fur lining will come from an tawny mink coat a friend found when clearing out his mother’s estate
  • The zibellino is a red fox fur I bought in a second-hand shop in Toronto’s Kensington Market.

Tempting as it is to get started making the outfit, this is as far as I’m going to go with the project until I come back from Italy!

Actually, that not quite true –  I’ve made the zibellino and am working on a detail that doesn’t show: stockings. As the countess is dressed for winter, she’s almost certainly wearing stockings.

I’ve used my imagination and am making a pair of knit red silk stockings in the style of the pair found in the tomb of Eleanora of Toledo. I dyed the yarn with cochineal and am waiting for it to dry. It looks like it’s going to be more towards purple than the red I was aiming for, so it’s going back in the dyepot tomorrow.

Stay tuned

* SCA – Society for Creative Anachronism


By | November 6th, 2014|costume, cotton, fur, Italy, SCA, silk, the stash, travel|Comments Off on Mining the stash part 2