The trials & tribulations of establishing the grain on linen

In a long thread on the Elizabethan Costume Facebook page, Co-Moderator Noel Gieleghem posted an excellent suggestion regarding the challenges of straightening grain in linen – plus a dire warning as to the perils of attempting to tear linen!

The thread is long; I’ve given a link to the whole exchange at the end of this post. It includes a lot of discussion about tearing vs. pull-a-thread-and-cut in various fabrics. Noel chimes in around the middle, passing on a really, really, REALLY good technique for straightening the grain on linen.

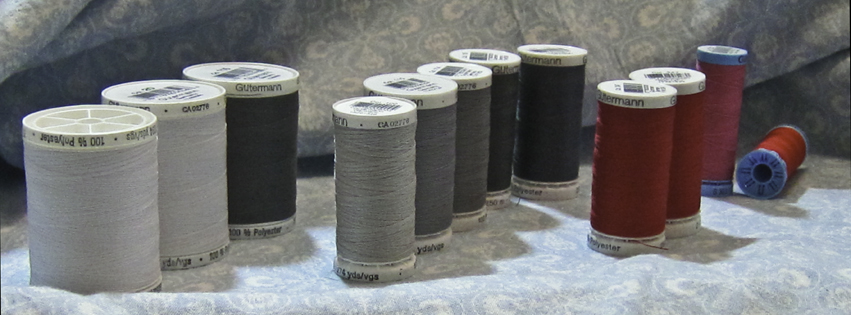
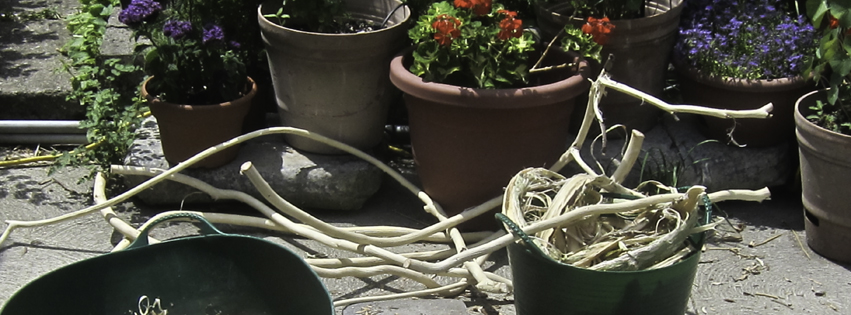
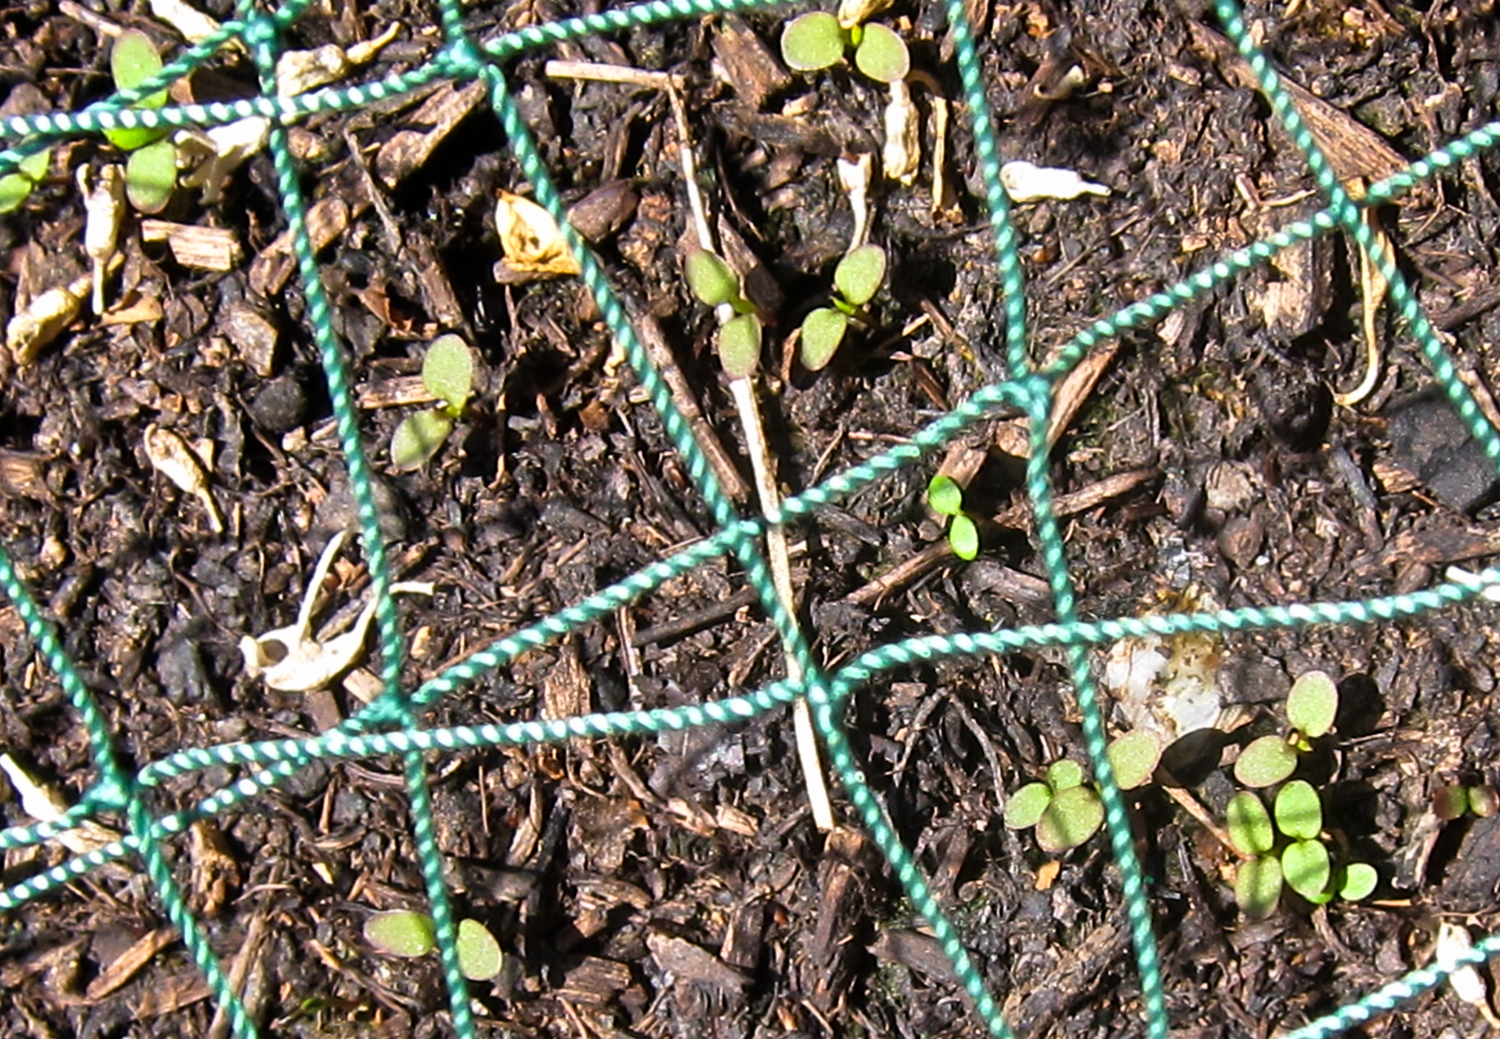
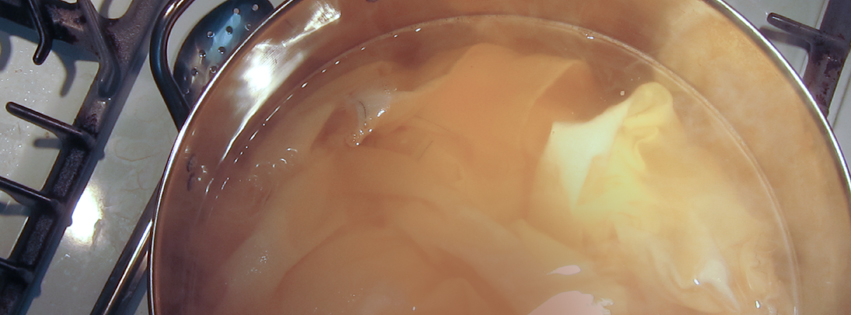
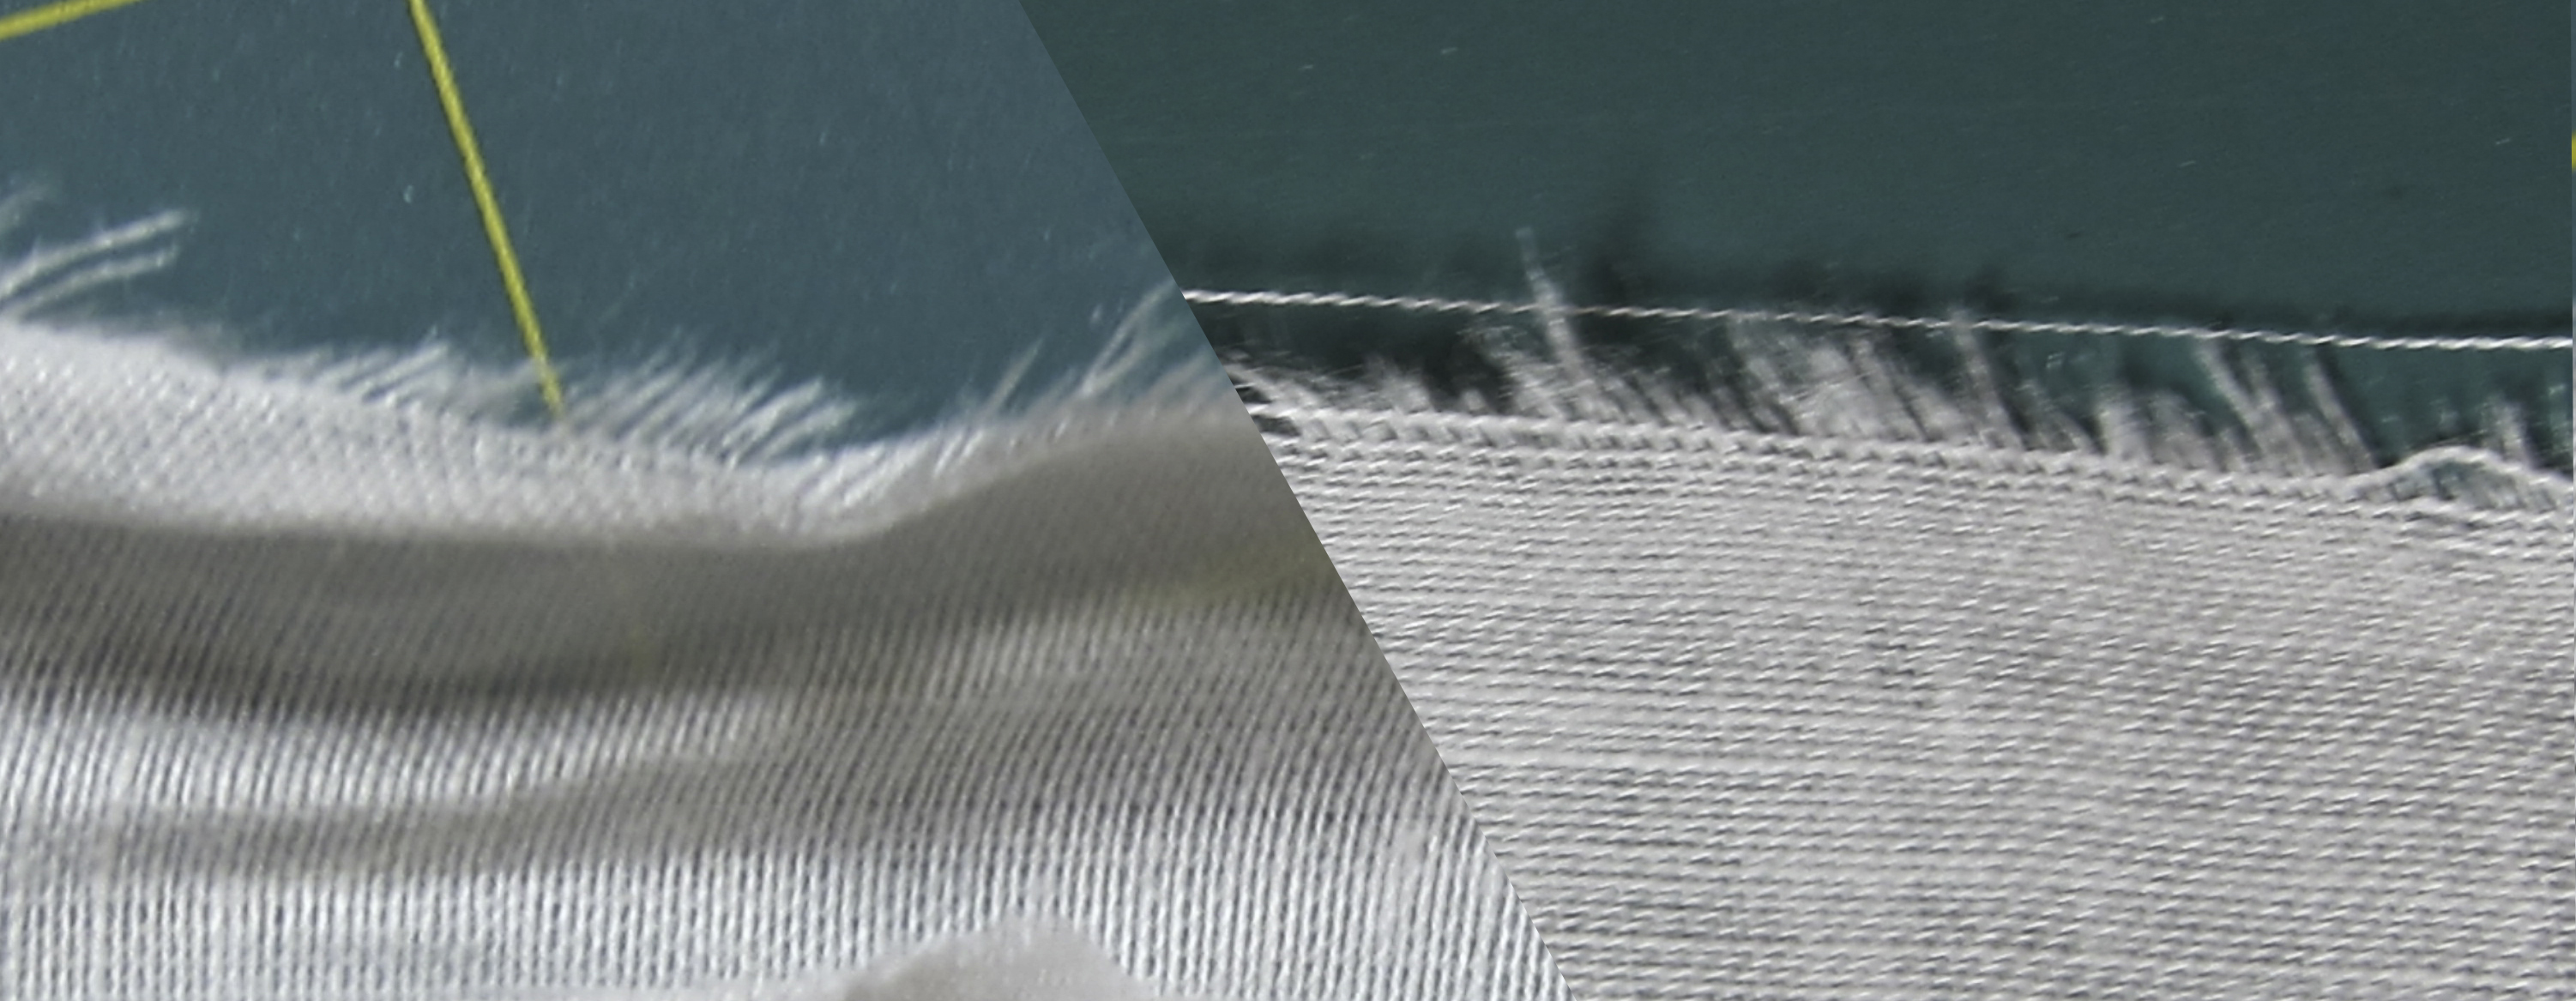
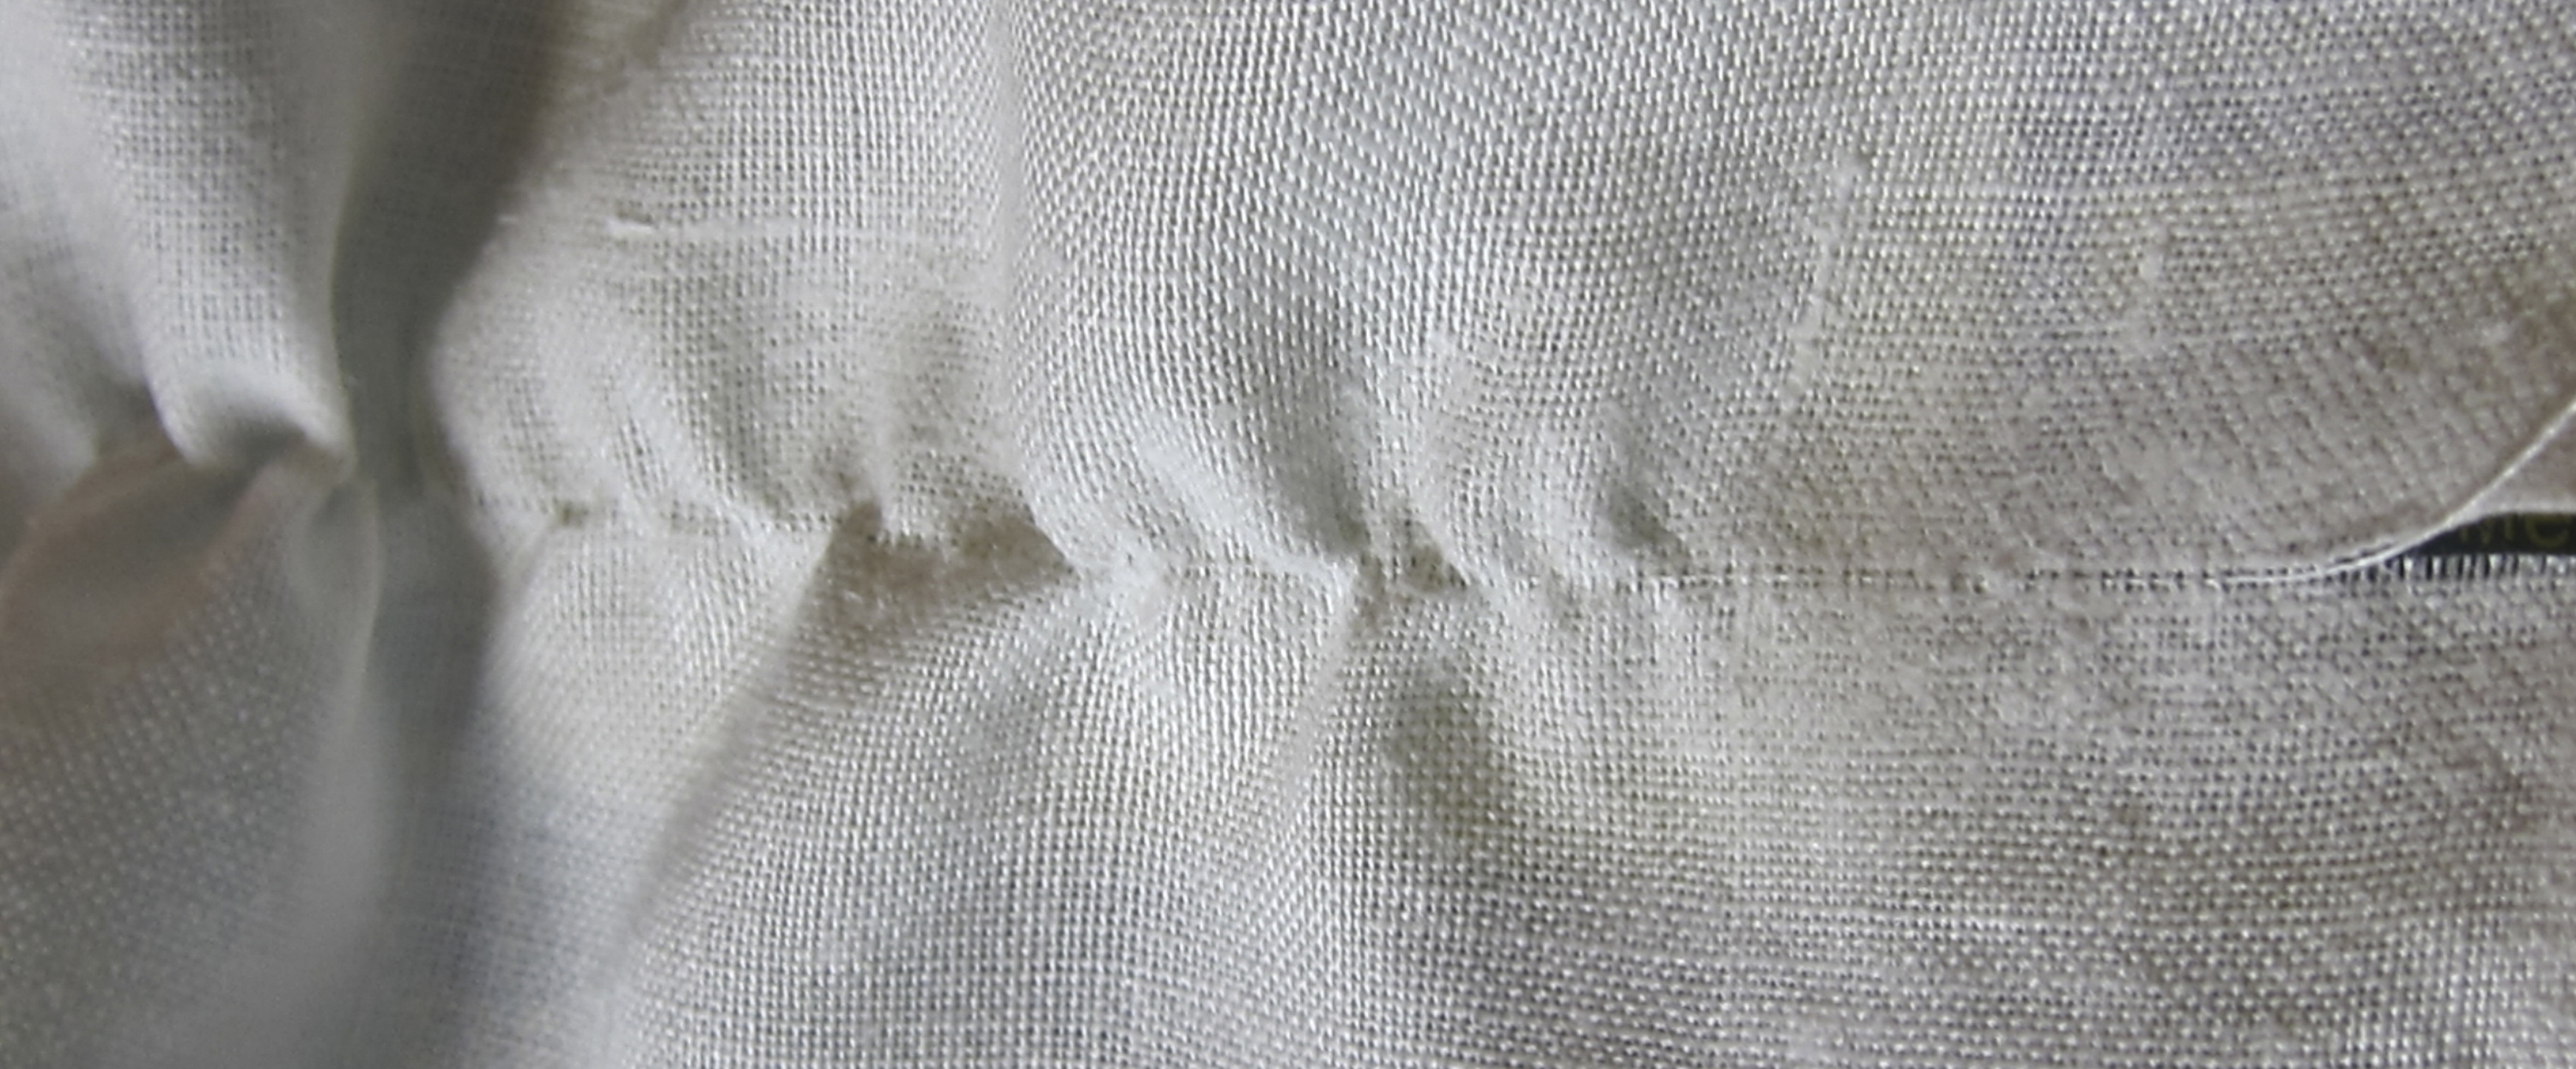
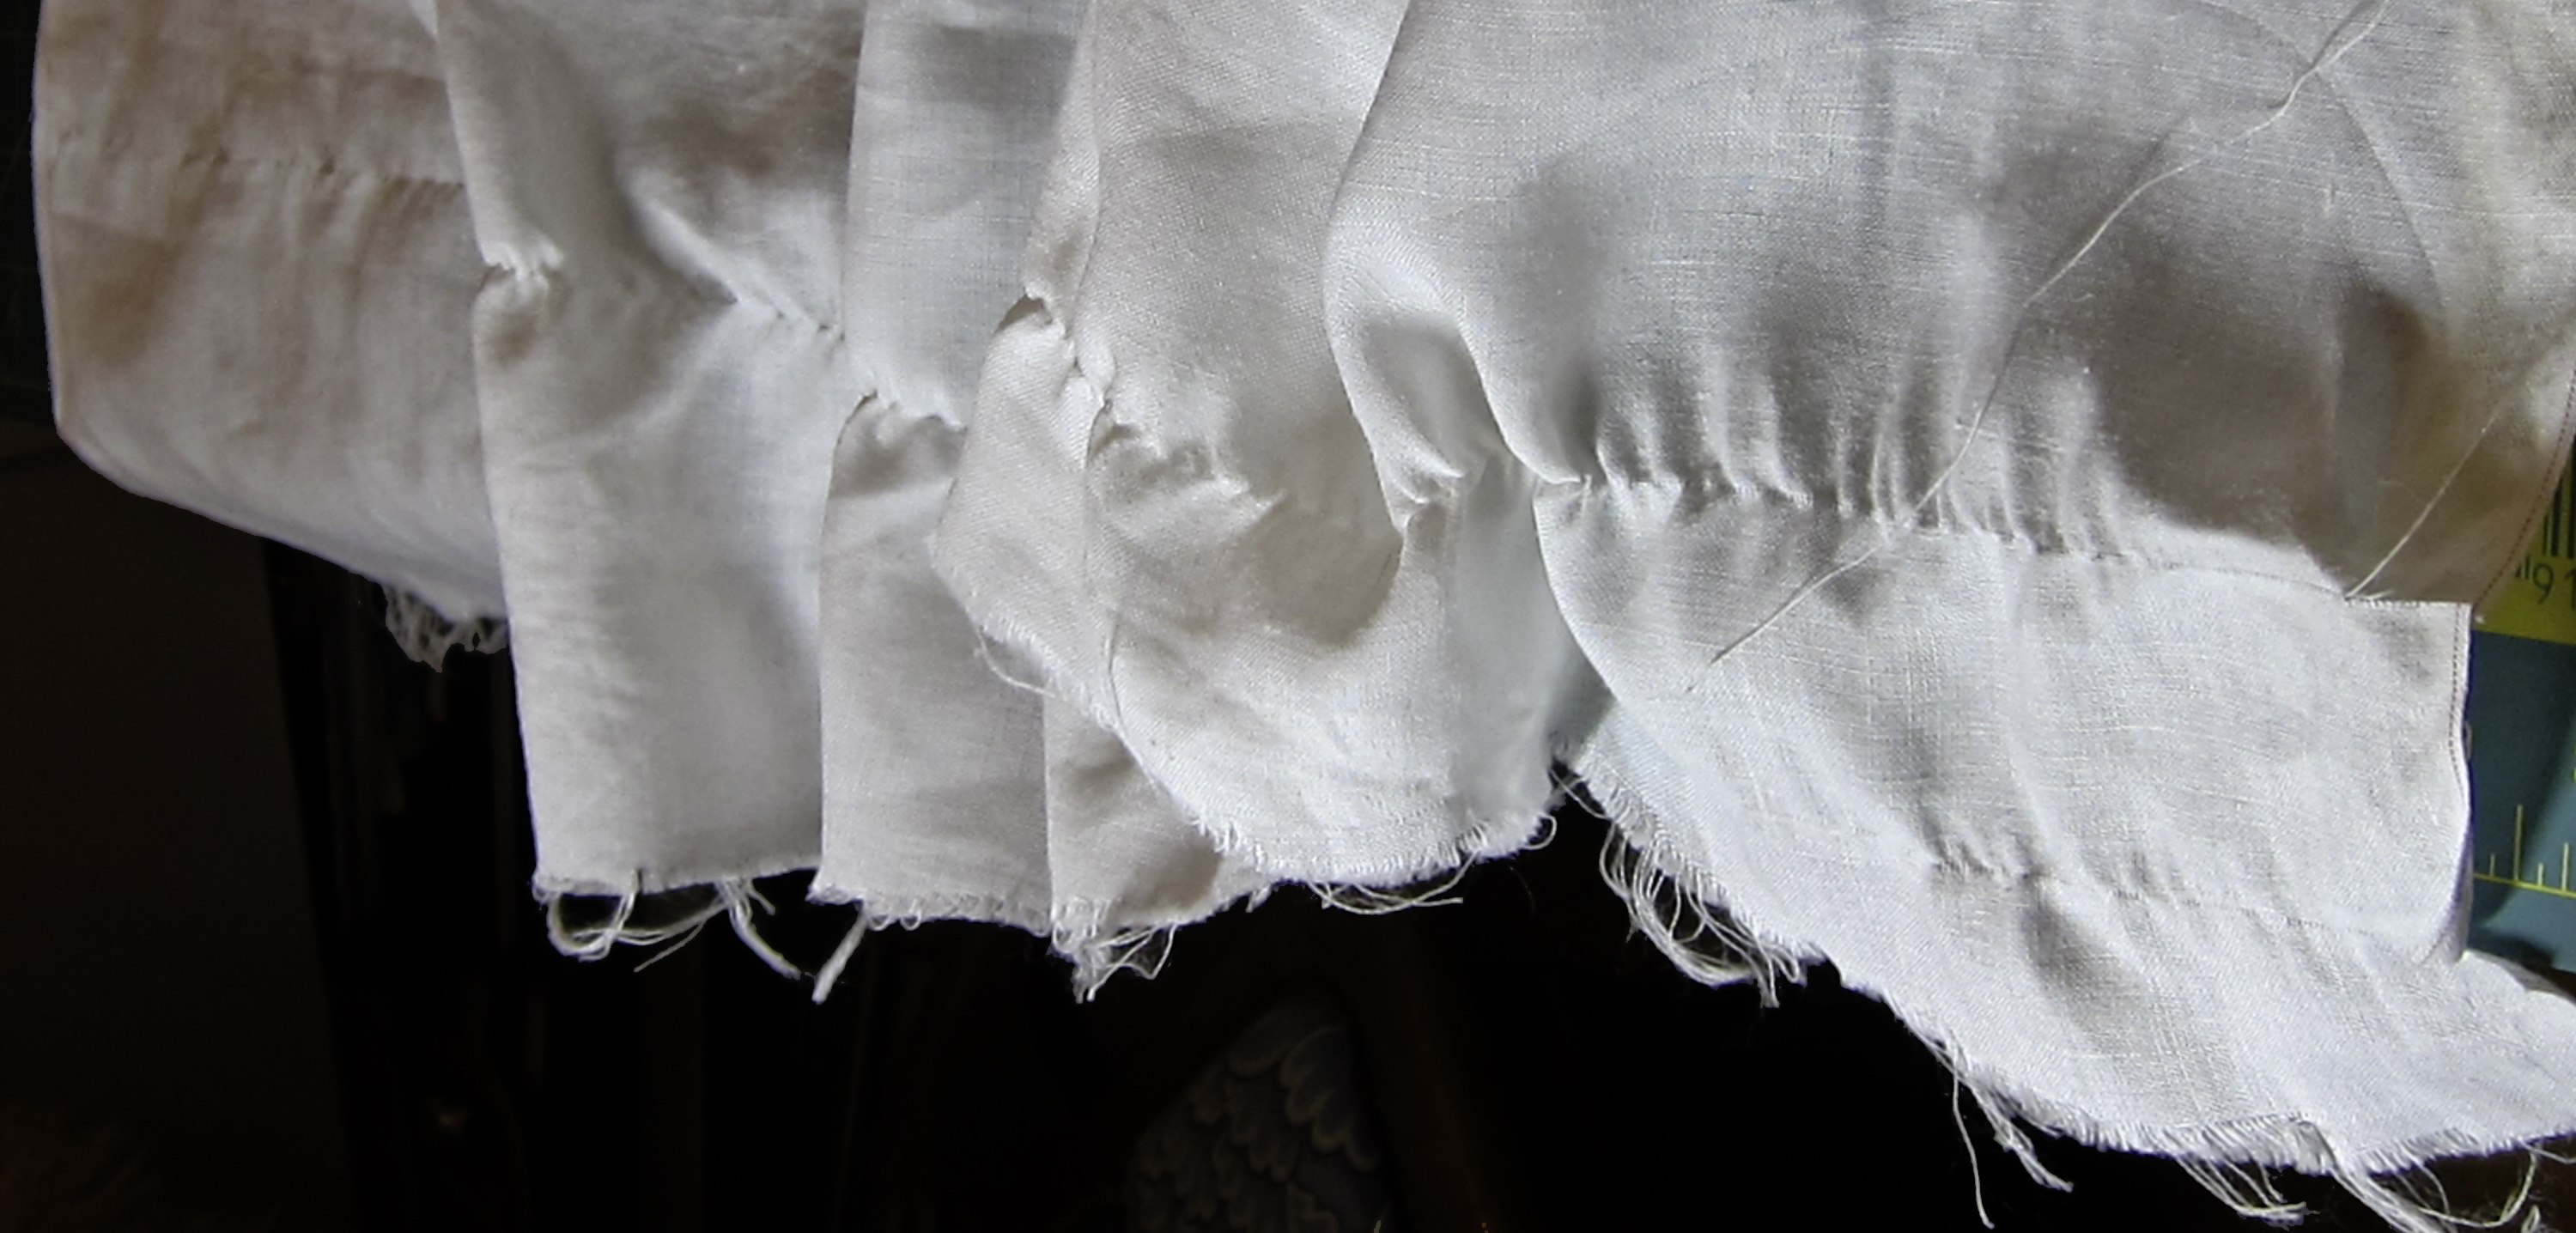
Linen does NOT like to be torn; tearing it distorts the grain, and, even with pressing, it stays distorted. The images above are a piece of handkerchief linen that’s been torn (it rippled like mad), then pressed carefully and thoroughly. Even after pressing, the torn threads are still off grain. Also, the first dozen or so lines of weft next to the torn edge are packed together. This may look minor, but it makes the edge behave differently from the body of the fabric, and can distort what’s being sewn.

So the preferred way of establishing the grain on linen is the old, tried-and-true “pull a thread” technique. Which is tedious.

But despair not! Noel wrote: “A tip I learned from Joy Shillaker in England is scribing your draw line with a bar of soap. It lubricates the thread you’ll be drawing and makes pulling it out much, much easier.”

Having spent many hours pulling threads that inevitably break, fishing the broken end out, and going through the cycle way too many times, I decided to test the technique. I’d already spent a serious chunk of time and patience straightening the grain on one end of my test subject, and that was a pain – the thread did not like to be pulled and broke at every opportunity.

In contrast, the soap line worked beautifully! It was orders of magnitude easier and faster than straightening the first end had been – and much, much less frustrating.

The end of the linen was so badly distorted – and crookedly cut – that it was hard to see where to put the soap line. So, I snipped along a thread, eyeballed where it led to, and started with a short (~30cm/1’) line:

Second try at making a soap line

Then I started to scoot the fabric along the pulled thread, drawing more sections of the soap line when I could see where it should go:

startscootingimg_4442-narrow

The whole process went fast and was super-easy; in fact, it went so well that I got across the whole width without the thread breaking!

linen scooted along pulled thread across full width of linen

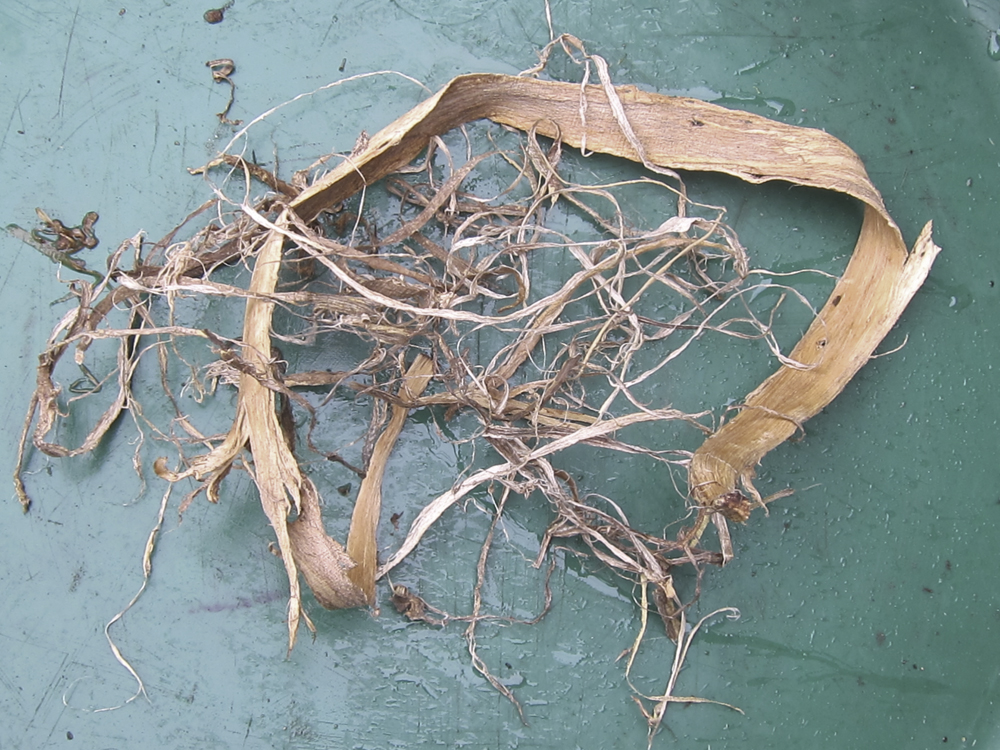
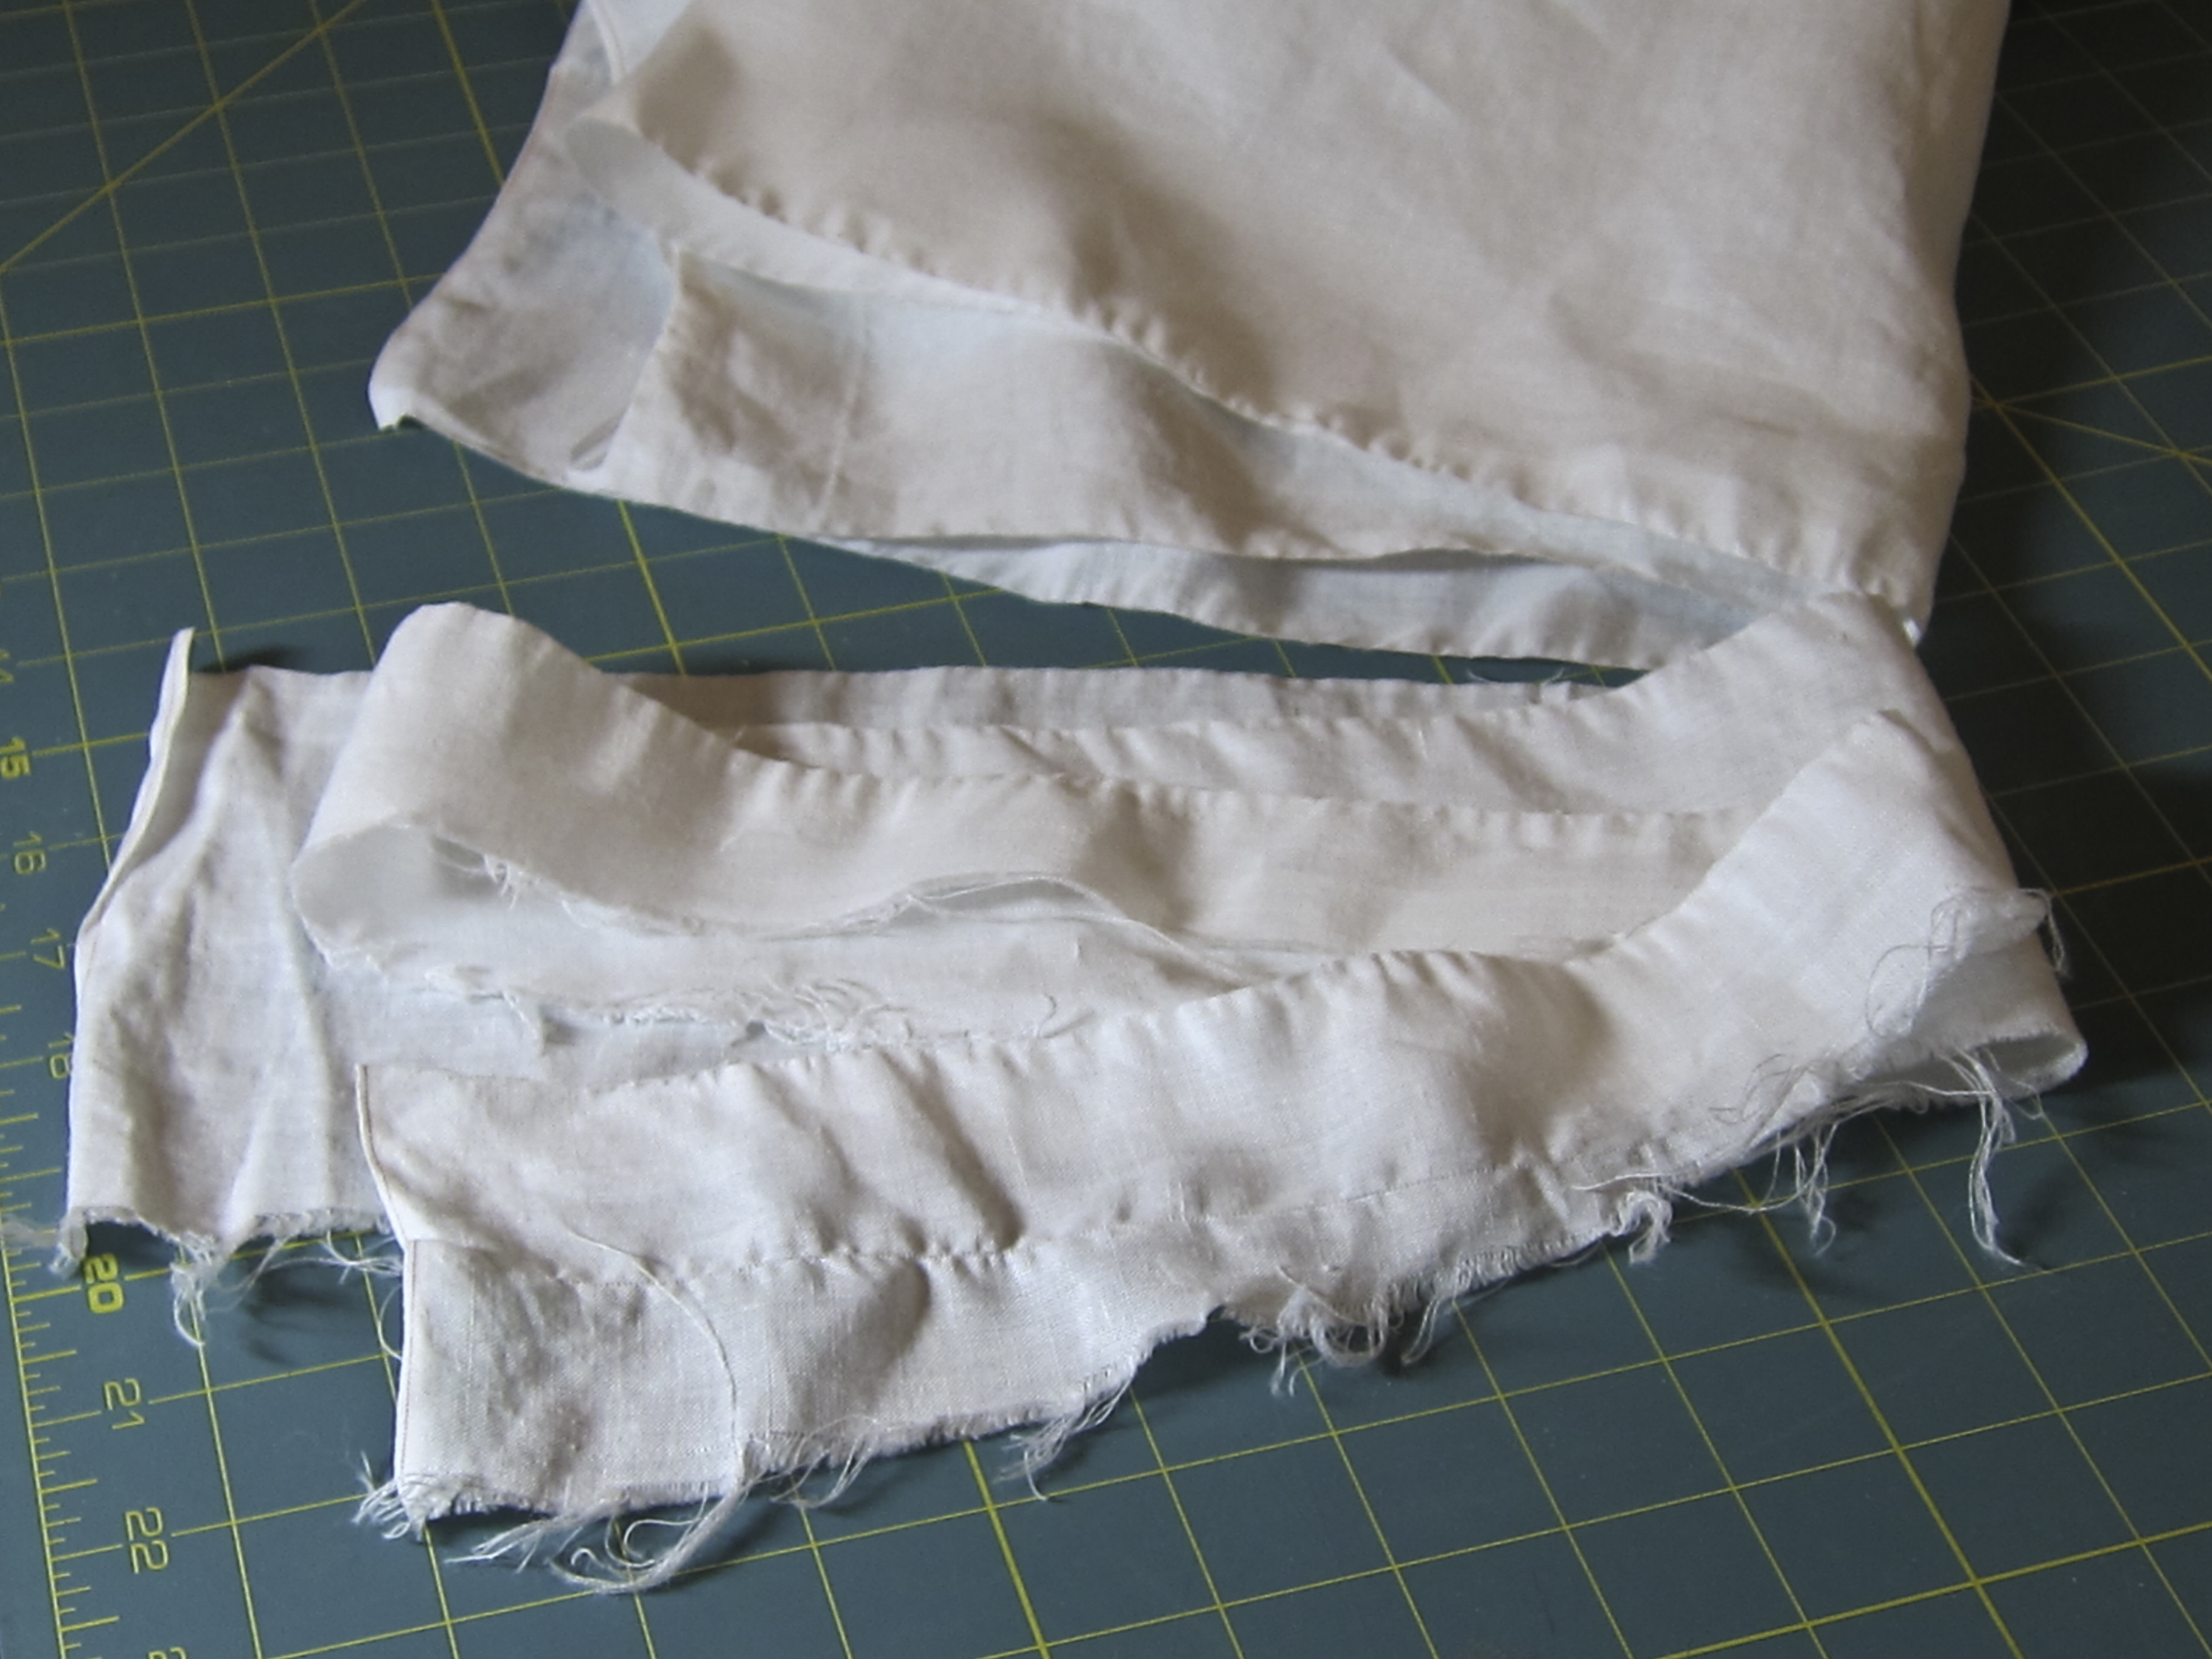
In record time, I had an established grain line – and an offcut that’s a graphic illustration of why it’s so important to establish that grain line!

All done - the grain line established; the fabric cut - and the wonky offcut

Thank you, Noel, for passing on that amazingly effective tip!

I’ve pasted a link to the whole conversation on the Elizabethan Costuming page here.

By | December 6th, 2016|damage, fibers, linen|Comments Off on The trials & tribulations of establishing the grain on linen

Fabricland closing at Honest Ed’s – opens at Galleria Mall

This is the second time I’ve stocked up on thread at a downtown Toronto Fabricland that’s closing, and it looks like it may turn into a tradition. Along with my receipt, the cashier handed me a 50% off coupon for their new store – in the Galleria Mall at Dufferin & Dupont.

Another location that’s slated to be demolished in the not-too-distant future! I don’t get it! Is it really good business practice to rent, staff, and stock a store, then close it, and sell off the stock at a serious discount after a year or two? Or even three?

So it looks like I may be making another thread-buying expedition soonish. (Thread is expensive; a 40% discount is not to be sneezed at!)

As for the 50% off coupon, I’ll have to be lucky to find a fabric I want. Since I prefer natural fibres, most of Fabricland’s stock is not something I would usually buy. Amidst the polyester, polyester blends, polar fleeces, etc, they do carry some natural fabrics, but they’re mostly kiddy-print flanelettes, craft cottons, or pricey. The pure linens they had today were $40 a meter before the discount – hair-raising for someone used to Fabric-store.com or Carolina Calicos, both of whom sell linen at less than $10 yard!

But who knows? As well as thread, this time I was looking for a printed cotton in shades of denim blue, and found one that worked. It’s the one in the background of the image, and it’s 100% cotton. It originally was $24 a meter – more than I would be willing to pay for a workaday cotton print – but at $8, I cheerfully added it to my basket.

(And in case you’re wondering why most of the threads I bought are grey – one of the oddities of colour is that, if a grey thread matches a fabric on the light/dark spectrum, it will happily blend in with pretty much any colour!  The red is because I’ve got a bunch of red sewing planned, and I like the colour.)


By | November 12th, 2016|cotton, fabric stores, linen|Comments Off on Fabricland closing at Honest Ed’s – opens at Galleria Mall

Wisteria textile – round 3


As I suspected, this lot of wisteria is woodier than the lot I harvested in May last year. Even after cooking it for most of a day, I still wasn’t able to split the fibres consistently, so I left it to soak in the ash/water mixture for most of a week.

It got a bit funky, so I rinsed it out & continued to soak it in clean water. Yesterday I was finally able to start separating the fibres. Not much to say. It’s a long, picky process:

  • pull a length out of the pot
  • untangle it
  • if it’s got bark on it, scrape the bark off (it’s not mandatory to scrape with an expired ROM membership card, but more fun than using a chipped kitchen knife)
  • pick out a fibre end
  • pull
  • if the strip is too wide to spin into usable fibre, split it & pull again
  • rinse
  • repeat

longAndShortIMG_3942The results are four categories of fibre: short, long, “needsAnotherBoilIMG_3945wasteIMG_3946needs another boil”, and waste – plus chunks that are obviously too woody to make fibre of any kind. Once I finish processing this lot, I’ll put the strips that are fibrous, but won’t separate, in to boil with wood ash for a few more hours & see whether they’re usable.

For some reason I had a lot less waste than last year; maybe July fibre is stronger than May fibre, and less brittle than the October harvest. Or, with practice, I’ve gotten better at processing it. Or both.

This lot of wisteria is darker than the previous batches –  I don’t know whether it’s because I harvested it during the middle of growing season, or because I left it in the ash bath longer, or that this summer is much drier than last summer. Once it’s woven, I’m planning to piece-dye it with indigo, and I’m curious about how the darker fibre affects the colour. I’ve got enough from my initial experiment to weave a sample for dyeing, and I’ll be interested to see how the two batches compare when dyed in the same bath!


Save

Save

By | July 25th, 2016|dyes, fibers, indigo, wisteria|Comments Off on Wisteria textile – round 3

Wisteria textile – round 2

The house-eating wisteria had a very bad day yesterday; my daughter and I attacked it.

Not just to harvest a few vines for making fibre, but to cut it back seriously. It was starting to infiltrate the roof, and, frankly, I’m very tired of its “house with a bad hair day” effect.

Plus the fact that it was so fat and happy that it didn’t bother to bloom this year!

woody wisteria vinesSo we gave it a severe pruning, separated the leaves & stems wisteria leaves & stemsfrom the woody vines, and today I started processing the vines for fiber.

This is my second wisteria project; the first was an experiment to see whether I could make any wisteria textile at all, which I posted on facebook

This time I’m aiming to produce enough wisteria fibre to weave a furoshiki with a hemp warp and a wisteria weft.

The processing is very low-tech – but hard work. It goes like this:

  • pound the stems with a sledge hammer
  • pull the cambium & bark off the heartwood
  • peel and/or slice the bark off the cambium
  • mix the cambium with water & wood ash & put on to boil

Which is as far as I’ve gotten today. The Very Big Pot is on the stove, full of long strips of wisteria and dirty water.Very Big Pot boiling wisteria

I don’t know how long this lot will take to process. The ideal time to harvest the wisteria is May, but tackling it is a two-person job, and between busy-ness and uncooperative weather, we didn’t get to it until yesterday.

With the extra growing time, some of the stringy, fibrous layer is getting woody, and I suspect I’ll have to pick it out and give it and extra-long boil to loosen it up enough to separate the fibres.

With this huge pot on the stove for the next few days, cooking food is going to be interesting!


Save

Save

Save

Save

Save

Save

Save

Save

By | July 10th, 2016|fibers, wisteria|Comments Off on Wisteria textile – round 2

Eleonora stockings – progress!

My latest attempt at the Eleonora stockings!

This is actually my third go at these stockings. Between my first attempt and this one, a lot more information had come out about them, the best being the images in the Medici archive.

The first time I tackled the stockings was from a pattern I downloaded from the internet, and knit with commercially-dyed red wool fingering. I stopped knitting & discarded this test as soon as I realized that the pattern was for a stocking with a present-day shape, only using the surface patterns from the originals, and that the gauge was way too big – more of a sport sock than an elegant lady’s stocking. The pattern doesn’t seem to be on the internet any more.

The second test was from the pattern by Anne DesMoines published on Ravelry. This one I knit with a silk yarn finer than the wool of the first test. Initially, the silk was white, and I dyed it with cochineal. It had some issues – the dye insisted on being a fuchsia pink instead of red, and the gauge was still too big, with fewer pattern panels than the originals. Also, I found the silk very unpleasant to knit with, and abandoned the attempt.

knittngWidgetClosedFor the current stocking I bought white laceweight wool yarn. This time I dyed it with madder overdyed with cochineal, and got a very satisfying brick red.

This yarn knits up at a finer, more period gauge – approximately 14 stitches to the inch on 1mm needles. None of the documentation I’ve seen to date gives the gauge of the actual Eleonora stockings. However, because of the number of stitches in the pattern panels and the number of repeats, it must be very fine.

As far as I can tell from the available images, this edition of the stockings has same number of patterned panels as the originals, and the stitch count is very close.

I changed a few details – I didn’t like the second zigzag and the eyelets in the cuff or the “ladder” effect of the double garter stitch in one of the panels, so I eliminated the zigzag, and substituted a purl square for the eyelets and a chequerboard pattern for the “ladder” effect, all of which are consistent with late 16th century knitting techniques. Cuff of stocking inspired by Eleanora of Toledo's

Since I plan to wear the stockings, I changed the shaping. The original Eleonora stockings are baggy in the calf and foot – the decreases for the calf are far too low on the leg to fit me and the feet are too thick. Perhaps, after at least eleven pregnancies, Eleonora’s feet and ankles were somewhat the worse for wear.

Instead of designing the foot following the the Medici archive images, I used the foot shaping for 16th century stockings shown in Richard Rutt’s A History of Hand Knitting.  The soles of the originals are mostly moss stitch or seed stitch; instead, I picked up and continued the band pattern just for the fun of it.

heelIMG_3512

One stocking is done and the second is in progress. With luck & a following wind, it’ll be done by Pennsic!

(The little *blip* at the back of the heel is historically accurate. I’ve been assured that it wears in fast and is comfortable..)

I’ve just been reminded of another change that I forgot about – and this one’s a biggie! Virgin Mary knitting in the roundThe Eleonora stockings were knitted flat and sewn up the back; mine are knitted in the round. I couldn’t bring myself to knit them flat. The technique was known by Eleonora’s time – Bertram von Minden’s Knitting Madonna, painted ca 1400-1410, is knitting in the round!


Save

Save

Save

Save

Save

Save

Save

Save

Save

Save

Save

Save

Save

Save

Save

Save

By | June 26th, 2016|cochineal, dyes, knitting, madder, Renaissance, silk, wool|Comments Off on Eleonora stockings – progress!

Japanese indigo finally sprouts!

After many weeks, and on the third attempt, my Japanese indigo has finally sprouted!

Now that I’ve managed to make a textile sample out of the wisteria vine that’s trying to eat my house, I’m on to a more ambitious project: a wisteria-fibre & hemp furoshiki (wrapping cloth), block-resist dyed with indigo.

Since I’ve got a limited amount of wisteria to work with, I’m planning to use commercial hemp thread as the warp.

And, to explore Japanese dyeing techniques, I’m working on growing Japanese indigo – Polygonum tinctorium.

It’s a cousin of Japanese Knotweed – which I’ve been battling for years – and I was dubious about letting it into my garden, but it looks like I needn’t have worried; it’s amazingly slow to germinate! Or at least, amazingly slow to germinate here in Toronto.

To start with, the seed is hard to find. My usual sources – Richter’s and Humber Nurseries – don’t have it, and most of the few suppliers on the web were out of stock by the time I tried to order it last winter. I finally found some on Etsy.

My first attempt to start the seeds was a dismal failure; nothing happened. It needs to be “evenly moist”, and after three weeks or so of nothing happening, I got less careful with the watering.

The second attempt was scuttled by squirrels. They decided the nice, well-tilled raised bed I used was the perfect place to dig.

Finally, I filled a big, self-watering pot with fresh organic soil mix, sprinkled the rest of the seeds on top (they need light to germinate), tied bird netting over the top, and kept a careful eye on the moisture level.

Nothing kept happening. For at least three weeks. Maybe four – I’ve lost track. Finally yesterday, long after I had pretty much give up hope, a bunch of tiny sprouts popped up.

Yay!

Now I have a big flower pot studded with pairs of  baby leaves. Maybe now it’ll pick up speed and behave more like a knotweed – I’m not sure whether to cheer or worry!

By | June 20th, 2016|dyes, fibers, hemp, indigo, wisteria|Comments Off on Japanese indigo finally sprouts!

Dye tests – scouring linen

This linen will be red. What shades of red, I don’t know yet – a series of tests with madder, cochineal and brazilwood is my current dye project.

Playing with the colours is fun&exciting, but much as I’d like to get right into weighing out the madder and grinding up the cochineals, I first need to scour the fabrics & yarns. Less entertaining, but necessary – before the colour goes in, whatever is inhabiting the fibre has to come out, and there’s a surprising amount of gunk on even the newest, cleanest, whitest textile!

Of the three fibres I scoured – silk, wool, and linen – the most dramatic was the linen. Though the yardage was new and clean and very white, the water turned this dirty yellow from the waxes and pectins from the linen, plus whatever was added in the processing.

In this case, I suspect there were optical brighteners – the fabric started out bright white. Now it’s still white, but with a more “natural” tone.

The PH meter I ordered just arrived in the mail! Now to calibrate it…


By | February 3rd, 2016|dyes, fibers, linen, scouring, silk, wool|Comments Off on Dye tests – scouring linen

Knitted silk stockings, first attempt

Raspberry-mousse coloured knit silk stockings - first attempt

My first attempt at knitting the Eleonora stockings in silk was an education! (My first-first attempt was in wool, which I’ve had lots of experience with – and the gauge was way too big, so I abandoned it.)

To get back to the silk: I wanted to dye the yarn a true red with cochineal.

Since cochineal is sensitive to ph – an acidic dyebath pushes it toward red and a basic one towards purple – I used neutral ph distilled water for the dyebath and added vinegar in an attempt to shift the colour towards red.

Though I’ve gotten bright reds with cochineal & vinegar on wool, for some reason the yarn refused to become red no matter how much vinegar I added.

It settled to a raspberry mousse shade and refused to budge, so I worked with that.

When I started to knit the cuff, I discovered that it knit up to significantly fewer rows per vertical inch than the swatch I’d made. This squashed the detail so badly that I could hardly see it, which surprised and puzzled me.

I asked a friend who had knitted in the round with silk, and apparently this was due to the fact that, unlike wool, silk has no “memory”. Wool springs back to its original size; silk stays stretched.

To make the pattern look right, I knit each pattern row twice. This made the pattern a little longer, but that was better than squashed.

For the swatch, I just knit on the needle part of a circular needle, back&forth with very little pulling, so it didn’t stretch. Working in the round on the stocking, I was pulling the piece around the whole needle, so it did stretch.

The other disappointment was that the surface of the yarn scuffed, spawning little balls of purple fluff. If this happened during the knitting, the finished stockings would probably get scuffed & covered with purple fluff when worn, obscuring the pattern.

Which would make knitting so much complicated detail kind of pointless.

So my next attempt will either be in wool or a wool/silk blend, depending on budget & availability, and if it comes out on the purple end of the scale when I dye it, I’ll try overdying it with madder to get a true red.

Live&learn!


Save

Save

Save

Save

By | December 3rd, 2014|costume, dyes, knitting, silk|Comments Off on Knitted silk stockings, first attempt

Mining the stash part 2

LiviaDaPortoThiene&Daughter4webTurns out my Mining the stash project is going to be delayed. For the best of reasons: I’m going to Italy with my sister next spring – and the dates are just too close to do both justice.

Much as I enjoy the annual SCA* Arts & Science comptetition, it’s no contest – I’m off to Italy!

A great opportunity to look at lots of art and at any historical textiles I can find.

With luck, I’ll be able to see stuff I’ve never met before and gather lots of information on colour, details and those visual elements that translate poorly at a resolution of 72dpi, or even in book-size photos.

In the meantime, I’ve gone through the stash & chosen the main fabrics for the gown and coat and the fur for the lining and the zibellino (the furpiece the countess is holding over her arm).

fabrics & furs for the Livia di Porto Thiene outfit project


  • The coat fabric is a grey/taupe cotton velveteen – apparently cotton velveteen is closer to what Renaissance velvets were than 21st century velvets. I’m hoping to be able to check this out while in Italy!
  • The gown fabric is dark green silk damask – to show the detail, I’ve made the scale bigger in the sketch than it is in real life
  • The fur lining will come from an tawny mink coat a friend found when clearing out his mother’s estate
  • The zibellino is a red fox fur I bought in a second-hand shop in Toronto’s Kensington Market.

Tempting as it is to get started making the outfit, this is as far as I’m going to go with the project until I come back from Italy!

Actually, that not quite true –  I’ve made the zibellino and am working on a detail that doesn’t show: stockings. As the countess is dressed for winter, she’s almost certainly wearing stockings.

I’ve used my imagination and am making a pair of knit red silk stockings in the style of the pair found in the tomb of Eleanora of Toledo. I dyed the yarn with cochineal and am waiting for it to dry. It looks like it’s going to be more towards purple than the red I was aiming for, so it’s going back in the dyepot tomorrow.

Stay tuned

* SCA – Society for Creative Anachronism


By | November 6th, 2014|costume, cotton, fur, Italy, SCA, silk, the stash, travel|Comments Off on Mining the stash part 2

Adding to the stash

Regardless of overstuffed storage space, the stash grows.

The Textile Museum of Canada Volunteers’For Love of Cloth” sale last weekend tested my resolve – and it crumbled a bit.

A pair of sample panels in this huge, gorgeous stylized carnation pattern that looks like it’s inspired by Ottoman ikats bushwhacked my resolve. They’re gorgeous; no idea what I’m going to do with them. They’re from Pierre Frey in Paris, and I discovered that one of the colourways is still available – one more yard would be enough to make a spectacular vest. However, when I found out that the fabric is $600/yard + tax + shipping, I gave that idea up. Maybe something parti-coloured!

My mission for going to the sale actually was to find a fabric to make the shell of a mink-lined vest. A couple of years ago I found a vintage mink vest with a the label of Simpson’s, a long-gone department store I used to shop at, and I bought it out of nostalgia.

The vest fits but it’s showing its age – bald spots around the arm holes and a couple of divots from moth-munches – so I decided to turn it into a vest lining.

I wanted a shell fabric that was lightweight and interesting, and lucked out with a sample panel of a toile de Jouy-like  cotton/silk damask.

Green and blue sample panel of cotton/silk damask in a toile de Jouy-like pattern


Now all I need to decide is whether I want to use the blue version or the green version…


By | October 21st, 2014|cotton, silk, Textile Museum of Canada, the stash|Comments Off on Adding to the stash