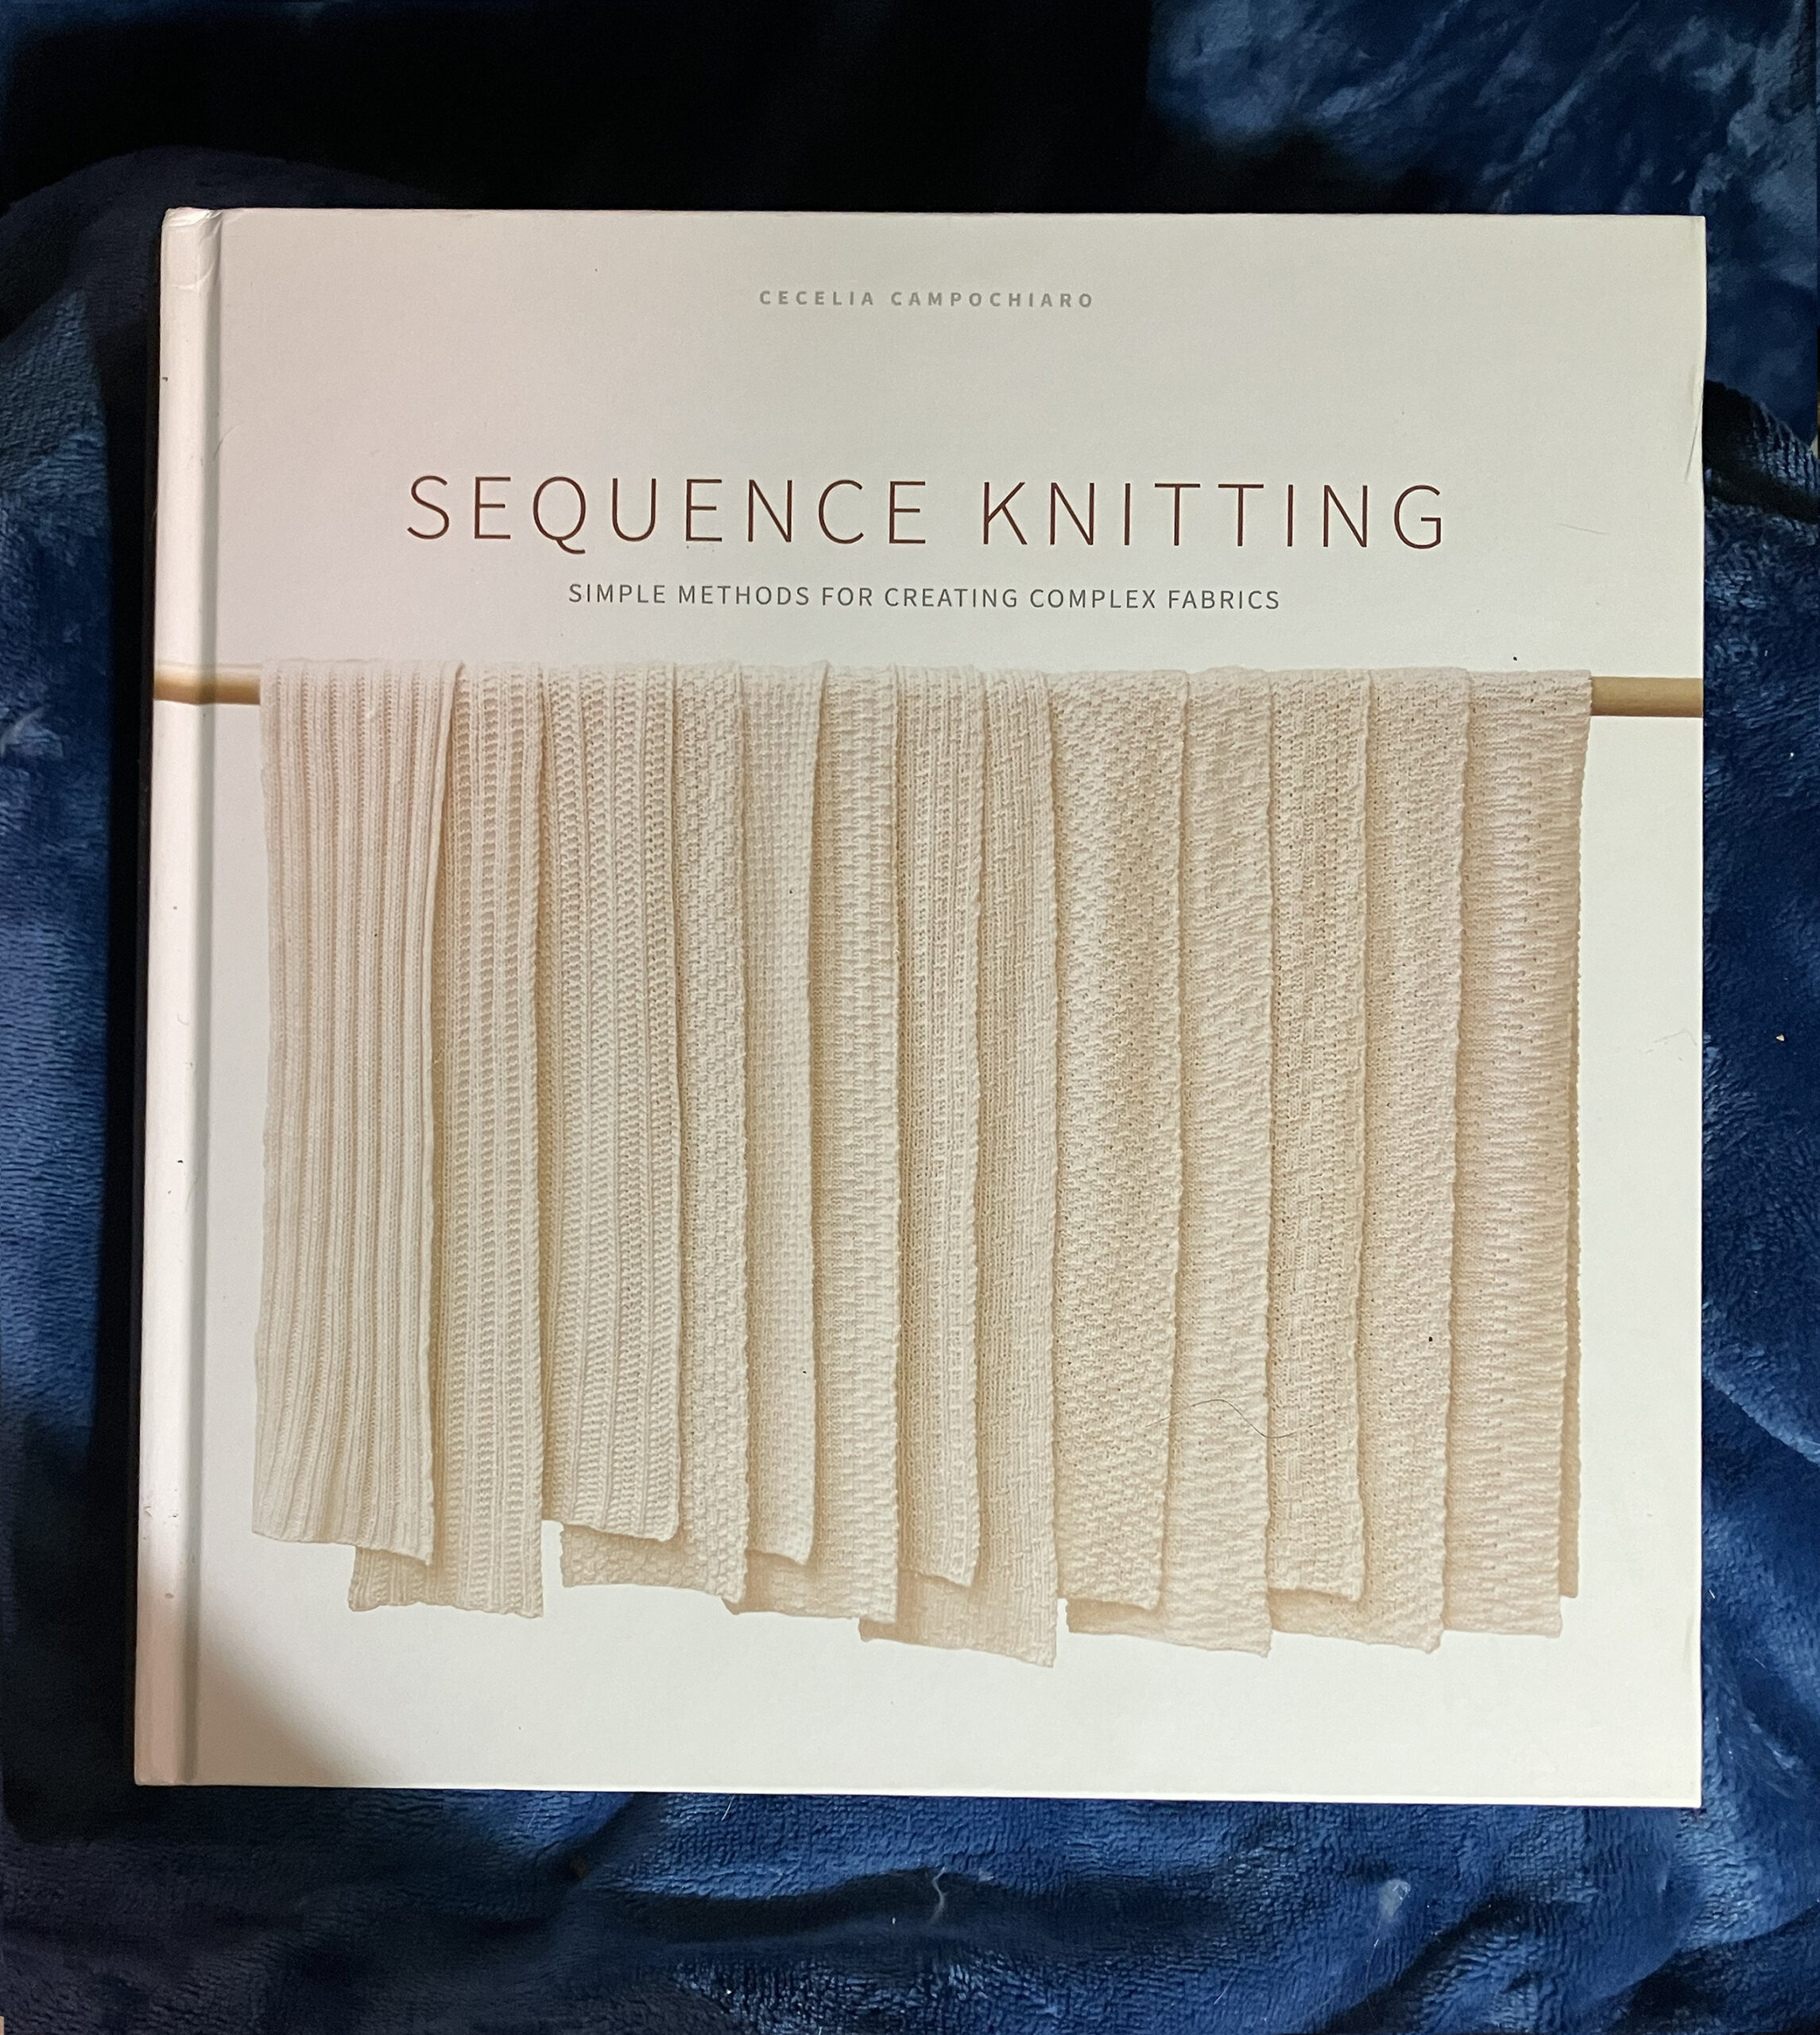
I got this fascinating book last fall, just before we moved. It shows how to make an amazing array of textures and patterns with a weird mix of super-simple knit patterns and math. Or, in knitters’ terms, it uses short sequences of knit and purl stitches, repeated over and over and over and over – on at least one more stitch than multiples of the length of the sequence.
Which brings in the change ringing – recently I had a chance to participate in a demonstration of change ringing with hand bells at a Society for Creative Anachronism event. Change ringing is also pattern-making with short sequences. Instead of stitches, it uses tones, and repeats by starting each round at a different place in the sequence.
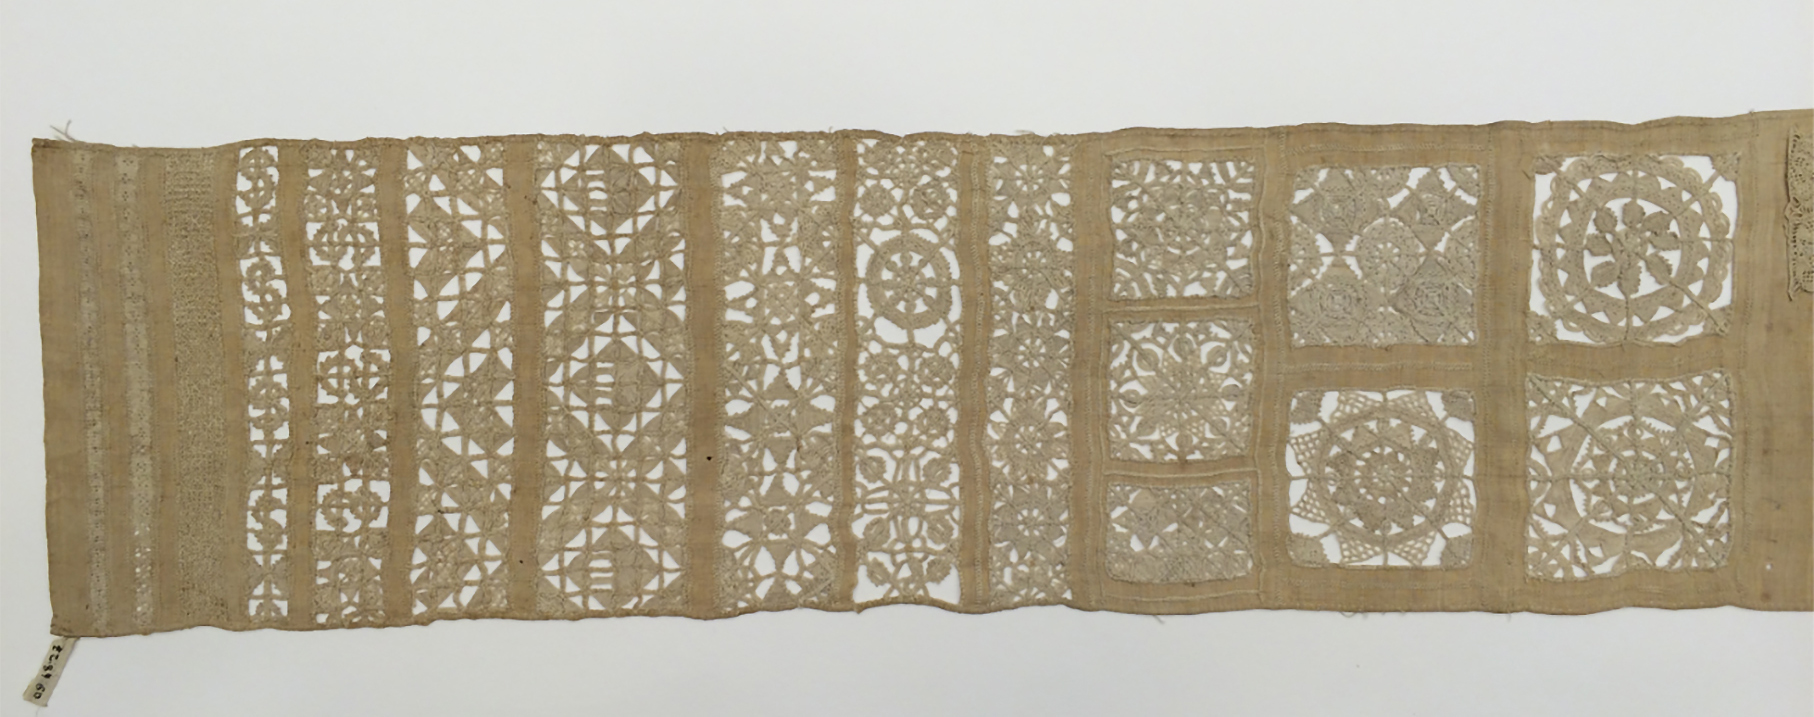
The other element is the Elizabethan whitework sampler, like this one in the Metropolitan Museum of Art – long&narrow, many patterns, one colour. Again, making a series of patterns with repeats of short sequences – this time stitches again, though thread through fabric rather than loops of yarn.
Weirdly, when I googled on “mathematics repeat “short sequences”” looking to see if there’s a name in mathematics for this kind of pattern making, it brought up pages&pages of information on short sequence repeats (SSRs) in DNA replication! Which is intriguing, and a little startling.
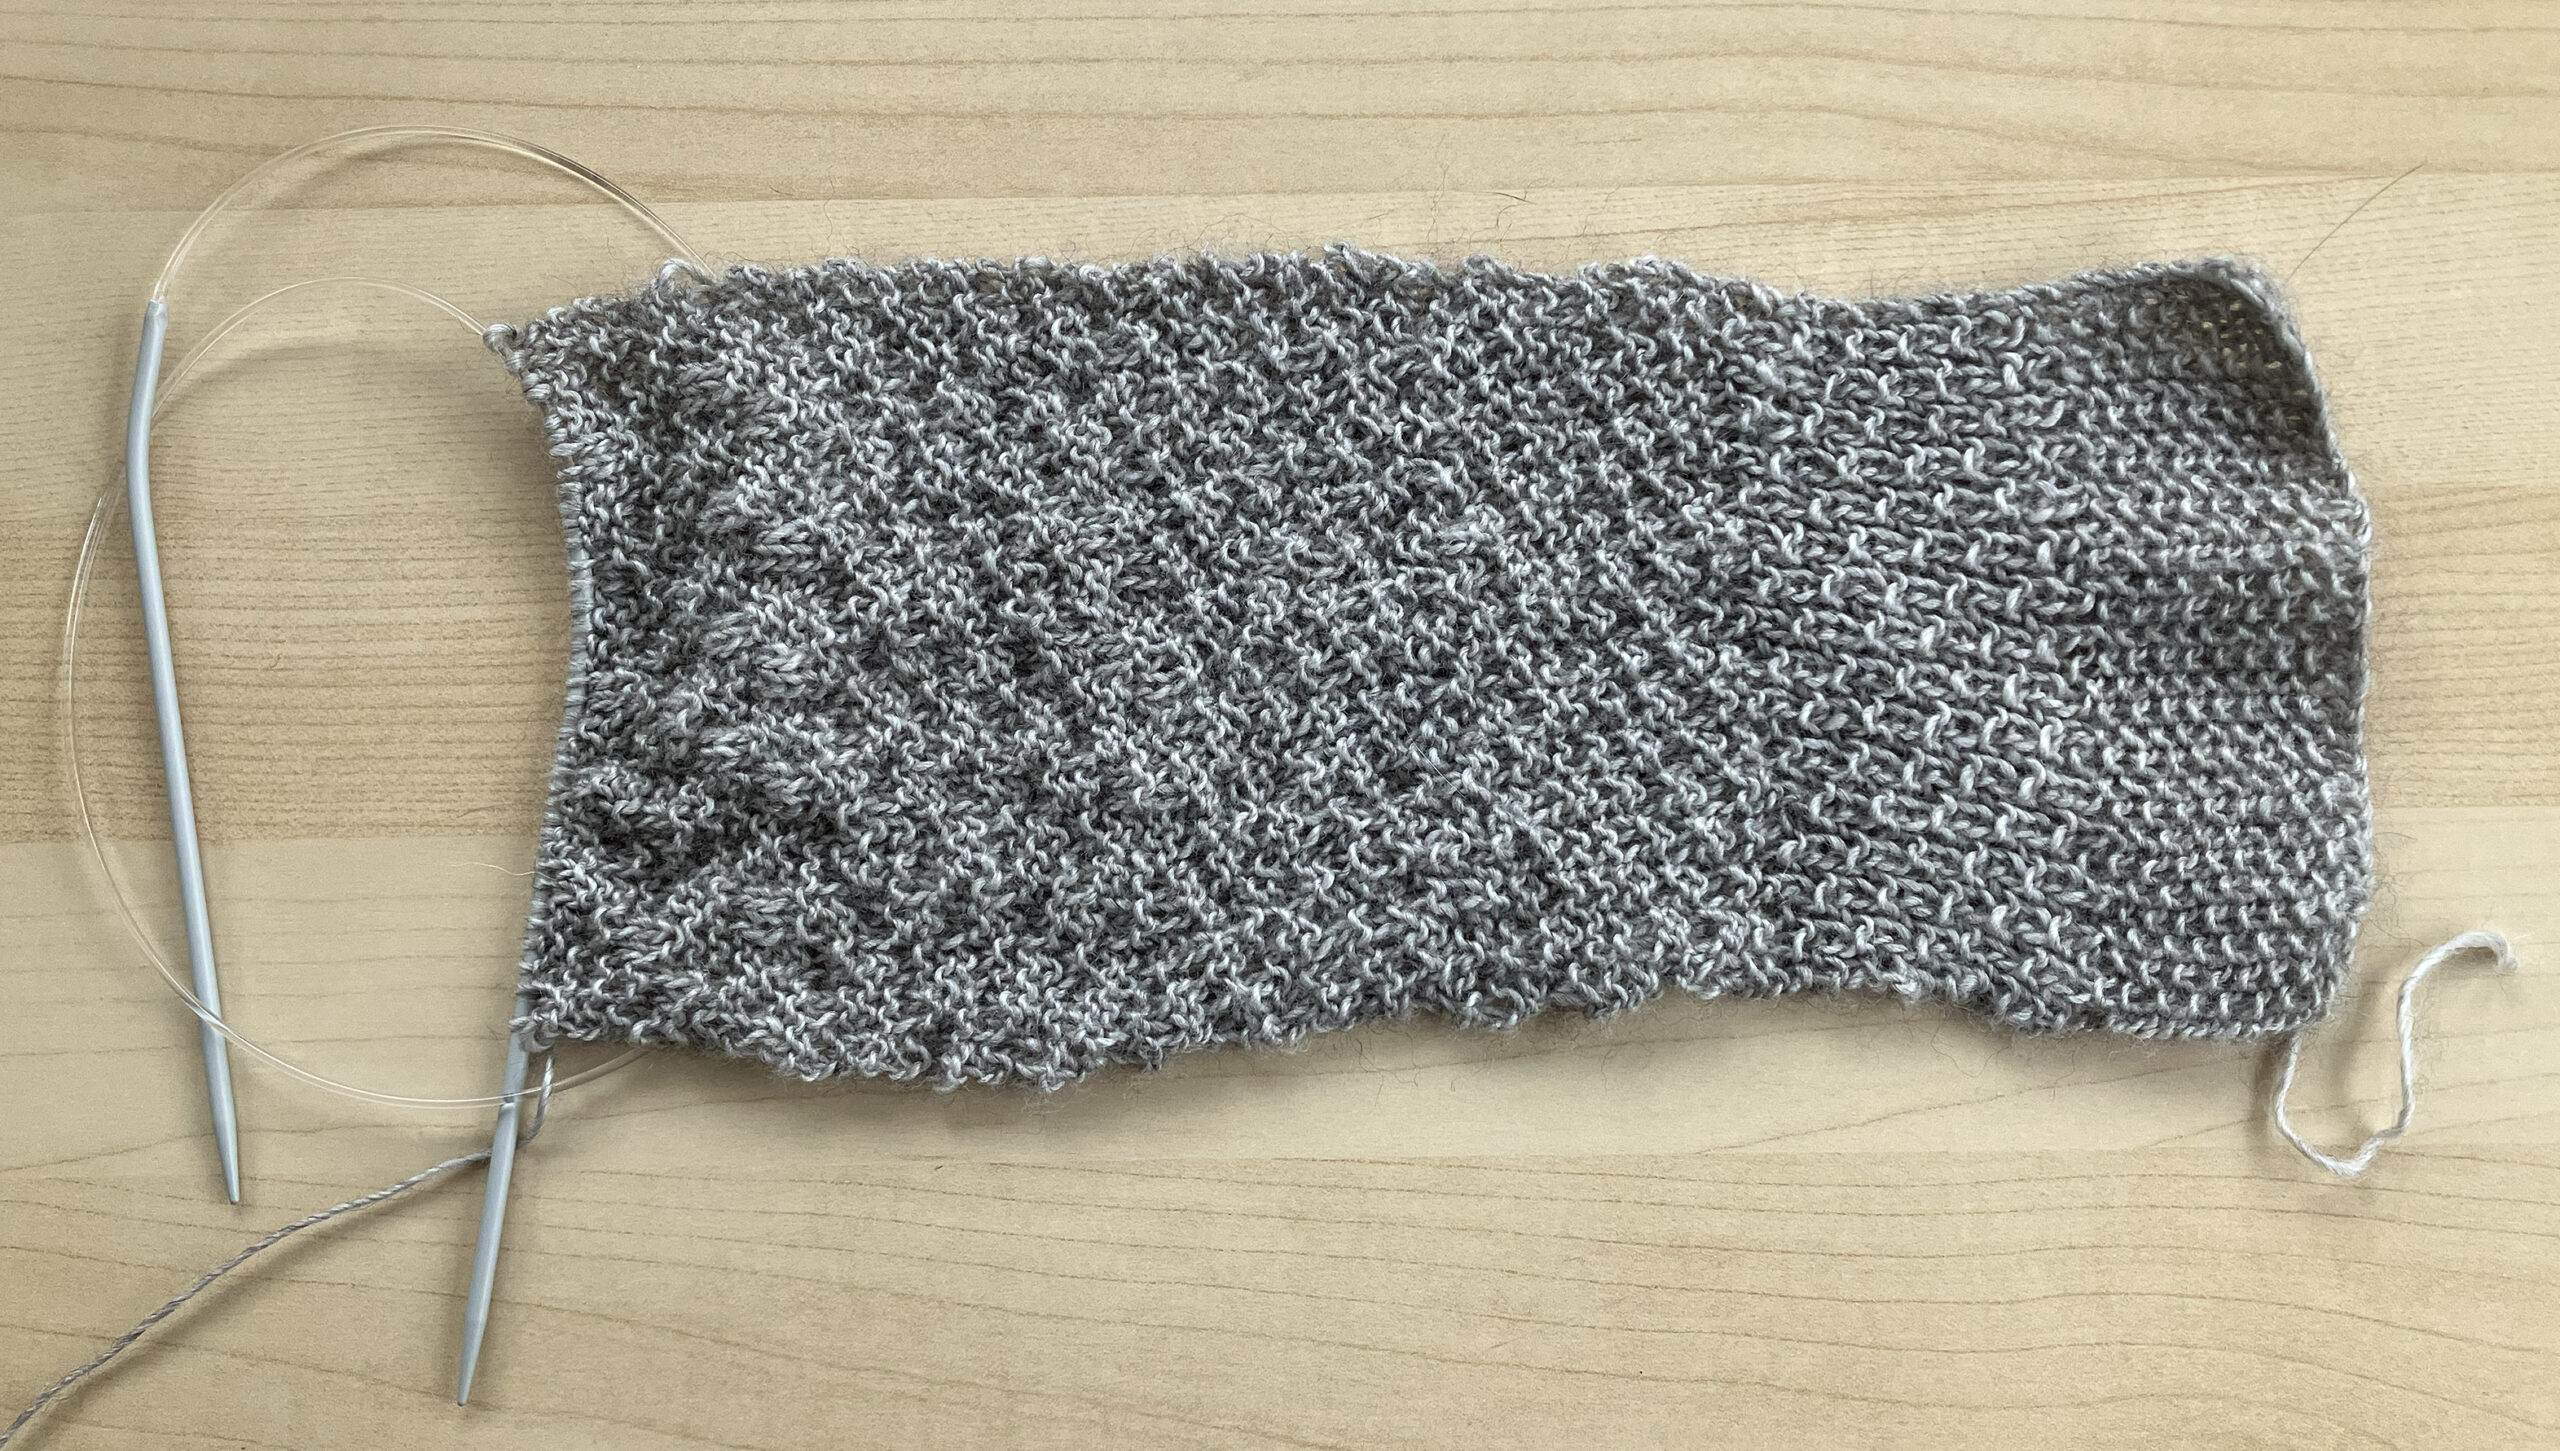
But, for now, I’m going to stay out of the DNA rabbit hole, and stick to repeating short sequences in a lovely pale grey merino/silk/yak yarn.
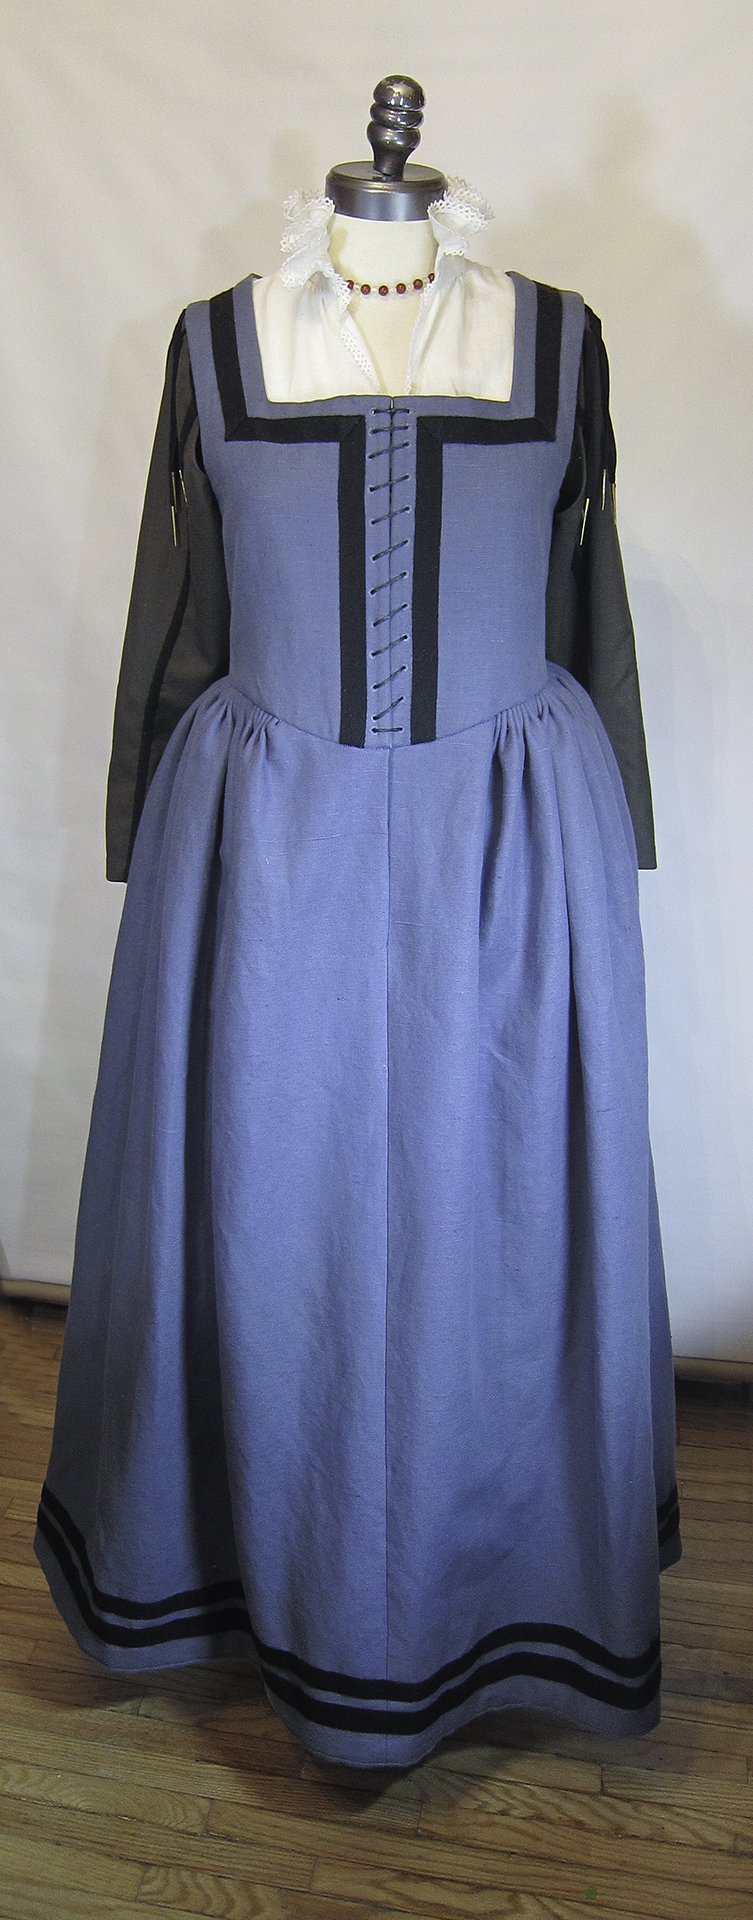
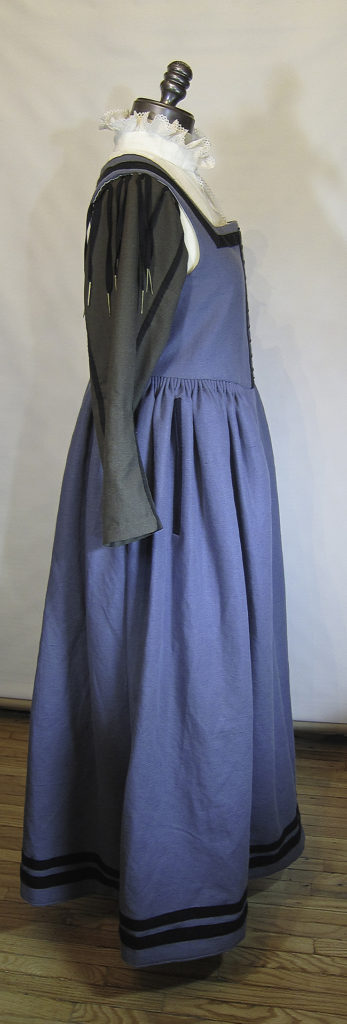
My pretty blue fustian sottana was sideswiped by Covid. I’ve gained weight, and, if I didn’t alter it, I’d either have had to lace it up excruciatingly tight, or wear a stomacher.
While I could actually get the front edges to meet – for a few seconds – it was way ridiculously too uncomfortably tight. And stomachers don’t appear to have been a thing in late 16th century Italy. Or, at least, I haven’t found a reference to one, or an image.
So alteration it was. Which is where the beauty of 16th century garment assembly came to the fore.
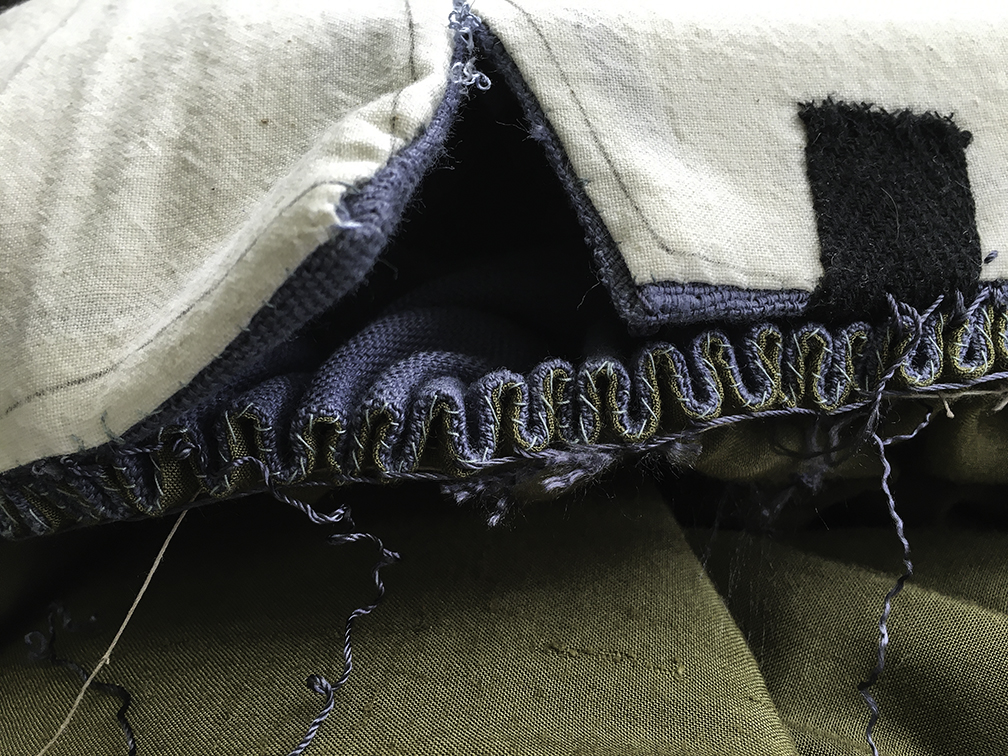
When I originally made the sottana, I used 16th century techniques, finishing each component – the two fronts, the back, and the skirt – completely before final assembly. I’d catch stitched the seam allowances of the fashion fabric to the canvas interfacings, and slip stitched the bodies linings in. The skirt is flatlined, and I and stitched the raw edges of the skirt lining under to hide the raggedy shuttleless loom selvedges. Then I whip stitched the seams of the bodies, applied the trim, stitched the skirt to the bodies, and, finally, sewed the trim to the bottom of the skirt.
Lots of hand sewing, and a clean finish all around, which made adding the extra SO much easier. (And easily reversible, if I ever lose the weight! )
Rather than having a bunch of raw edges to contend with when I unpicked the seam where I wanted to add the extra fabric, there was a nice, clean, finish, all ready to pop the extensions in.
It needed about 2.5 centimetres/1 inch width added on each side. I had plenty of fabric left to make the alterations – almost a meter of the fustian, and lots of the washed canvas & muslin that I’d used for the interlining and lining.
Since the added piece was such a simple shape, I didn’t bother with making a pattern – I measured it out on the canvas, cut it out, and cut the fustian around the canvas, adding seam allowances. Then I followed the same process as with the original construction – catch stitching the seam allowances to the canvas interfacing, slip stitching the lining in, and whip stitching the finished extensions into place.
Once that was done, I tried the sottana on just to be sure the alteration fit. It does; and I put it up on my judy to photograph it. Kinda disappointing. It looked OK; just … OK.
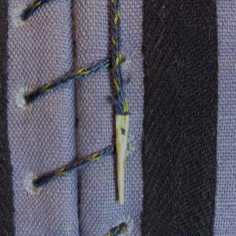
So I had a dig through my stash to see if I had some of the original tape that I’d used as trim left to cover the extra seam in the bodies. I did, but not enough, so I went to Mokuba to see if they still carry it. They do – and they have a narrower version, which is in even better proportion. I splurged a kingly $2.49 for a meter.
Because the sottana is made to be washable, and I’d pre-shrunk all the elements, I soaked the tape in hot water, then dried it in the sun. Once it was dry, I ironed it and sewed it on over the extra seams.
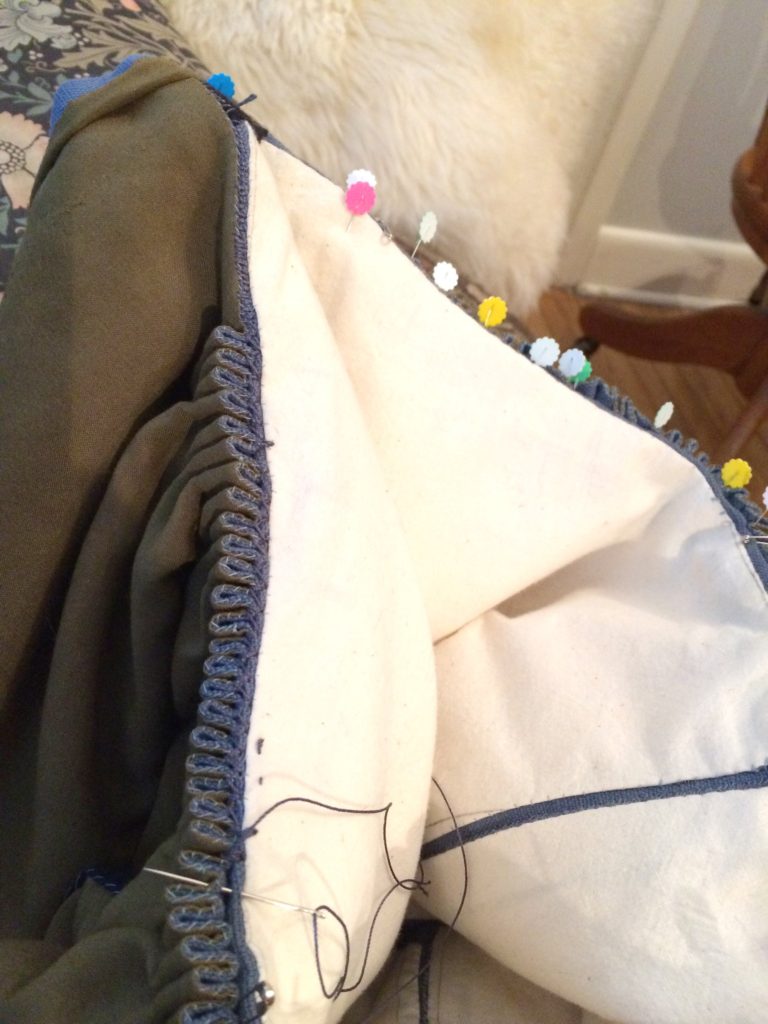
Luckily, to sew the skirt back on, I didn’t have to re-gather it – cartridge pleats are flexible, and I’d stabilized them with lots of stitching on the inside. All I had to do was pick back the stitches joining the skirt to the bodies a few centimetres either side of where I added the width, and the cartridge pleats graciously agreed to expand enough to accommodate the extra girth.
All in all, the “finish each part, then assemble the whole” method of construction makes alterations SO much easier. I didn’t have to contend with clipped seam allowances, raw edges, re-gathering the skirt, or the general messiness of tidying the whole thing up. All I had to do was unpick two seams and a bit of a third, make the extensions, sew them in, and re-attach the skirt.
I suspect it also would make repurposing parts of worn-out clothing a lot easier. I haven’t seen any examples, but I wonder if there were some Frankenstein garments out there, with the front from one, the back from another, the sleeves from a third, and so on.
Fabric was precious; people wanted to get as much mileage out of it as possible, so it wouldn’t surprise me! Not at all!
In the late middle ages and Renaissance, “fustian”
meant an affordable fabric woven of two kinds of fibre – cotton & linen, or
cotton & wool, or linen & wool.[1]
A lot of historical novels I’ve read mentioned fustian. It’s one of those words, like “curricle” or “cotehardie” that writers use to position their work in past time. It’s not something you’ll find in a present-day fabric shop unless it’s one that specializes in textiles for historical reenactors.
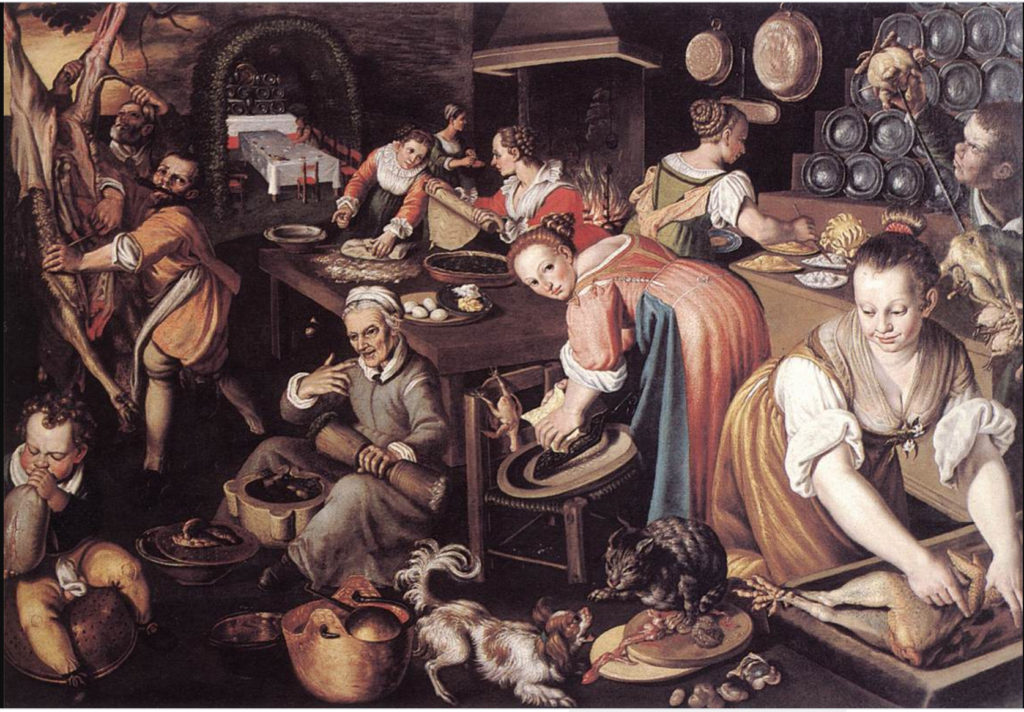
Last summer at Pennsic, a reenactment event that features a marketplace full of supplies for reenactors, I found a generous remnant of cotton/linen fustian and decided to make an “everyday” sottana of it, loosely based on what the women in Vincenzo Campi’s lively kitchen scene are wearing.
All of the materials I used would have been available in the late Renaissance, aside from a package of olive green iDye and a meter or so of synthetic whalebone.[2]
The materials:
blue fustian fashion fabric
“natural” cotton canvas interlining
“natural” cotton muslin bodice lining
lightweight linen for the skirt lining, dyed olive green [3]
synthetic whalebone to reinforce the front edges of the bodice
a small remnant (aka cabbage)[4] of silk for reinforcing the corners of the front neckline
21 brass aiglets. 20 are for the points tying the sleeves on, and the 21st is a tiny one for the lacing cord. I made that one myself . It’s my first attempt at making an aiglet, and I’m quite pleased with it. The lacing holes came out very, very small, and the purchased aiglets I have are too big to pass through them without using pliers
a largish piece of cabbage of lightweight olive green wool for the sleeves
cotton and linen threads for assembly, and, for touch of luxury, silk threads to make the eyelets and the lacing cord
two kinds of black cotton braid – herringbone-patterned for the trim, and plain tabby weave for the sleeve points. Sewing the herringbone braid on, I discovered it has a tendency to pick up dust & cat hair. Luckily, it cleans up easily with a lint roller!
Except for the fustian and the braids for trim, all of the materials, including the packet of iDye, were from my stash! (Though I did have to buy some salt to add to the dye.)
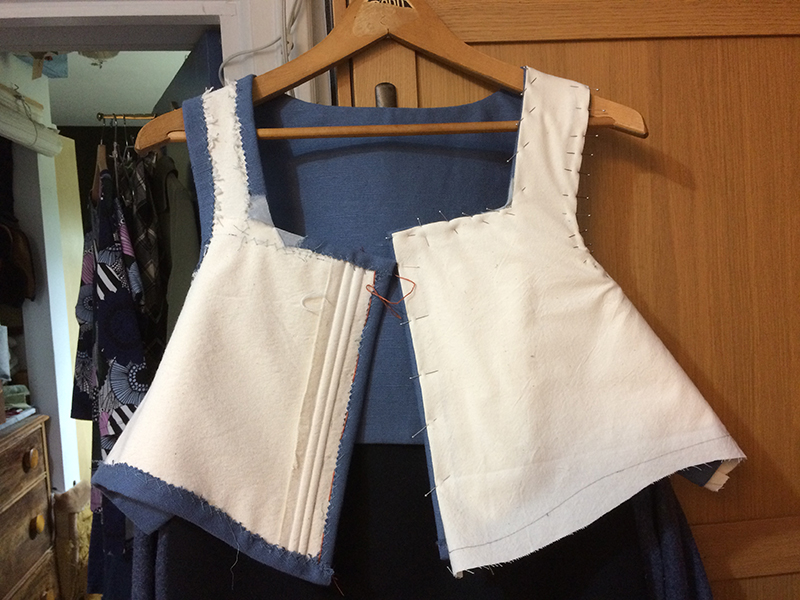
For the bodice pattern, I
used one that I had drafted a while ago. It was designed to side lace, but that
was an easy fix – I turned the lacing edges into seams and created a centre-front
opening. Then I made a muslin out of sturdy cotton canvas, tweaked the fit, and
used the muslin as the underlining of the bodice.
Instead of bag-lining the bodice, I assembled it Renaissance-style. To minimize bulk at the shoulders, I sewed the shoulder straps in position and trimmed the excess fabric. Then I catch stitched the seam allowances over the canvas underlining, and slip stitched the lining in.
Once that was done, I whip stitched the pieces together and made the eyelets.
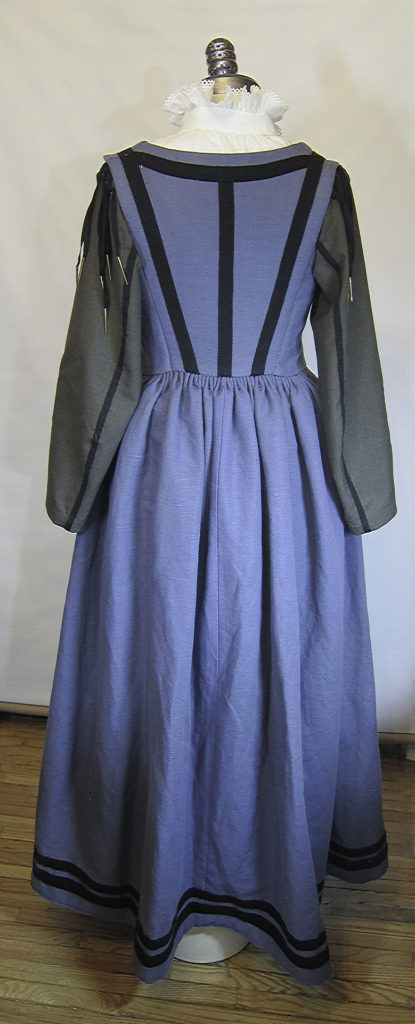
There’s no pattern for the skirt – it’s two full widths of the fustian, flat-lined, seamed at the centre front and back, and with the front seam left open for about thirty centimeters at the top so that I can get into the garment.
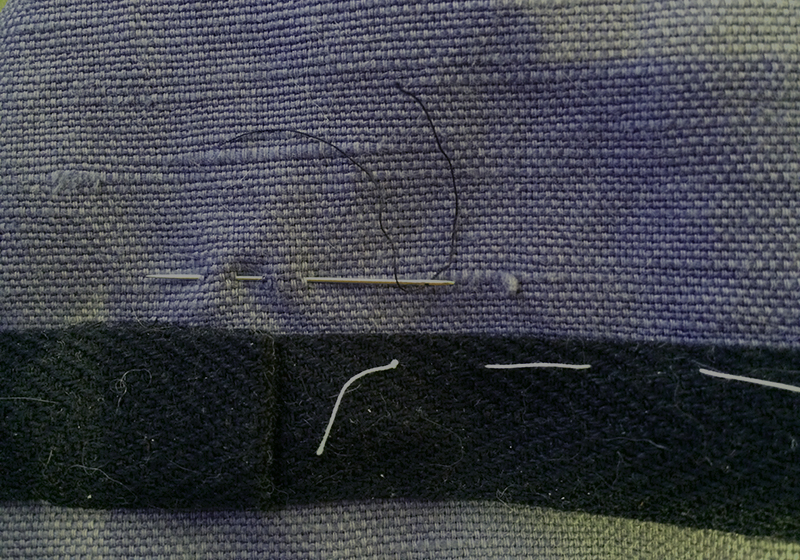
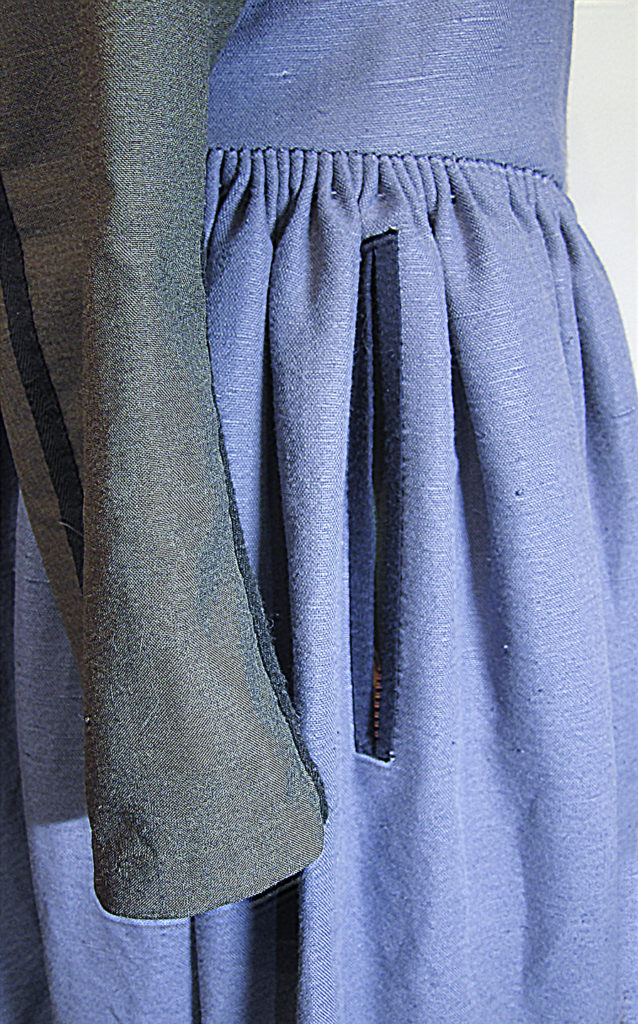
On the right hand side of the skirt I’ve made a fitchet – an opening so that I can reach my tie-on pocket. The edges of the fitchet are bound with a piece of navy blue linen from my cabbage basket.
To gather the skirt to fit
the bodice, I used cartridge pleats. I like cartridge pleats a lot, and use
them whenever they’re appropriate.
For the hem, I tried an experiment. I like padded hems; I like the way they make a skirt hang & move. For padding, I usually use wool felt. This time, because I want this sottana to be washable, and wool felt shrinks and gets lumpy, I used multiple layers of the fustian – seven if I remember correctly. It works as well as the felt!
The sottana is fully lined, and, aside from the long seams on the skirt and sleeves, it’s hand-sewn. Up to and including flat-felling the sleeve seams and the skirt seams where the raggedy shuttleless loom selvedges showed.
Between catch stitching the seam allowances, sewing in the linings, whip stitching the pieces together, clean-finishing the seams, hemming the top&bottom of the sleeves, making the eyelets, making the points, and sewing on the trim, it was a LOT of hand sewing!
Luckily, I enjoy hand sewing, and, all in all, I’m satisfied with how this project turned out!
[1]the meaning of “fustian” has changed with time – in the late middle ages/Renaissance it meant a fabric woven of two kinds of fibre. By the nineteenth century, “fustian” meant cotton fabrics with a short, brushed pile, like corduroy. By the late 20th century, the word had become an archaism.
[2] I’m ignoring the fact that the materials were made with present-day processes rather than being organically grown, hand-harvested, plant dyed, etc. etc. And, though I’m not against all use of animal products, hunting whales is inexcusable in today’s world – therefore the synthetic whalebone.
[3] originally, this lining linen was bright egg yolk yellow. Linen is heavy, so when I found this cheap & lightweight linen, I bought a lot of it even though it’s a colour I wouldn’t usually choose – yellow is easy to overdye. Which I did. With iDye. In the washing machine.
[4] “cabbage” was the medieval/renaissance term for the fabric left over from making a garment, and the tailor got to keep it!
This year I’ve entered the Realm of Venus’s Italian Renaissance Costume Challenge (IRCC). The start date is the first of April – today.
The rules: the IRCC is a four-month long challenge to create a complete man’s, woman’s or child’s late Italian Renaissance outfit, from the skin out, of a style circa 1480 to 1600. The outfit can be of any social class and needs to include at least one accessory, with a maximum of four accessories allowed.
What I’ve proposed to make is:
a camicia
an underskirt
a gown based on the extant diamond twill half-gown held in Pisa
a headdress or cap
Depending on how things go, I may add one or two of the following
an apron
a belt
a pearl necklace with matching earrings
a vest or short cape
Entries started a month ago. That first month was to be dedicated to deciding on what to make and gathering materials.
Deciding what to make was easy; ever since I found out about the wool/linen diamond twill half dress that’s in Pisa, I’ve wanted to make a gown based on it, using the diamond twill I found when King Textiles – one of our local fabric shops – had to move when their building was sold to a condo developer.
I’ve also wanted to try needle lace, so, if all goes well, the “headdress” will be a needle lace cap.
And my current White Wolf Fian challenge is a carved busk. So far all I’ve done on it is taking a carving class at Lee Valley and assembling the tools & materials, so, since I haven’t started on the actual busk, it works with the timing rules. Though, since it’s woodwork rather than textile, I’m not sure it fits in the criteria – I’ll have to check before adding it to the entry.
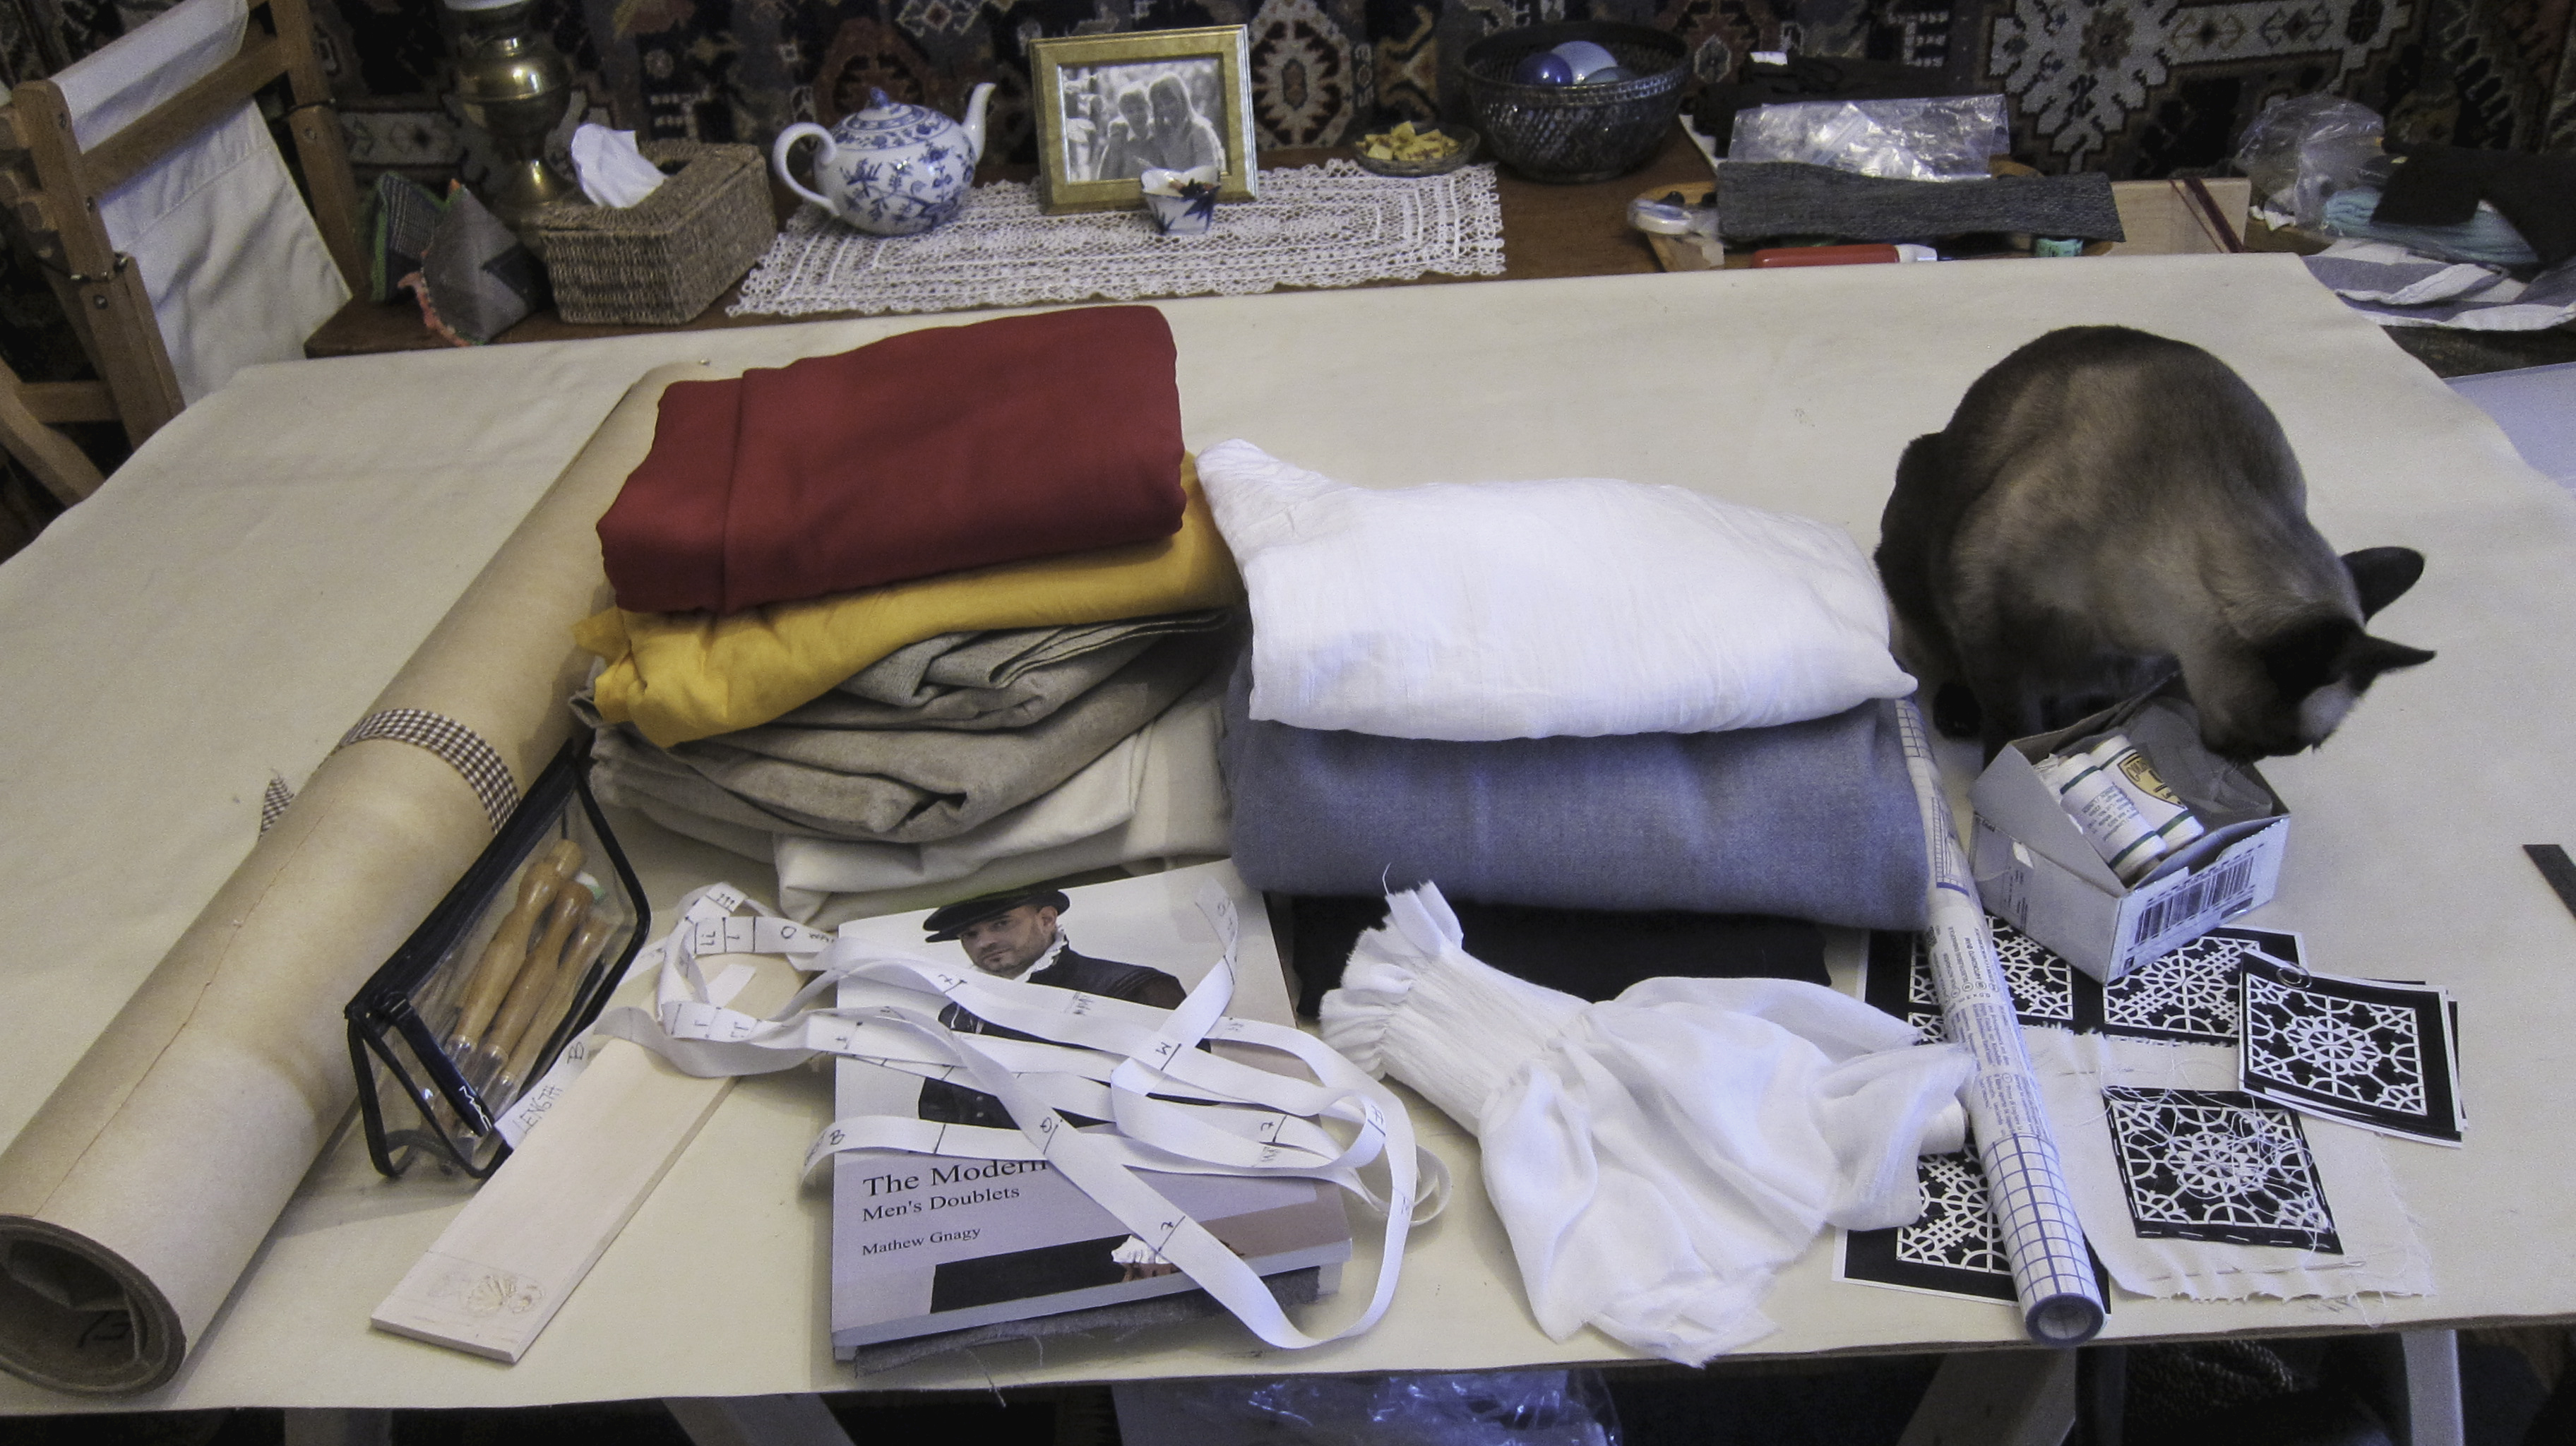
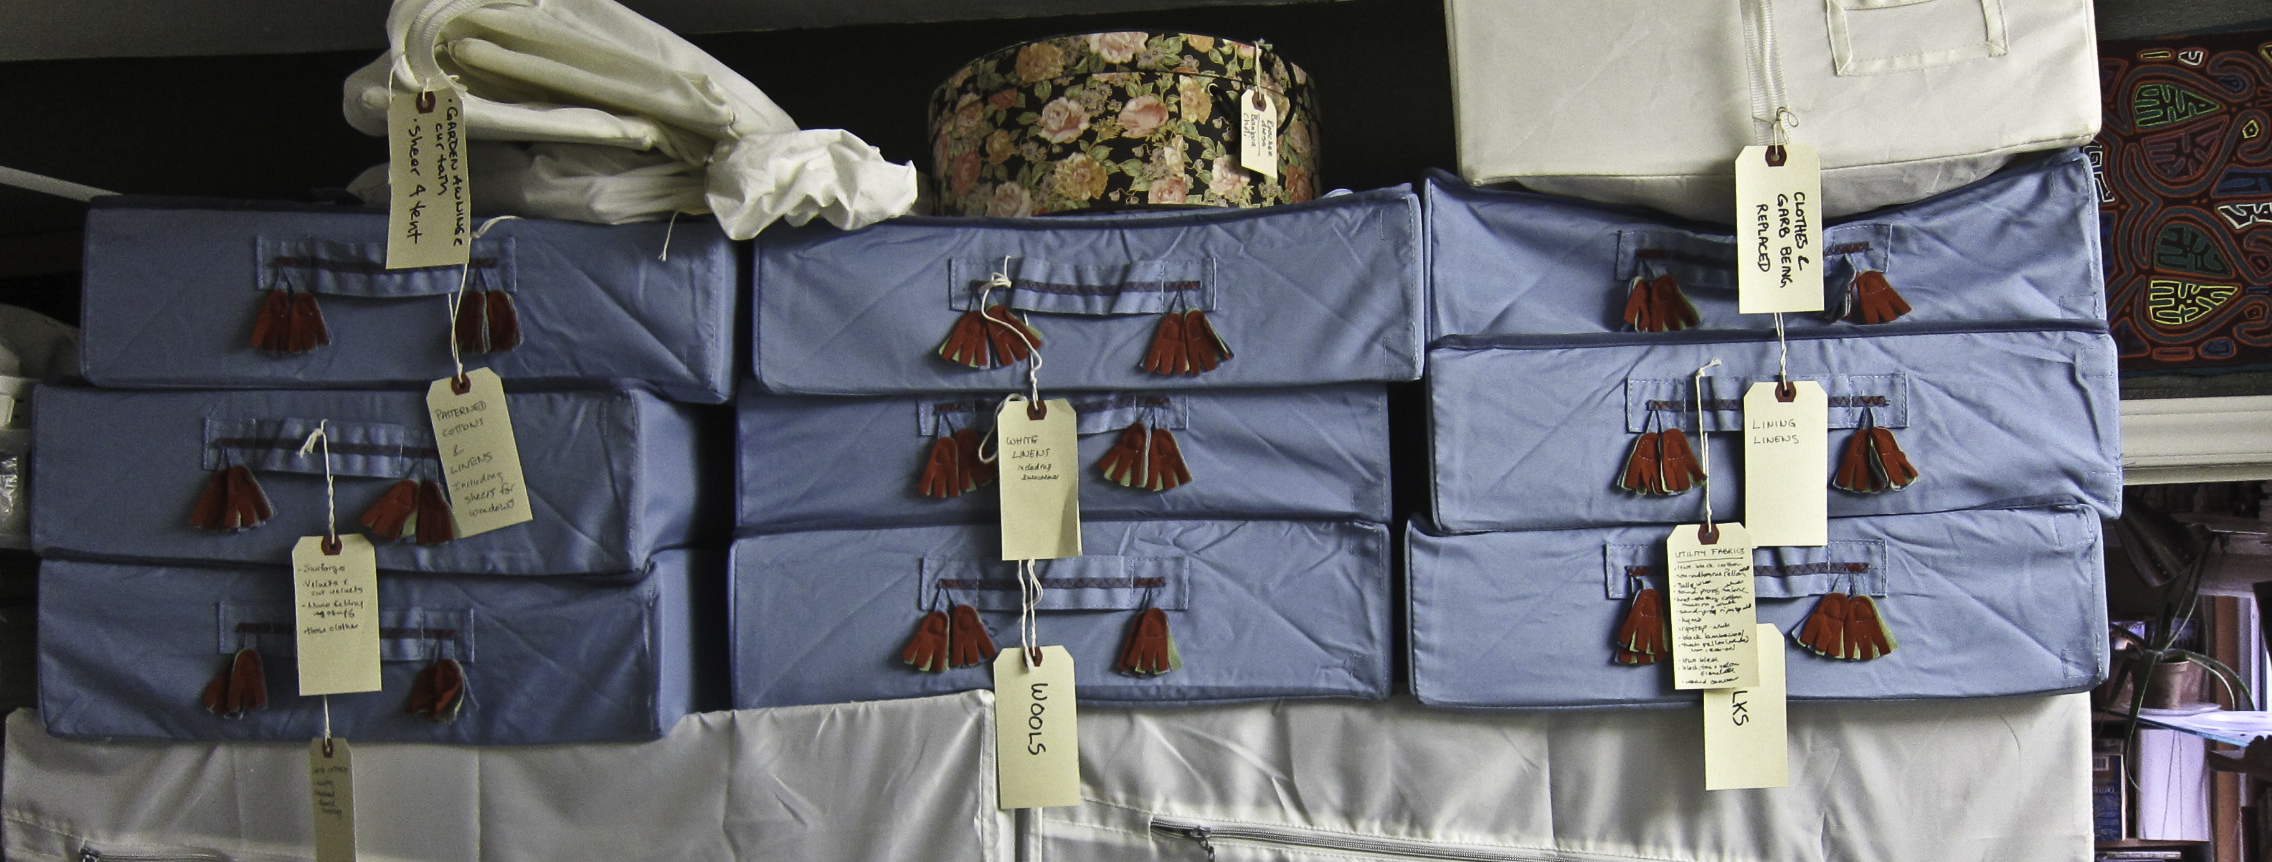
As for gathering materials, that’s pretty much done:
The fabrics:
The right stack:
white lightweight cotton for the camicia
blue wool/linen diamond twill for the gown
black wool twill for the gown’s guards
The left stack:
red lightweight wool for the petticote
lightweight yellow linen for the linings (lightweight linen is usually expensive, so when I found this one cheap at Pennsic*, I bought lots of it even though it’s not a colour I’d usually choose for linings)
cotton canvas, heavy linen & various interfacings for the bodice
The odds & ends:
50/3 linen thread for my super-ambitious lace cap plus the images & plastic to cover them (it might wind up as a lace-edged cap)
Mathew Gnagy’s Modern Maker volumes and the bara tapes I made following his instructions
a sample of the smocking for the camicia
my faithful roll of butcher paper that’s seen me through many patterning adventures
a piece of basswood and some carving tools for the busk
and, of course, the obligatory furry assistant.
I’m not sure I’ll use all of this, and will probably find I’m missing some odds & ends.
Today’s project: drafting the basic bodice pattern:
…to be continued
Pennsic is an annual Society for Creative Anachronism event that’s held in Pennsylvania and usually draws 10,000 or more attendees. One of its features is a market with lots of merchants who specialize in reenactment-related stuff.
Like most fabriholics, I have a stash. A fabric stash that, despite my best intentions, keeps on growing.
Every single yardage in my stash was acquired with the intention of making something specific – and most of the somethings never got made. And, with every addition, the likelihood of previous intended projects actually getting made recedes.
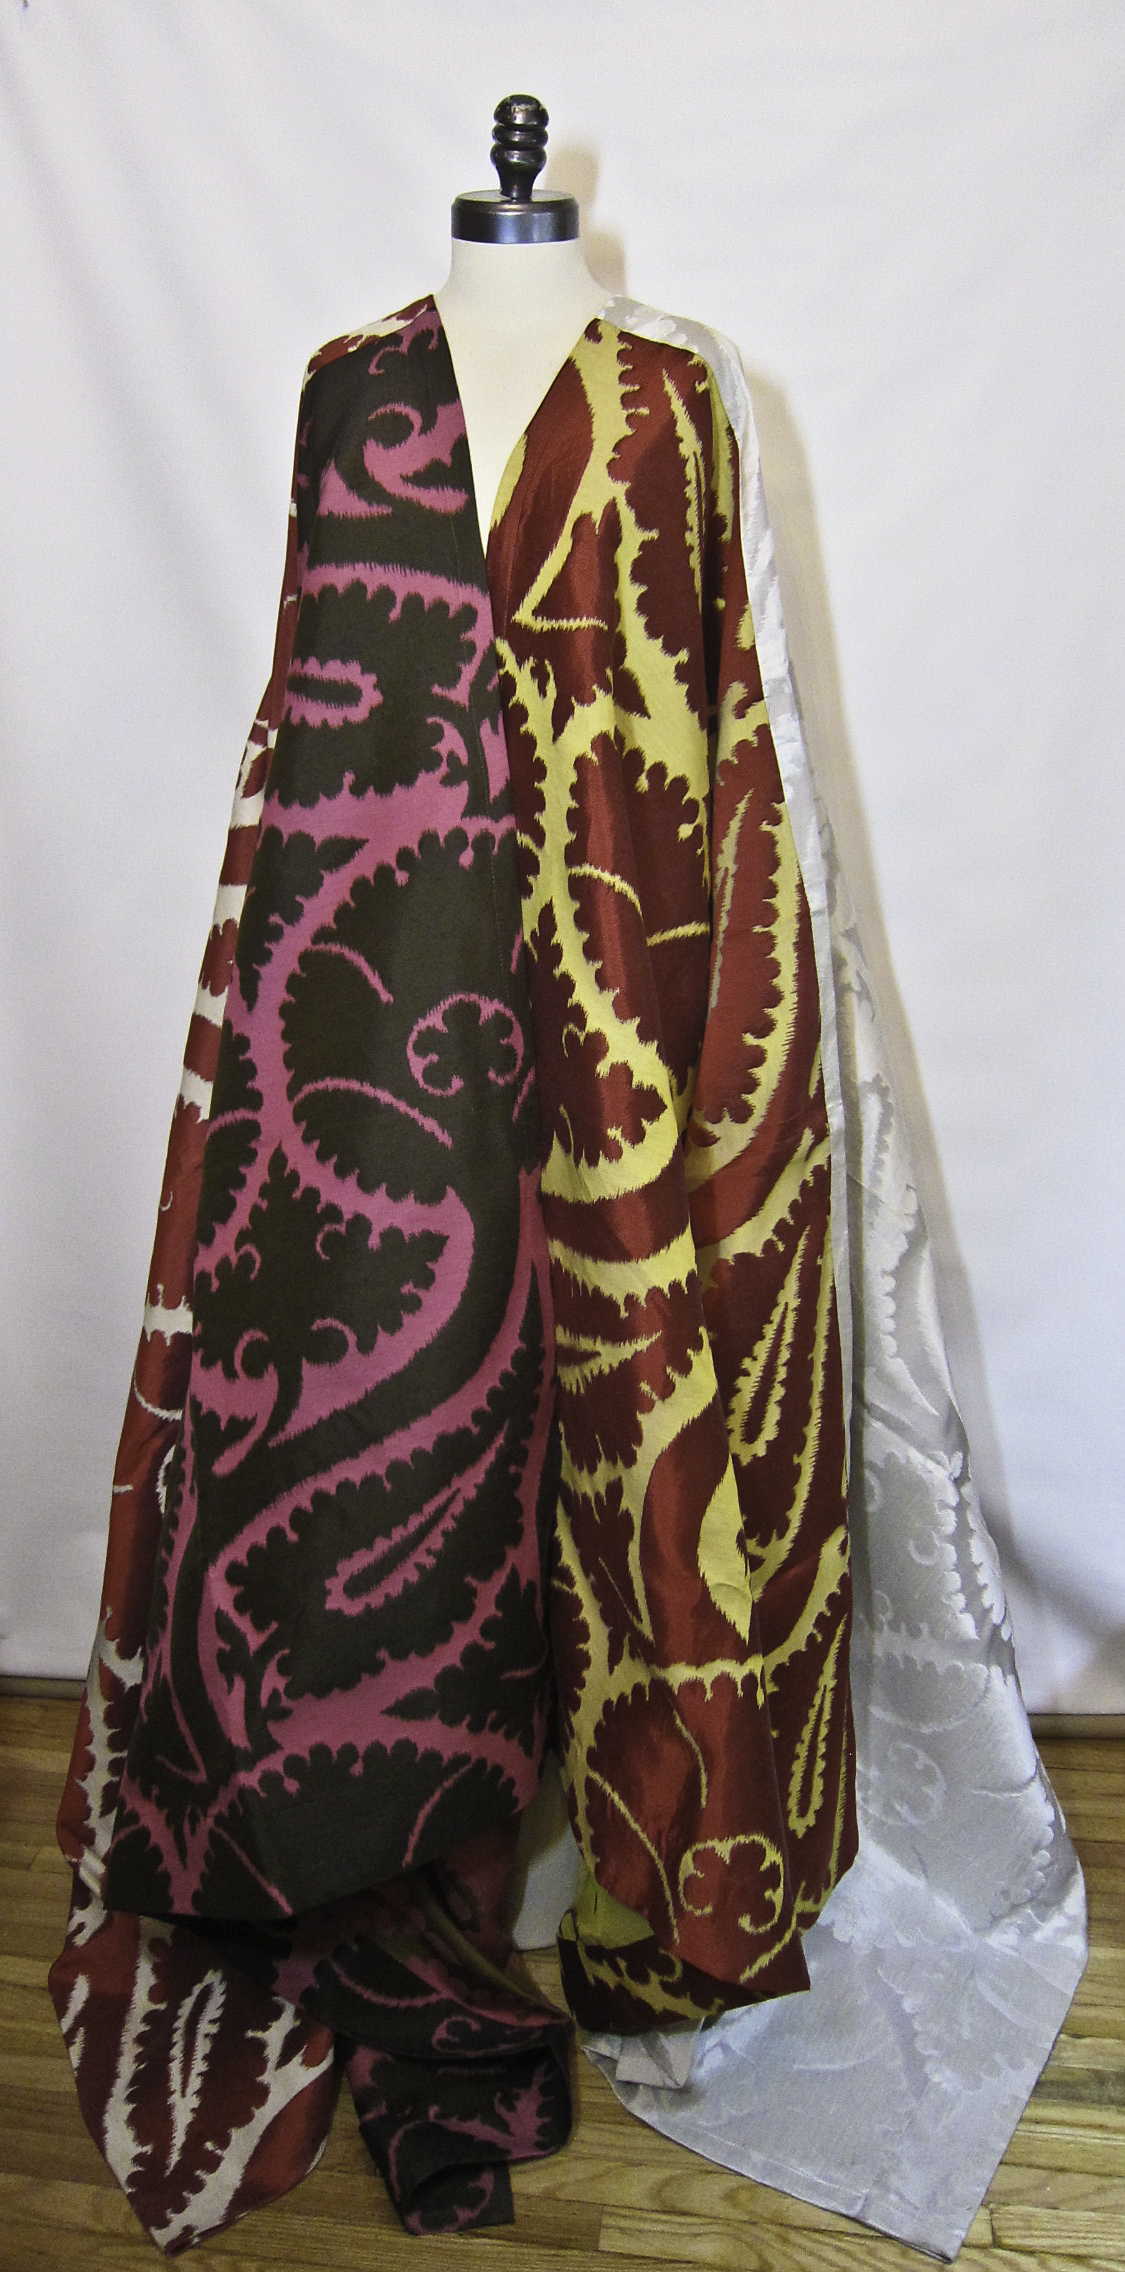
Some things didn’t get made for financial reasons
Like the long vest I wanted to make with the set of gorgeous silk & cotton sample panels that I got at the Textile Museum’s legendary Yardage Sale. There was plenty of fabric to make the vest parti-coloured, which was what I originally intended. But I really loved the deep rose & black colourway and discovered that, though the design had been discontinued, the deep rose & black was still available. From France. At $600 US/meter. Plus shipping.
Nope.
That took the shine off the project, though it’s still on the intentions list. That was three or four years ago, and the disappointment has mostly worn off; I’ll probably make the vest eventually – parti-coloured instead of all deep rose & black.
Some things haven’t been made for technical reasons
The black mink coat
Like turning the black mink coat that I got in the years people were donating furs to Goodwill into a lining for a tweed coat.
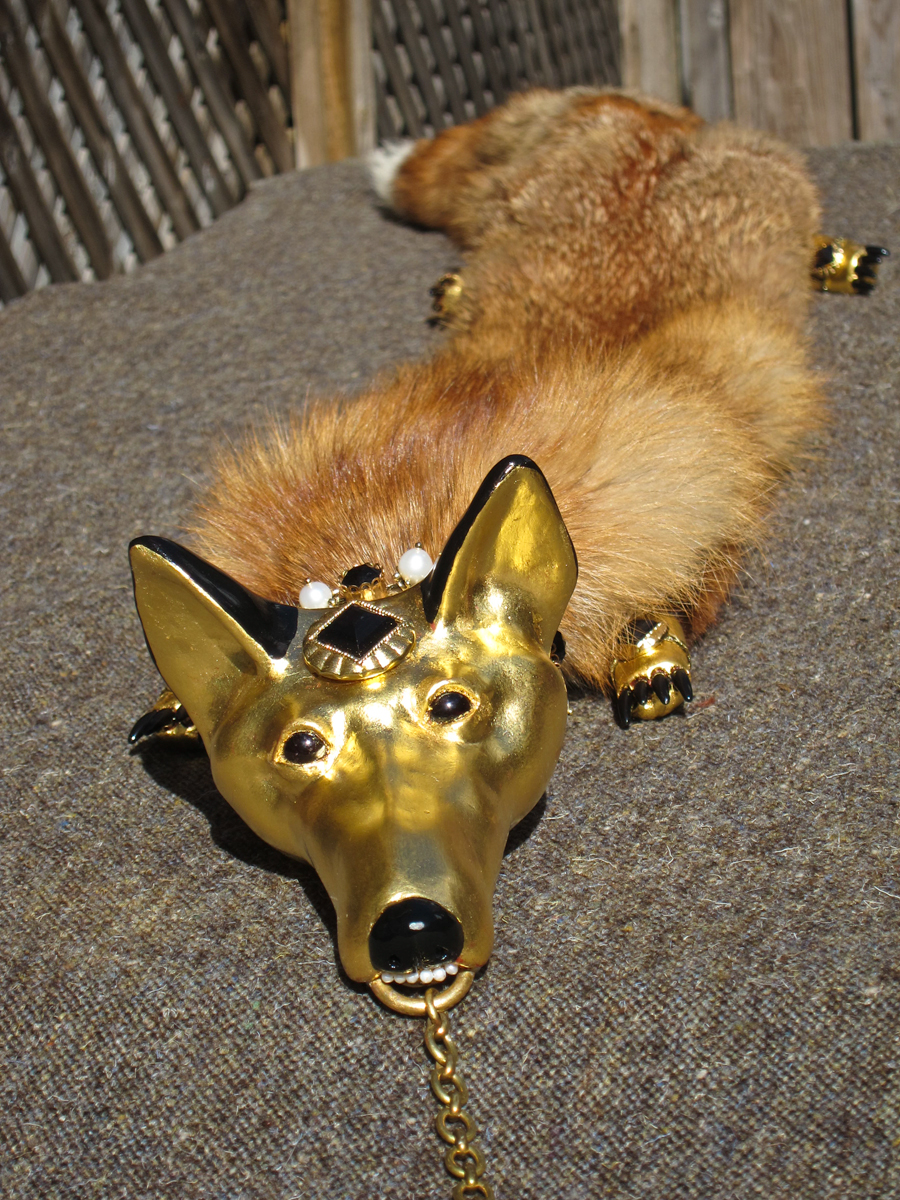
The zibellino
I’ve got the tweed. I’ve got the fabric for the interlining. I’ve researched on how fur is handled. I’ve made small fur items, including a zibellino.
But I’ve been seriously nervous about cutting into a fully functional mink coat.
The Viking caftan
This has gone on for ten years, which is ridiculous. So I finally took a sideways step and made a fur-lined Viking kaftan, using a fur seal coat from a local second-hand store for the lining.
With one thing and another, it took me most of the winter to work through the learning process, but now I have a wearable, albeit heavy, fur-lined coat.
So, the mink-lined tweed coat is back at the top of the stack now. With luck, I’ll get it finished before the vintage raccoon coat I wear when it gets brutally cold falls apart (which it’s threatening to do)…
Some things haven’t been made because I have no real use for them
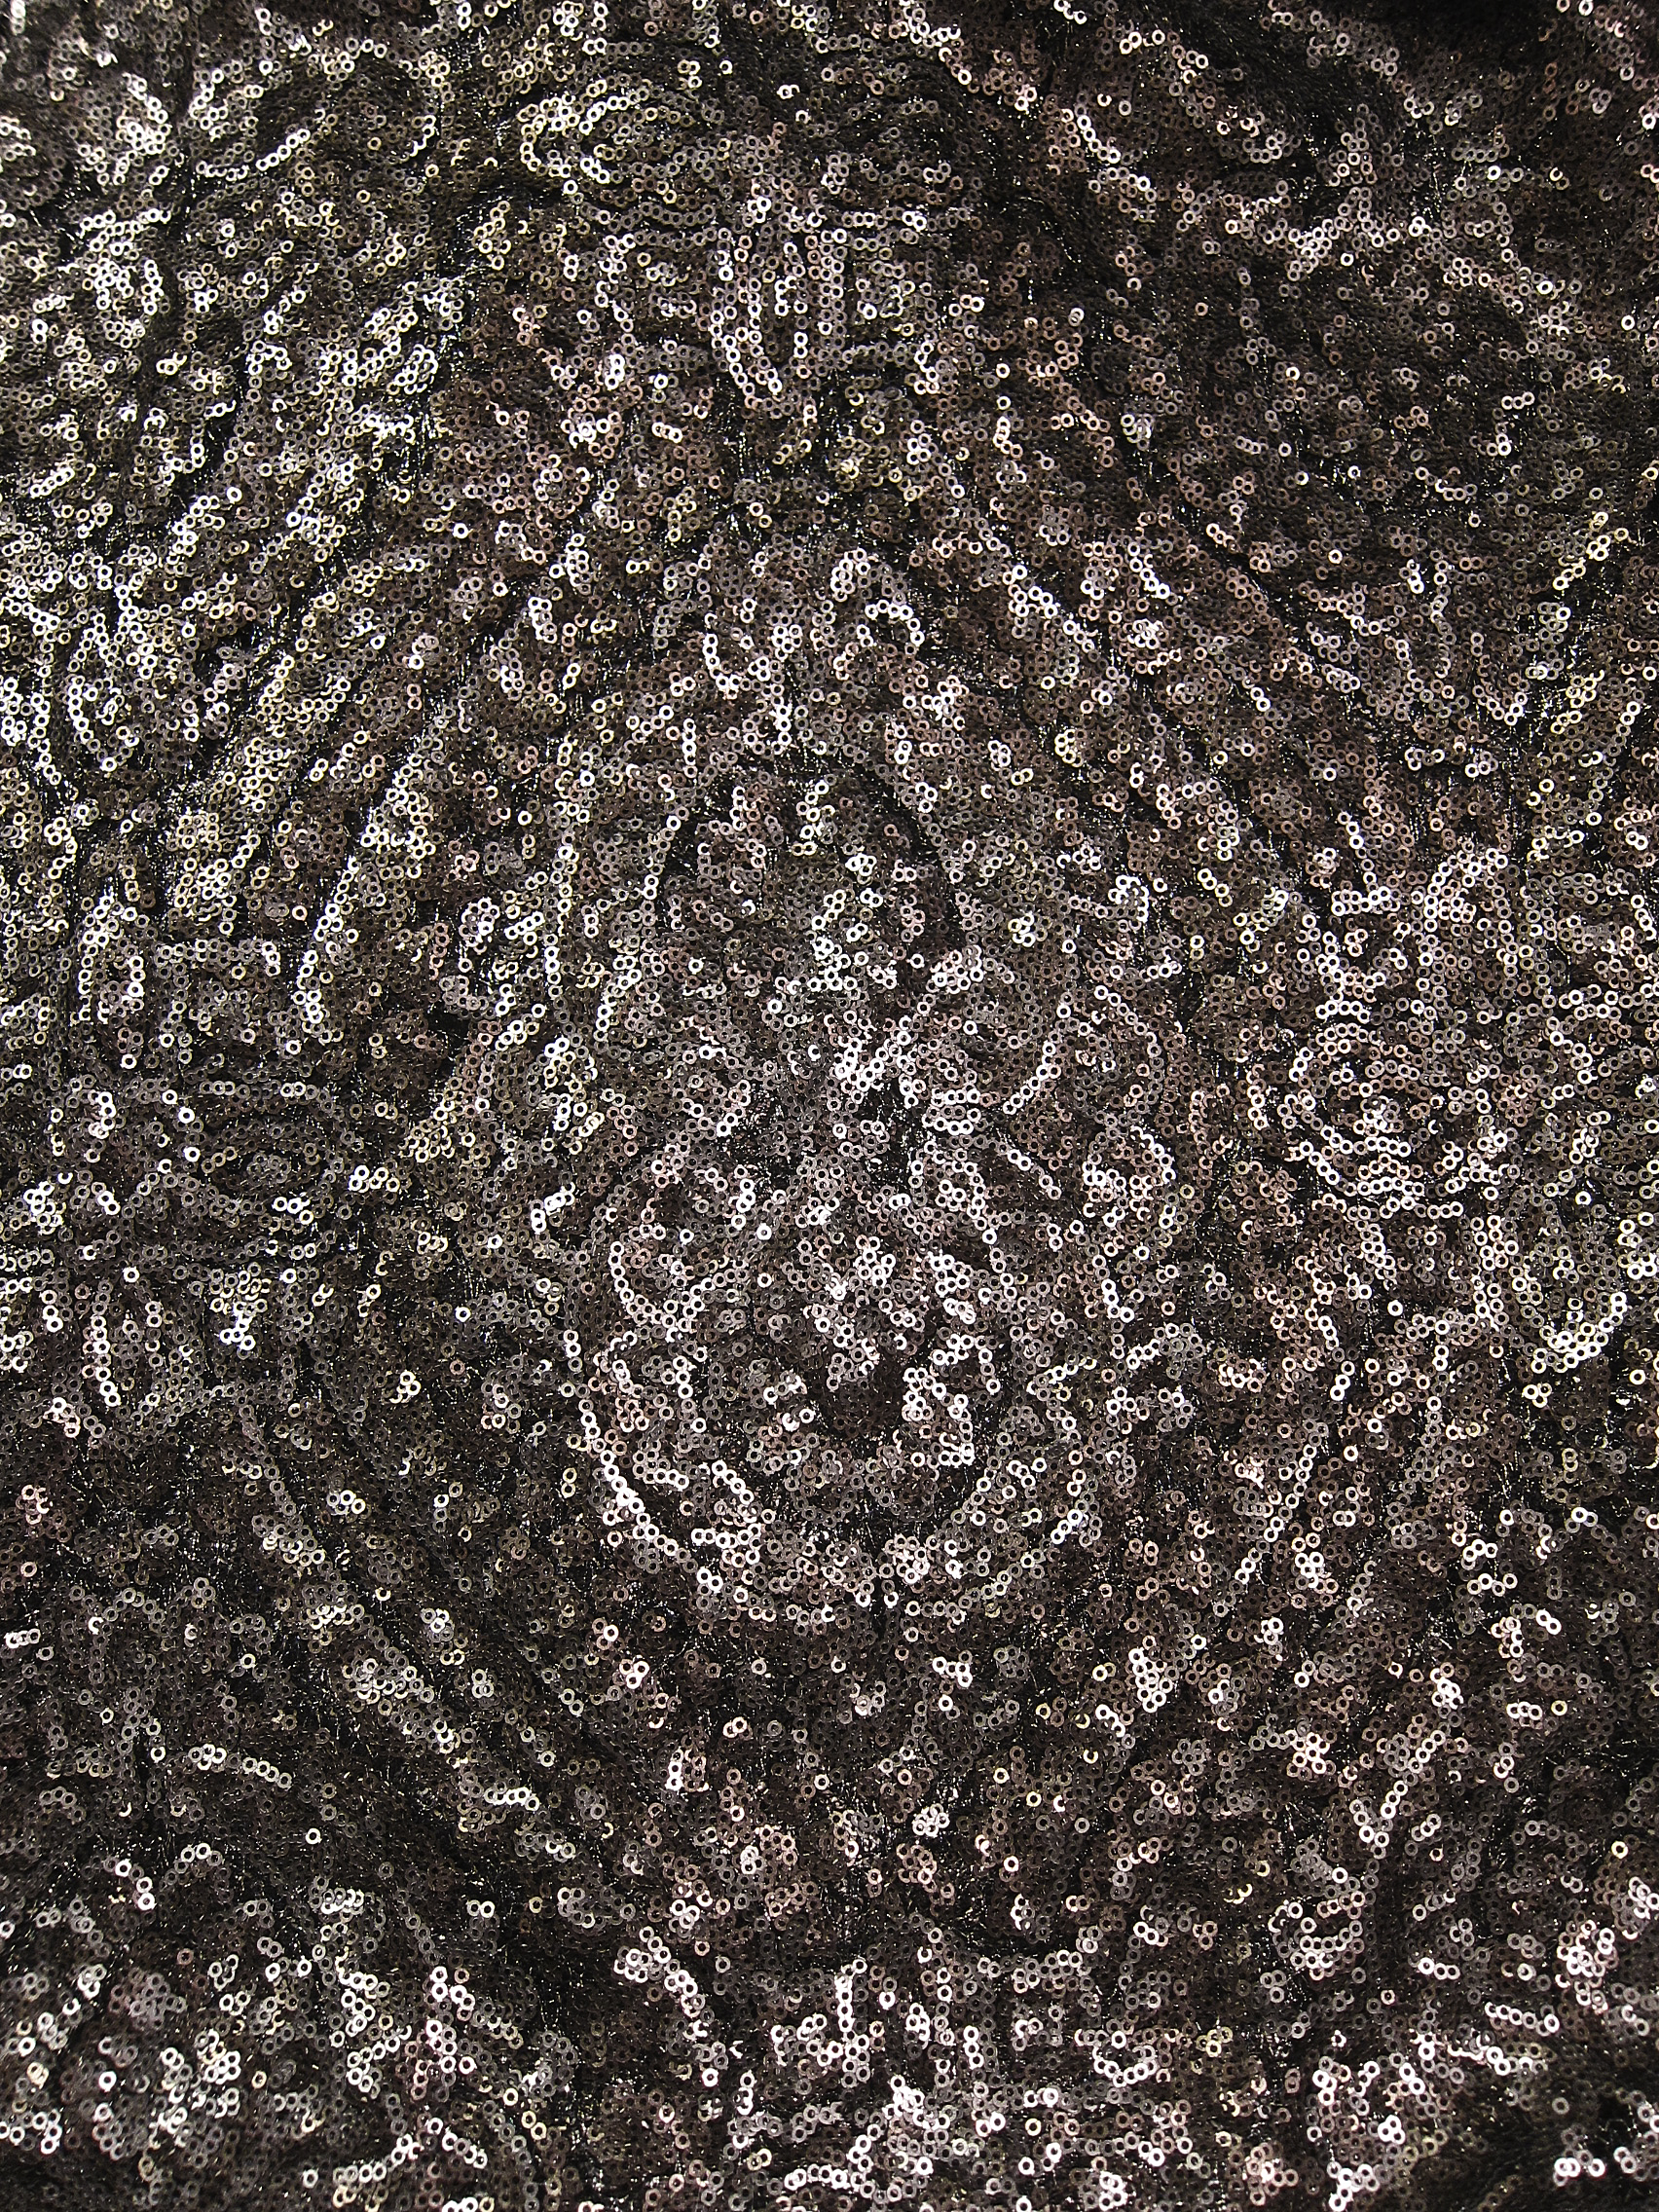
Glitter!
Like the overtunic I want to make from the gorgeous sequined fabric I bought on impulse five or six years ago.
I know what I want to make from it: a twenties-style evening gown with a glittering overtunic. I have the glitter; I have the black silk to make the underdress.
But the last time I wore an evening gown – a Balmain model with a skirt of layers of flowing grey & white chiffons and silk ribbons that I made from a Vogue Paris Designer pattern – was the McGill graduation ball in 1965!
Some things haven’t been made for practical reasons
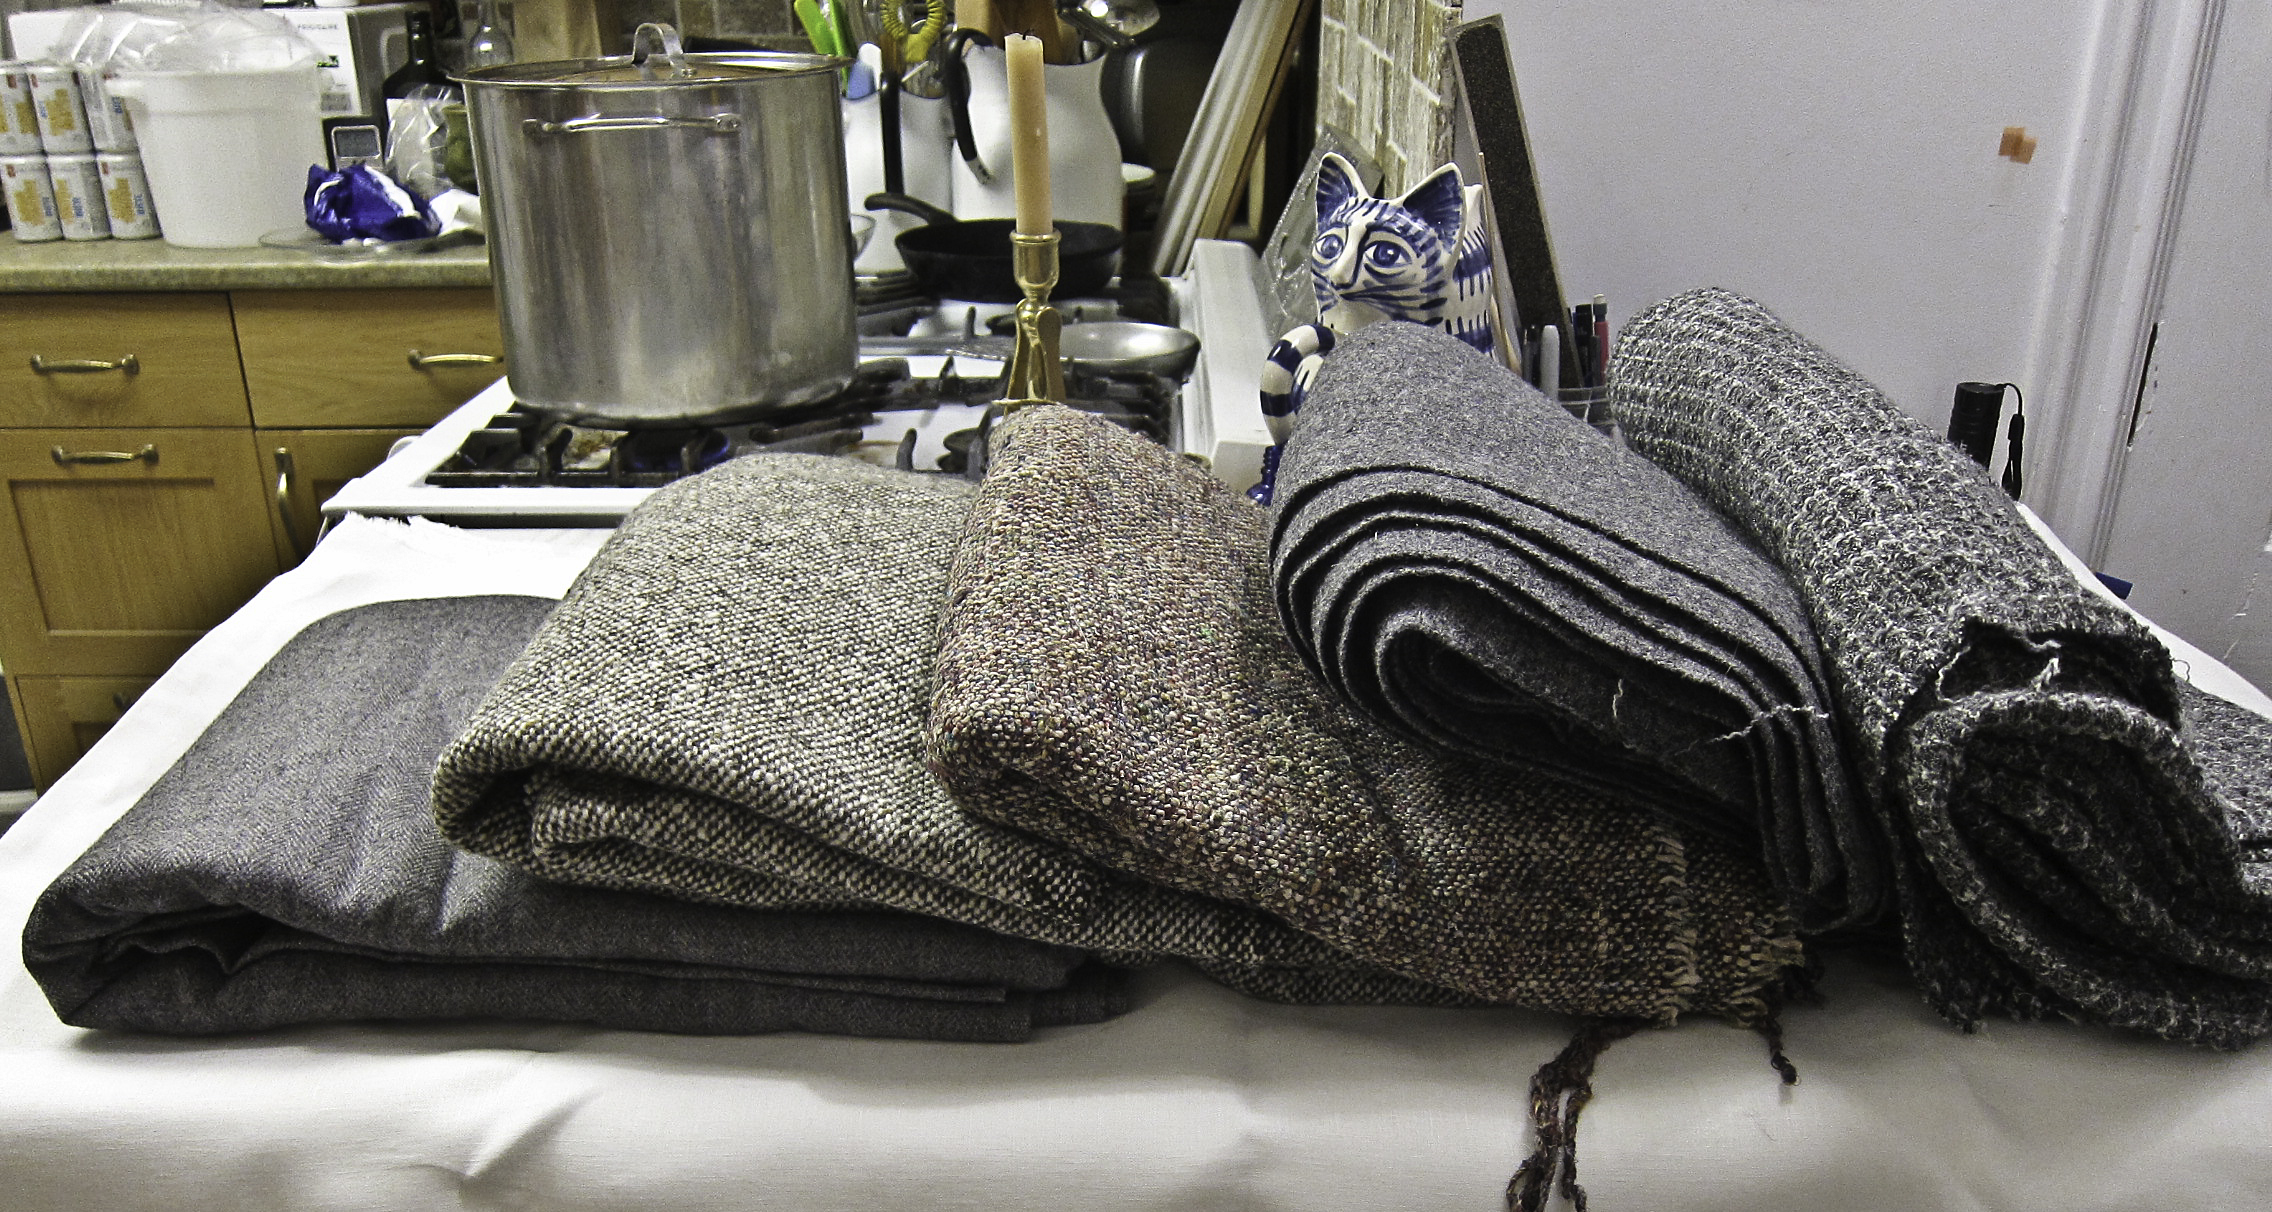
I love tweed. I have a lot of lengths of tweed. Tweed is a cold-weather fabric. I live in a centrally-heated universe – and global warming is making tweed season shorter and shorter.
A sampling of my tweed collection
…for the coat
Outer garments like my mink-lined tweed winter coat project work, but I’ve already got more coats for moderately cold weather than I actually need.
Tweed pants are too hot, ever. And sometimes scratchy.
Tweed skirts are good for winter, but wearing panty hose or tights doesn’t do it for me – and knee-highs or socks feel odd under skirts. This winter I’m going to try wearing colourful long knee socks with decorative garters in the medieval/renaissance mode & see how I feel about it. If it works, maybe more tweed skirts.
Then there are vests and jackets but…
Many things haven’t been made because of time
… I don’t think I have to say more about this one…
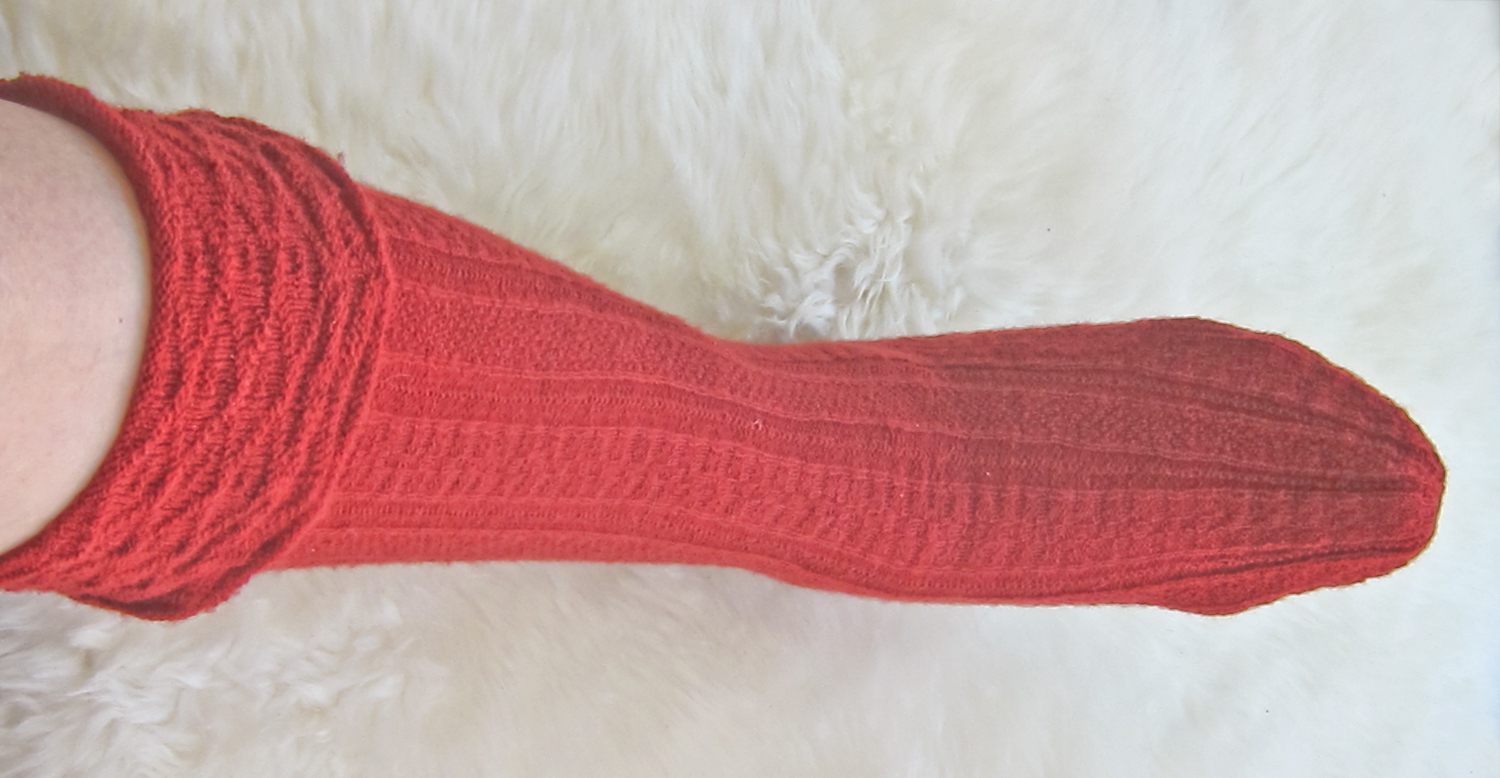
This is actually my third go at these stockings. Between my first attempt and this one, a lot more information had come out about them, the best being the images in the Medici archive.
The first time I tackled the stockings was from a pattern I downloaded from the internet, and knit with commercially-dyed red wool fingering. I stopped knitting & discarded this test as soon as I realized that the pattern was for a stocking with a present-day shape, only using the surface patterns from the originals, and that the gauge was way too big – more of a sport sock than an elegant lady’s stocking. The pattern doesn’t seem to be on the internet any more.
The second test was from the pattern by Anne DesMoines published on Ravelry. This one I knit with a silk yarn finer than the wool of the first test. Initially, the silk was white, and I dyed it with cochineal. It had some issues – the dye insisted on being a fuchsia pink instead of red, and the gauge was still too big, with fewer pattern panels than the originals. Also, I found the silk very unpleasant to knit with, and abandoned the attempt.
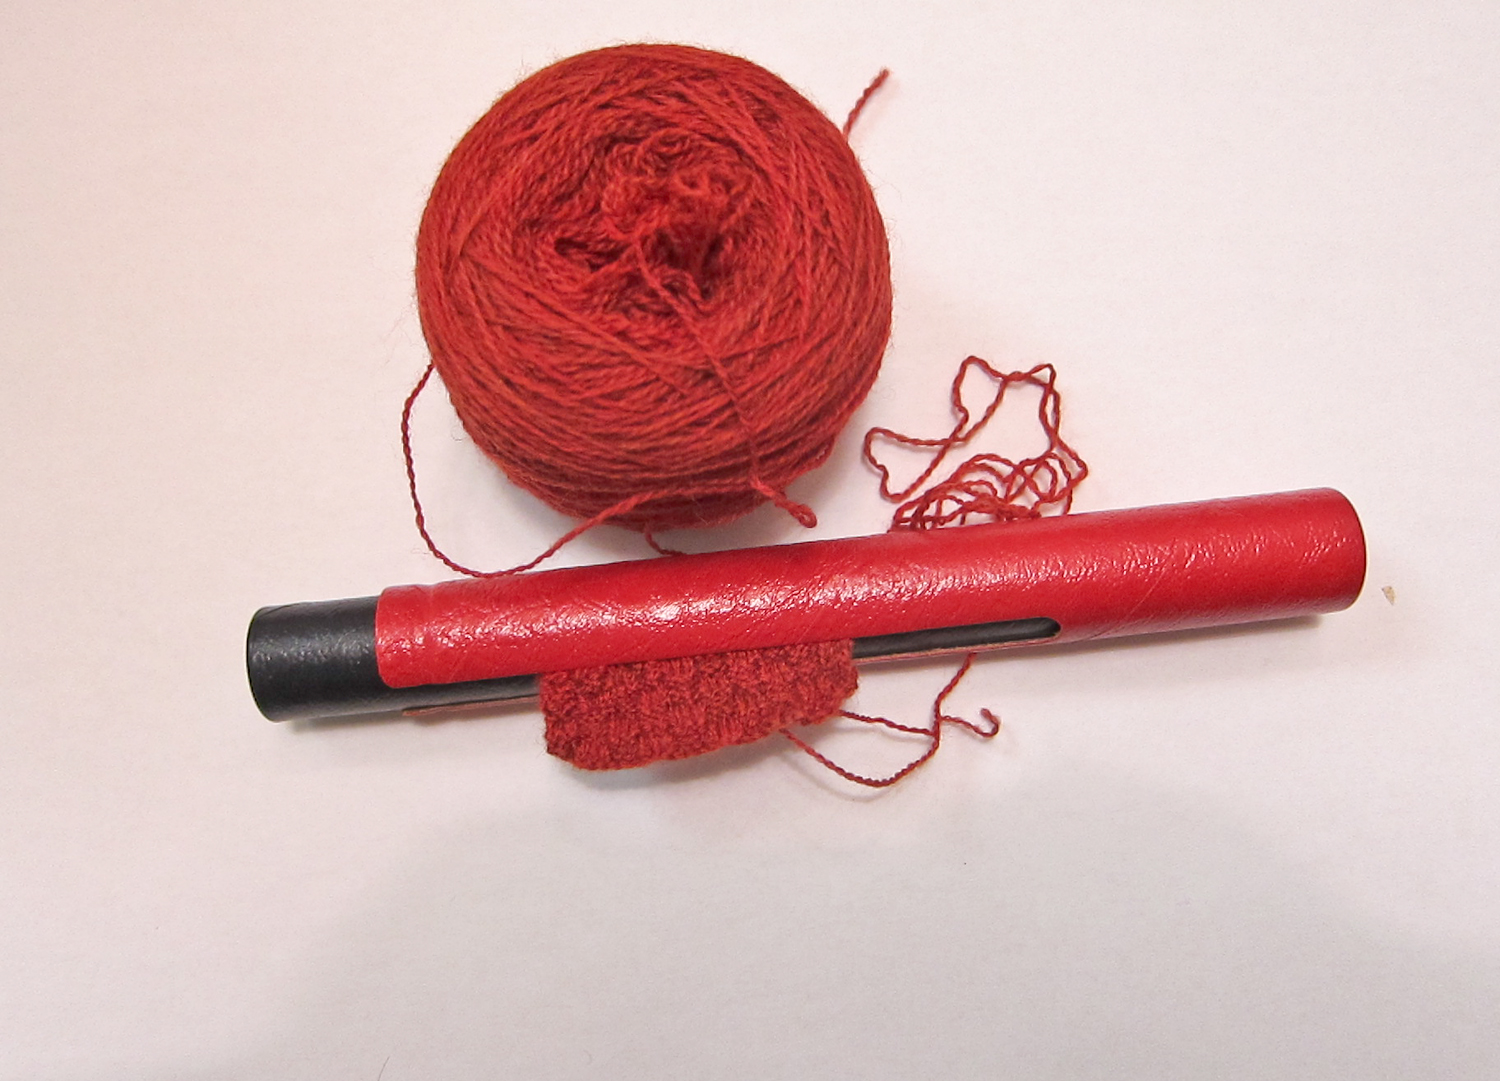
For the current stocking I bought white laceweight wool yarn. This time I dyed it with madder overdyed with cochineal, and got a very satisfying brick red.
This yarn knits up at a finer, more period gauge – approximately 14 stitches to the inch on 1mm needles. None of the documentation I’ve seen to date gives the gauge of the actual Eleonora stockings. However, because of the number of stitches in the pattern panels and the number of repeats, it must be very fine.
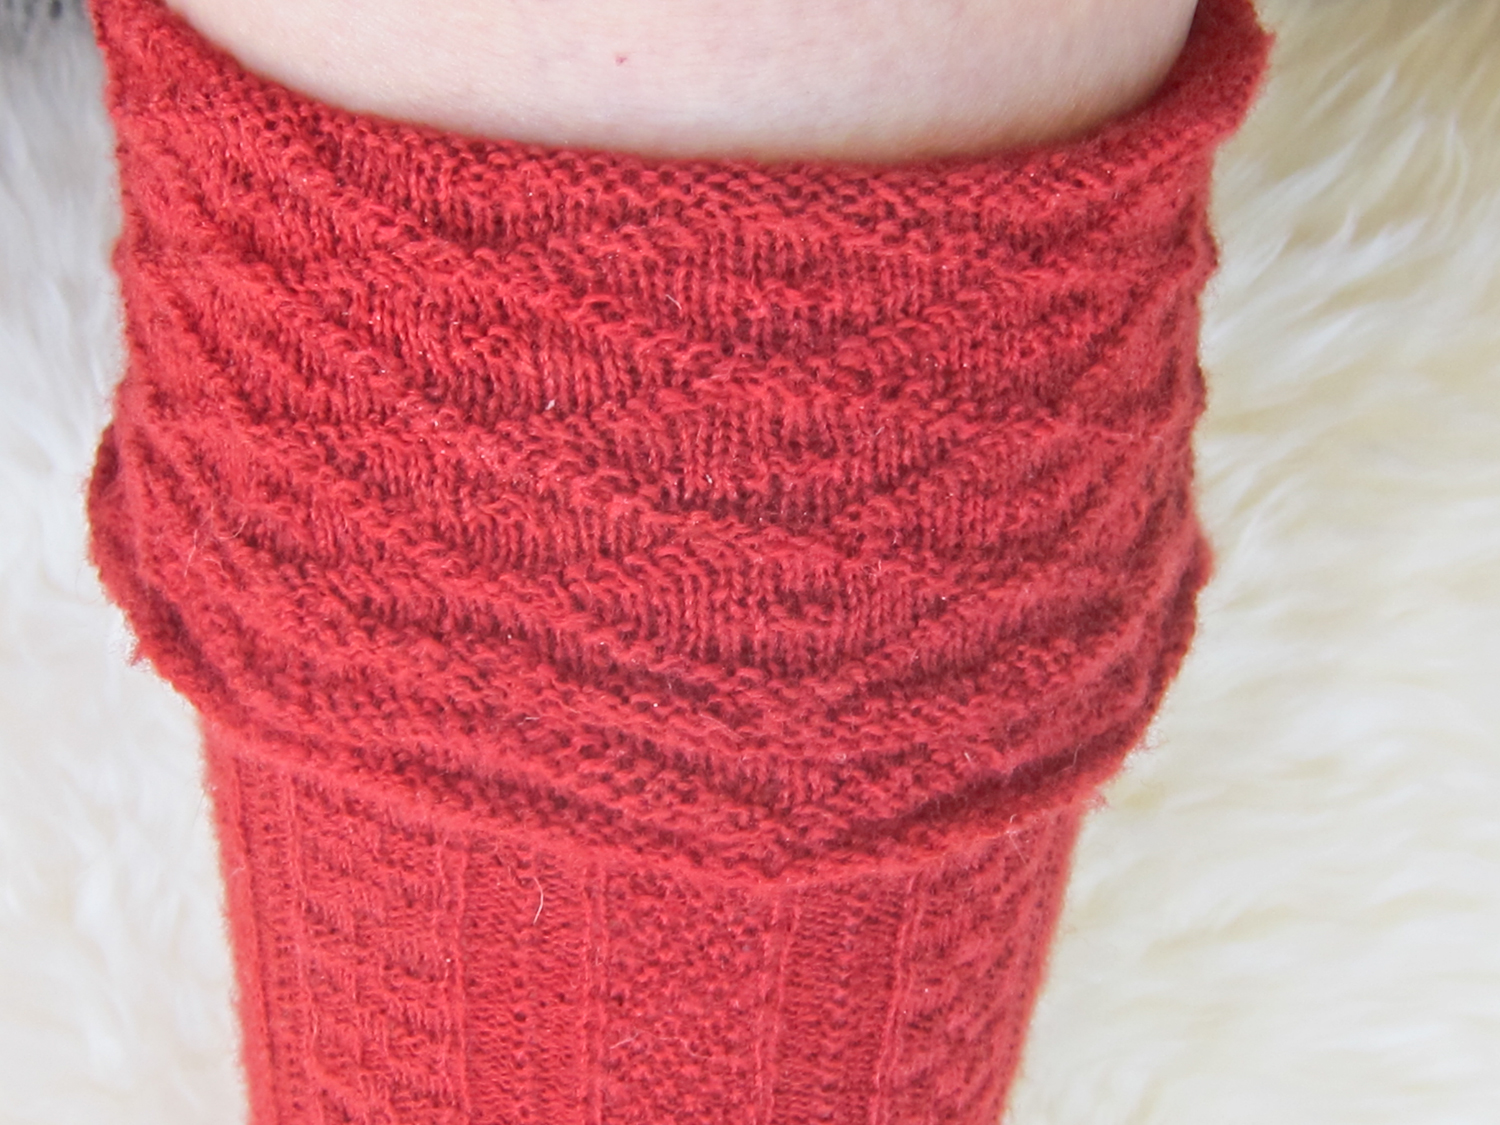
As far as I can tell from the available images, this edition of the stockings has same number of patterned panels as the originals, and the stitch count is very close.
I changed a few details – I didn’t like the second zigzag and the eyelets in the cuff or the “ladder” effect of the double garter stitch in one of the panels, so I eliminated the zigzag, and substituted a purl square for the eyelets and a chequerboard pattern for the “ladder” effect, all of which are consistent with late 16th century knitting techniques.
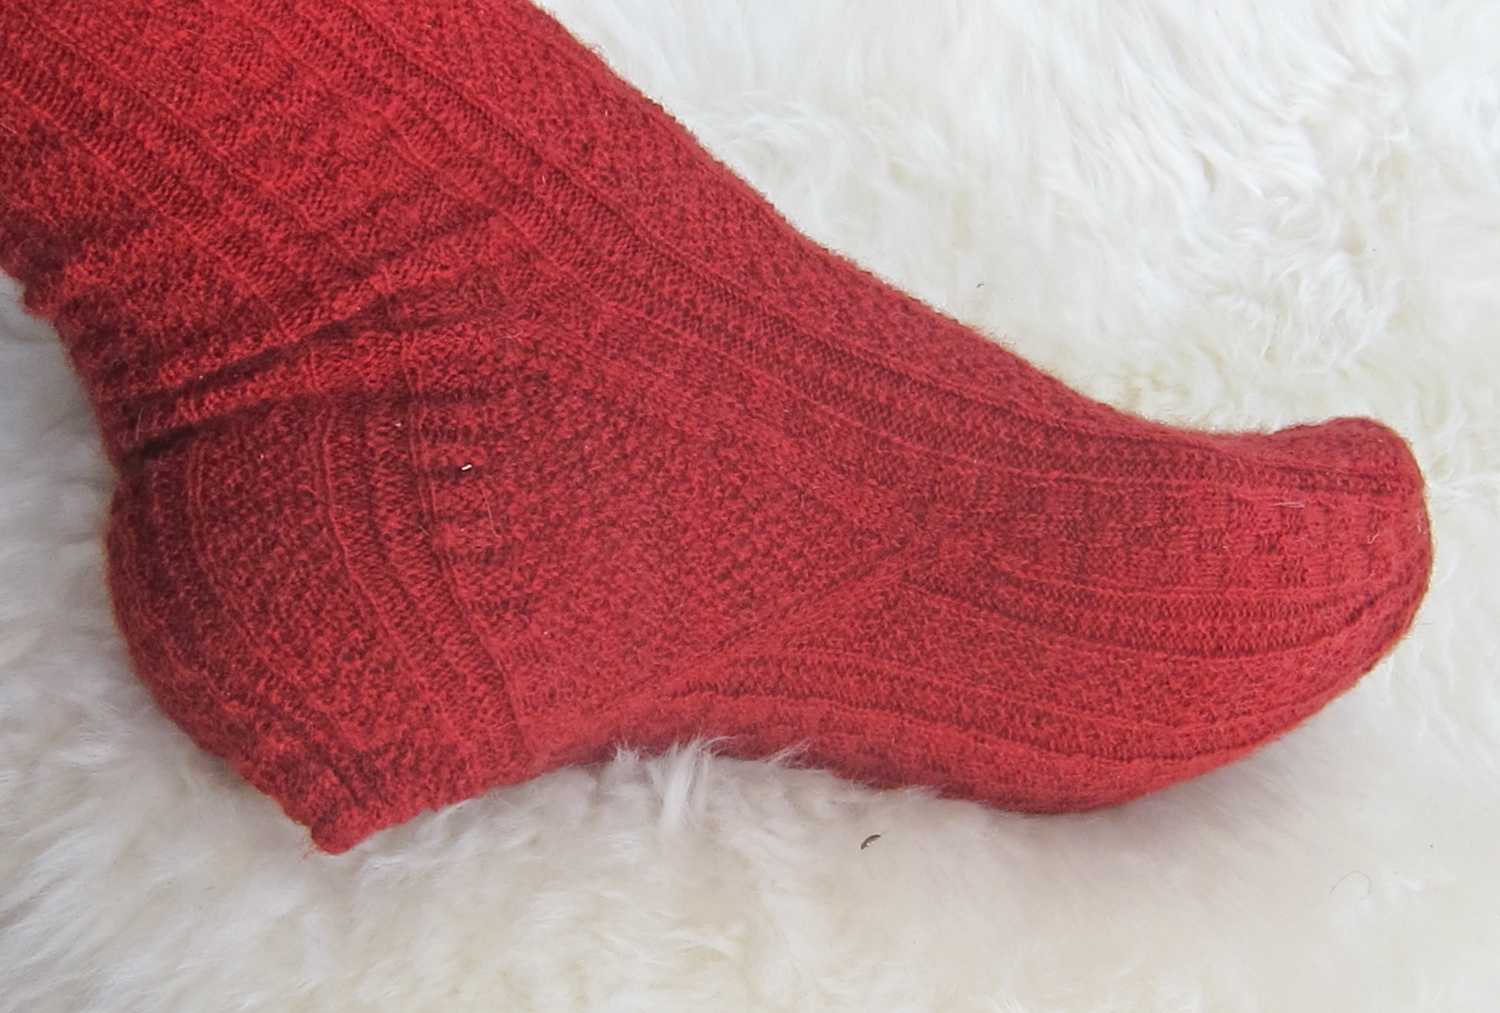
Since I plan to wear the stockings, I changed the shaping. The original Eleonora stockings are baggy in the calf and foot – the decreases for the calf are far too low on the leg to fit me and the feet are too thick. Perhaps, after at least eleven pregnancies, Eleonora’s feet and ankles were somewhat the worse for wear.
Instead of designing the foot following the the Medici archive images, I used the foot shaping for 16th century stockings shown in Richard Rutt’s A History of Hand Knitting. The soles of the originals are mostly moss stitch or seed stitch; instead, I picked up and continued the band pattern just for the fun of it.
One stocking is done and the second is in progress. With luck & a following wind, it’ll be done by Pennsic!
(The little *blip* at the back of the heel is historically accurate. I’ve been assured that it wears in fast and is comfortable..)
I’ve just been reminded of another change that I forgot about – and this one’s a biggie! The Eleonora stockings were knitted flat and sewn up the back; mine are knitted in the round. I couldn’t bring myself to knit them flat. The technique was known by Eleonora’s time – Bertram von Minden’s Knitting Madonna, painted ca 1400-1410, is knitting in the round!