At last, The Stockings

My Eleonora of Toledo-inspired stockings have been an adventure – with more than its share of misadventure – but they’re done and I’m delighted! [1]

After a couple trial runs, I started work on them five years ago. Though there’s an excellent pattern available on Ravelry [2], it’s in a heavier gauge than I wanted. It’s also faithful to the surface design of the originals, and I wanted to tweak a couple of details.

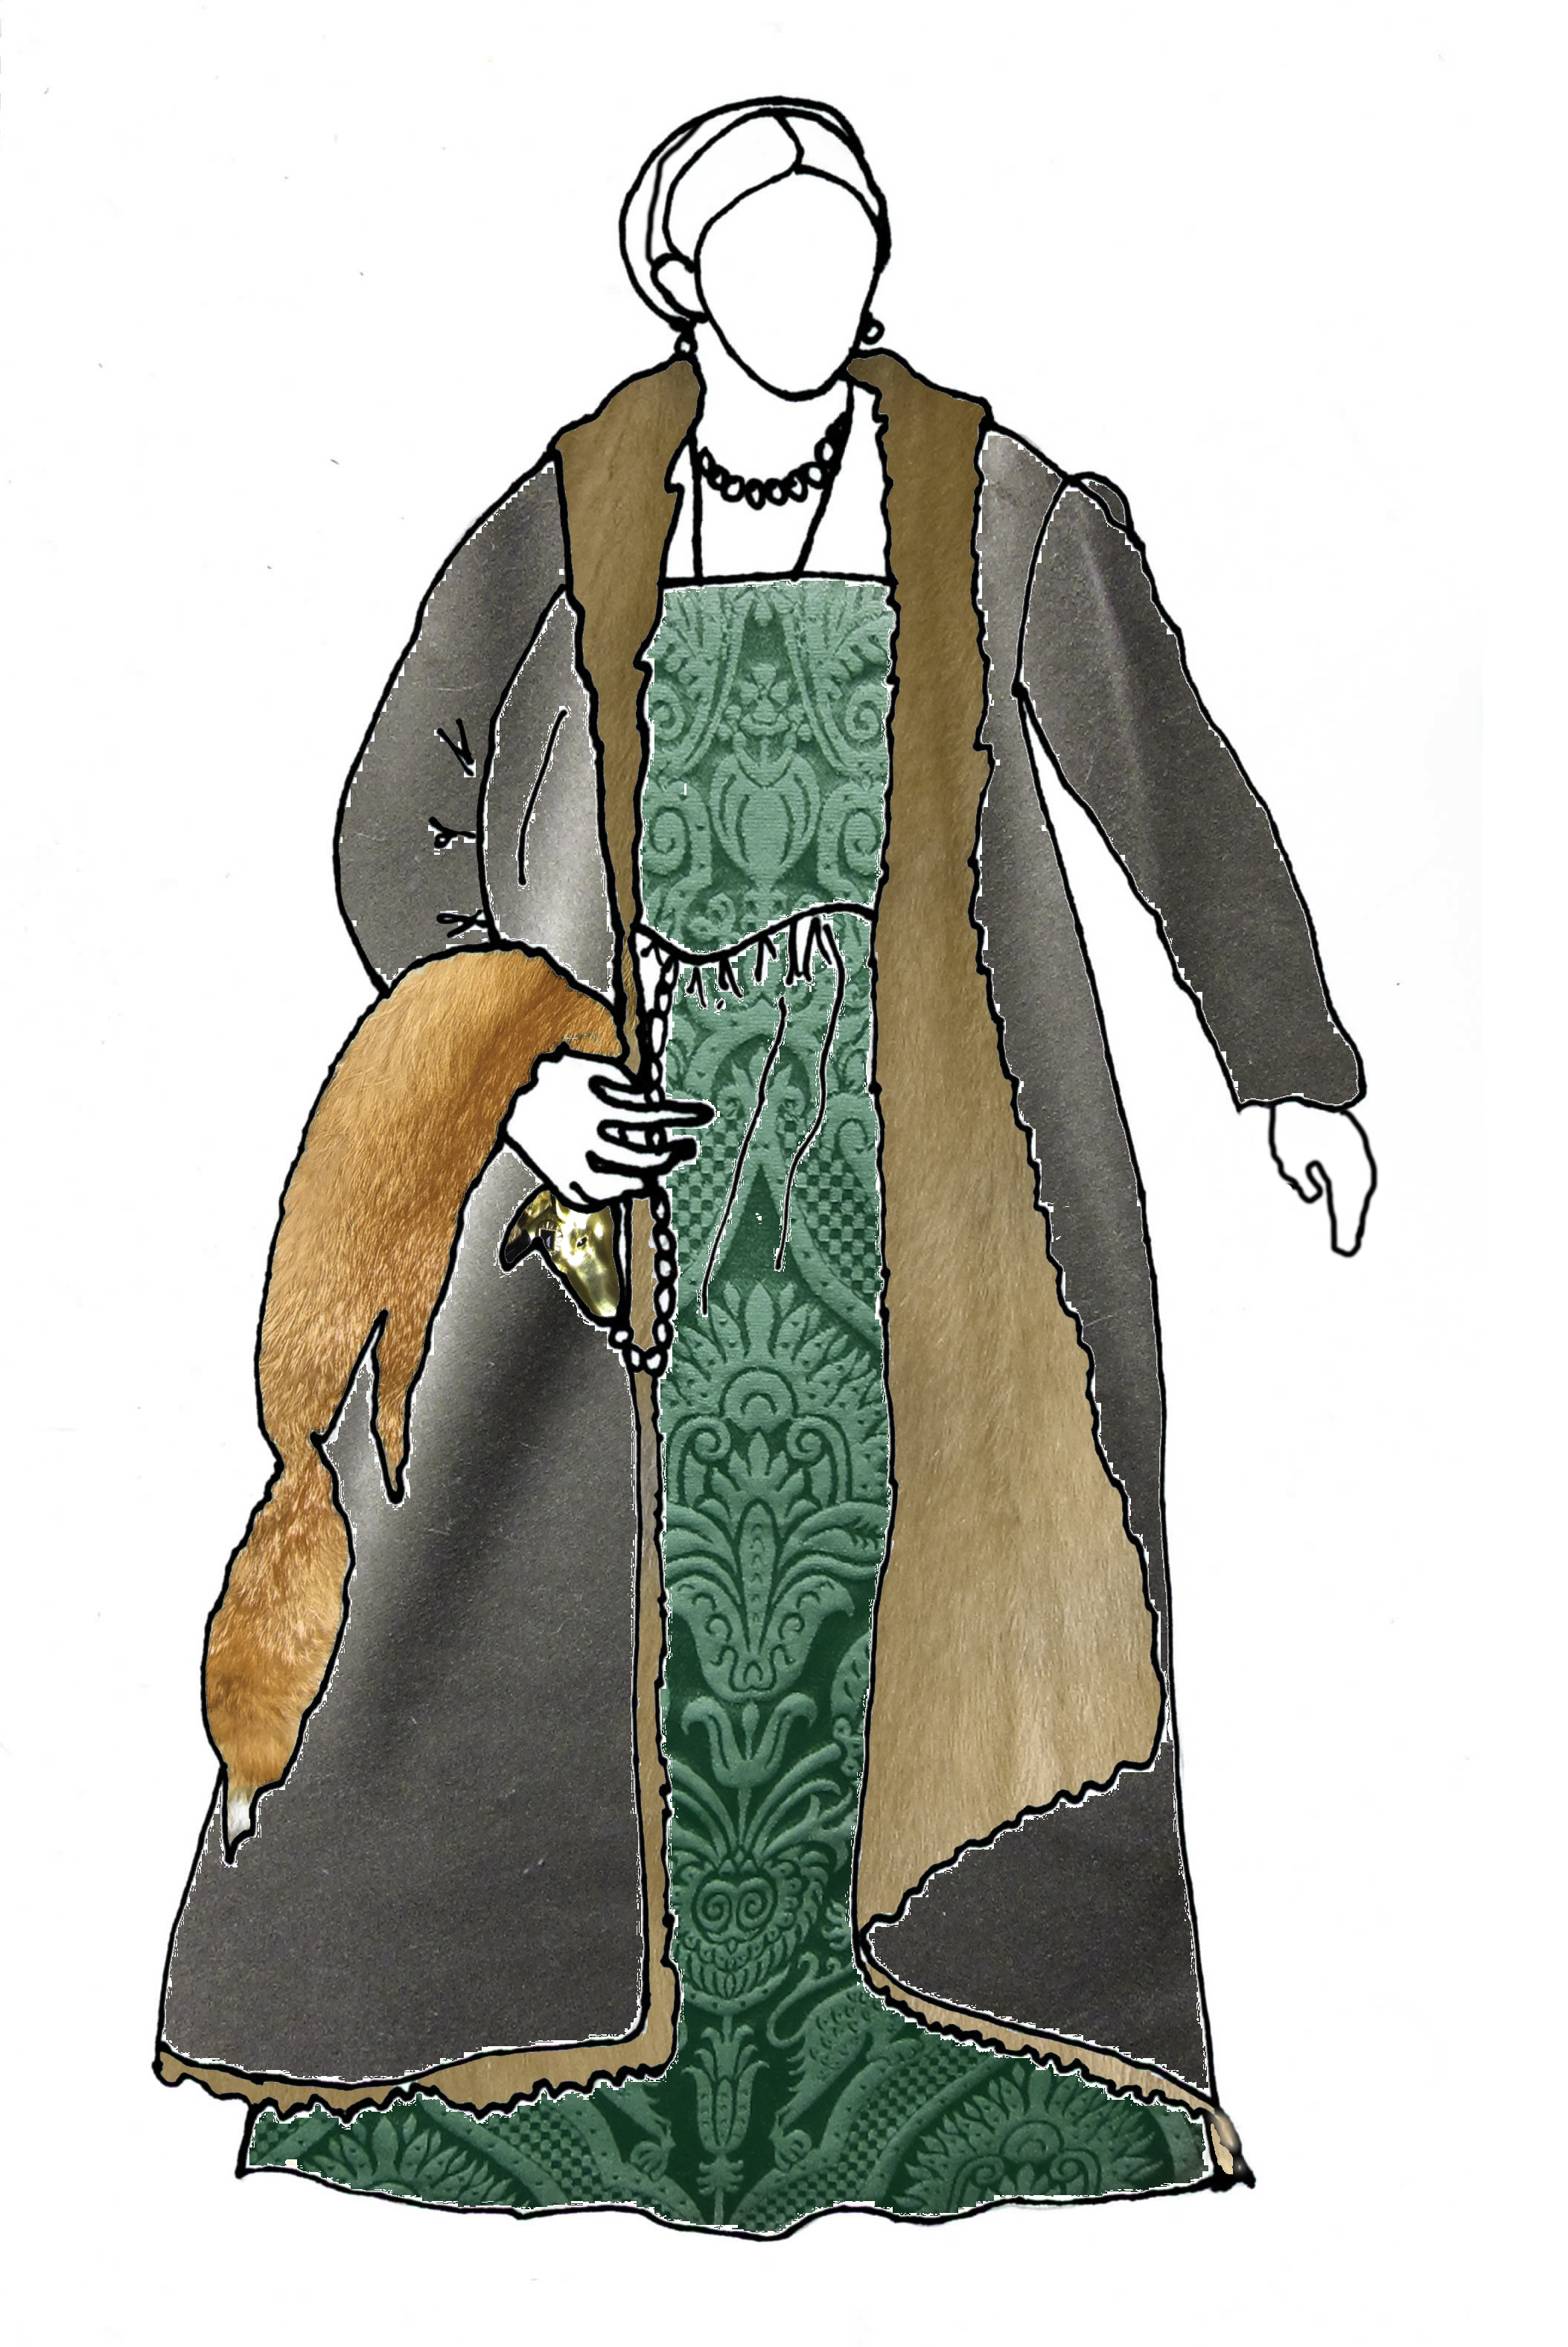
So I developed my own pattern. Most of it is based it on information gleaned from the Medici Archive, who hold the actual stockings. At the time, they had high-resolution images available on their website. [3]

As I intend to wear the stockings, they are not a line-for-line copy.

  • the originals are silk; mine are wool, which I prefer because of its resilience, knitting qualities, comfort – and ease of repair
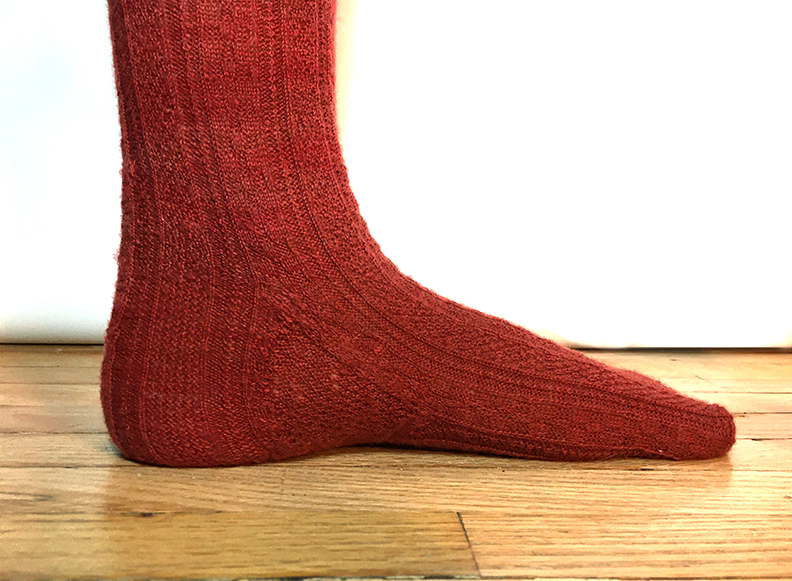
  • the original stockings look baggy in the calf and foot. The decreases for the calf are far too low on the leg to fit me, and the feet are too thick. Perhaps, after at least eleven pregnancies, Eleonora’s feet and ankles were somewhat the worse for wear. Whatever the issues, the stockings wouldn’t have been practical in their original form, so I adjusted the shaping.

In a period-consistent manner, I tweaked minor details of the surface patterning that didn’t appeal to me

  • on the cuff, I used purl squares instead of eyelets in the centre of the diamond pattern and omitted the second zigag at the edge
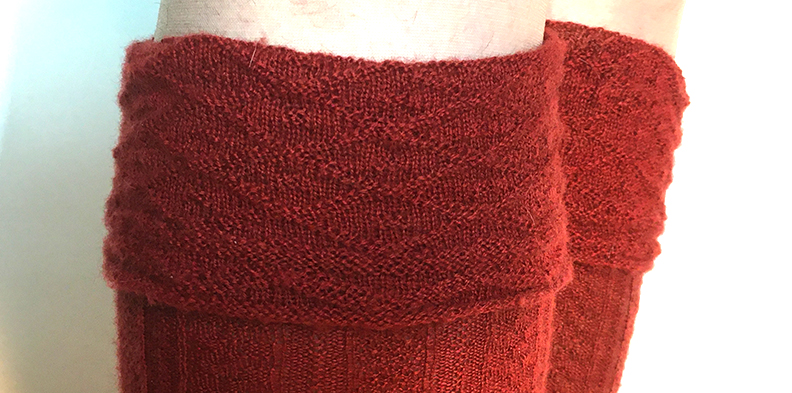
  • on the widest leg panel, I substituted a chequerboard pattern for the ladder effect of the originals
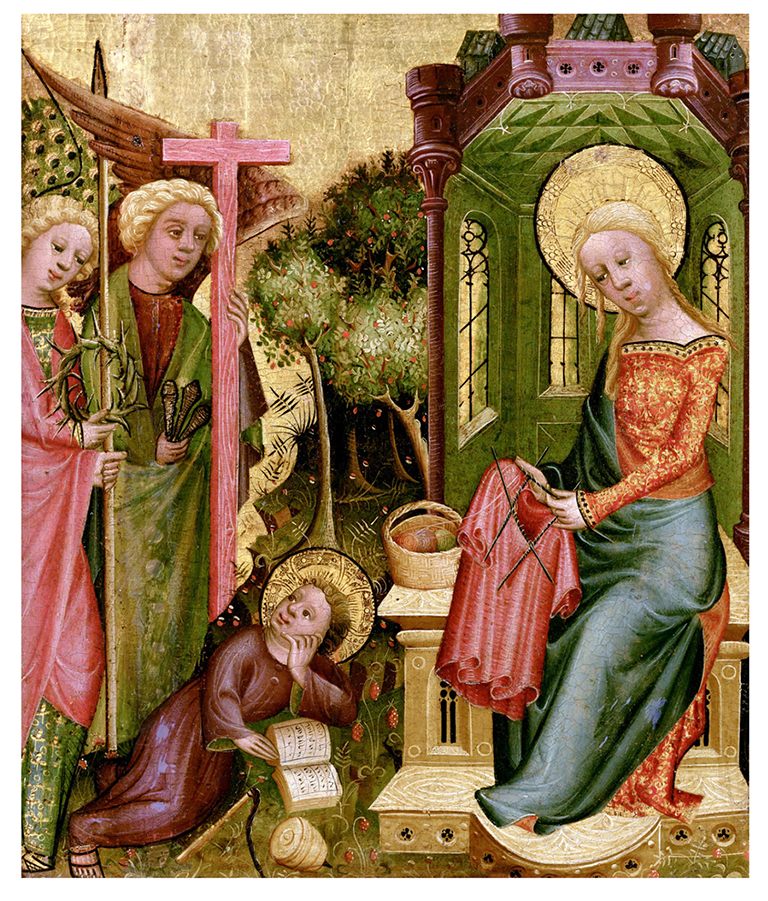
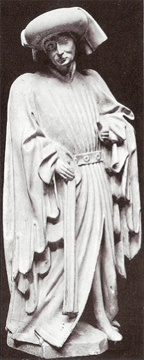
  • And finally, though the original stockings may have been knit flat and seamed up the back [4], I knit them in the round. Strictly personal preference. By the sixteenth century, knitting in the round was known – the Virgin Mary, in this 15th century painting by Master Bertram of Minden, is clearly knitting a garment in the round

  • The heels and feet are mostly educated guesswork. Unfortunately, all the available detailed images were of the stockings in profile. None showed the back of the stocking or the sole face-on, so I based the shaping on Richard Rutt’s diagram of feet of 16th century knitted silk stockings.[5]

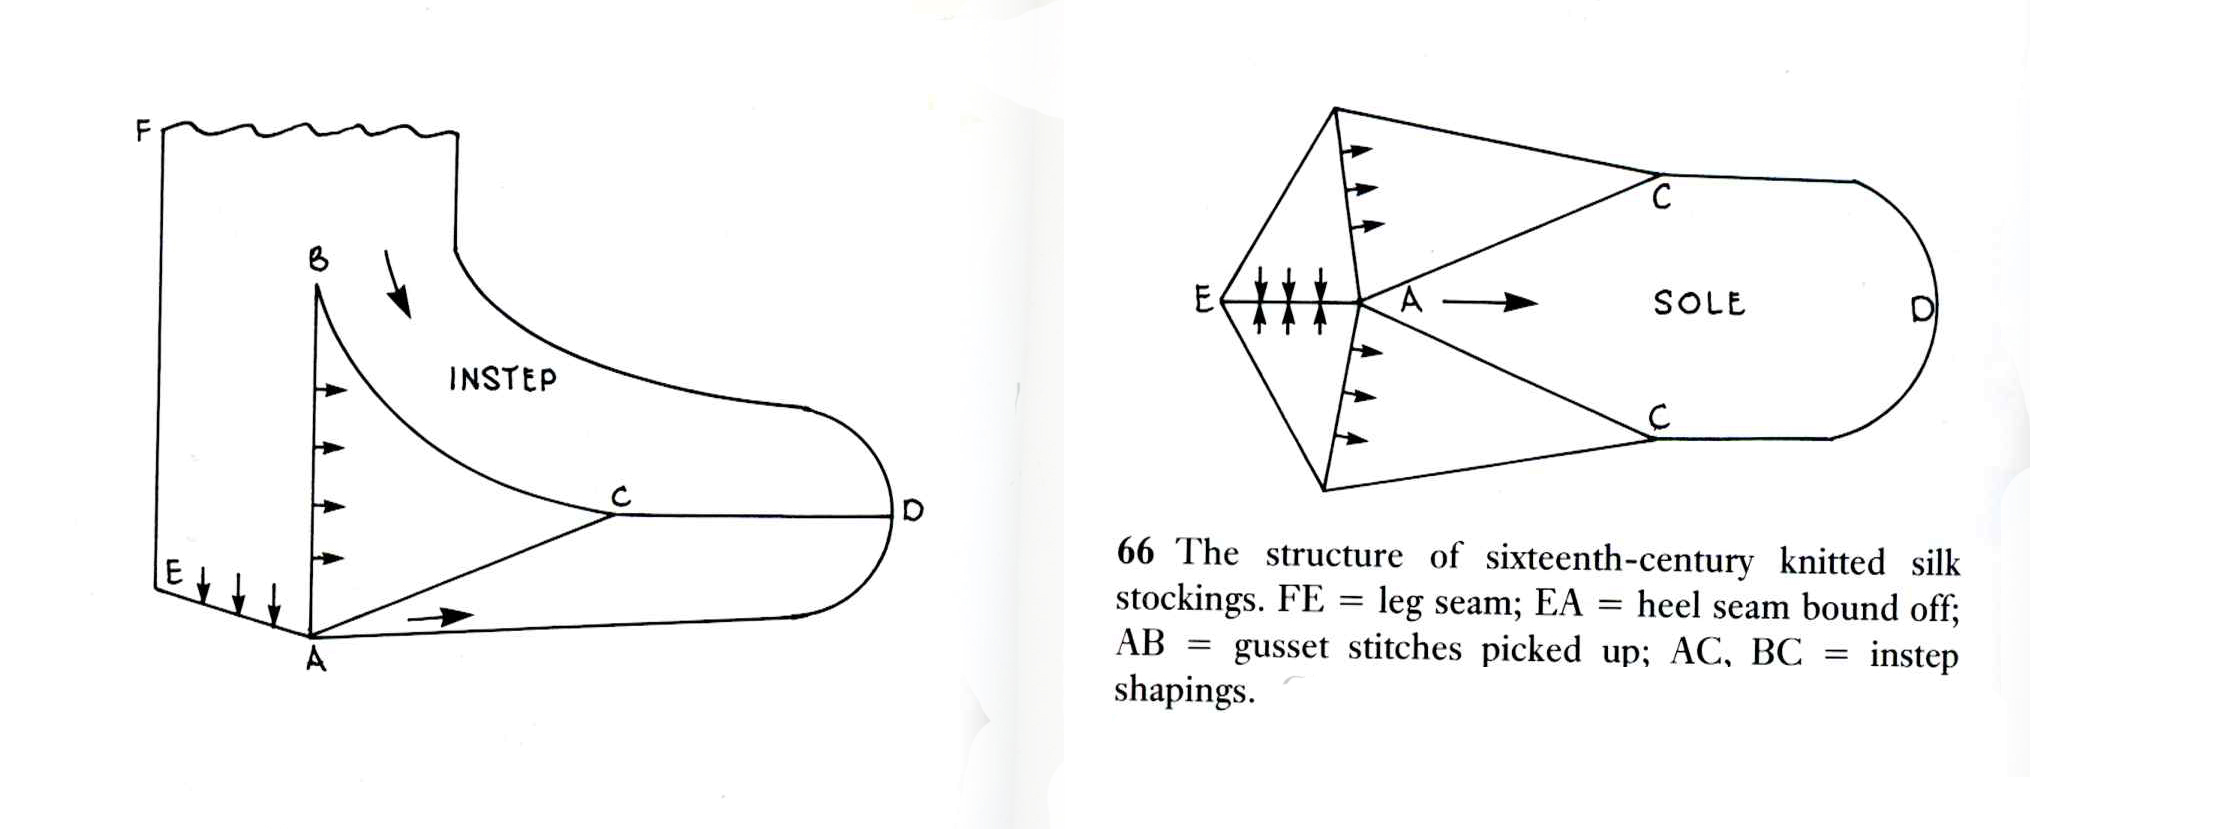
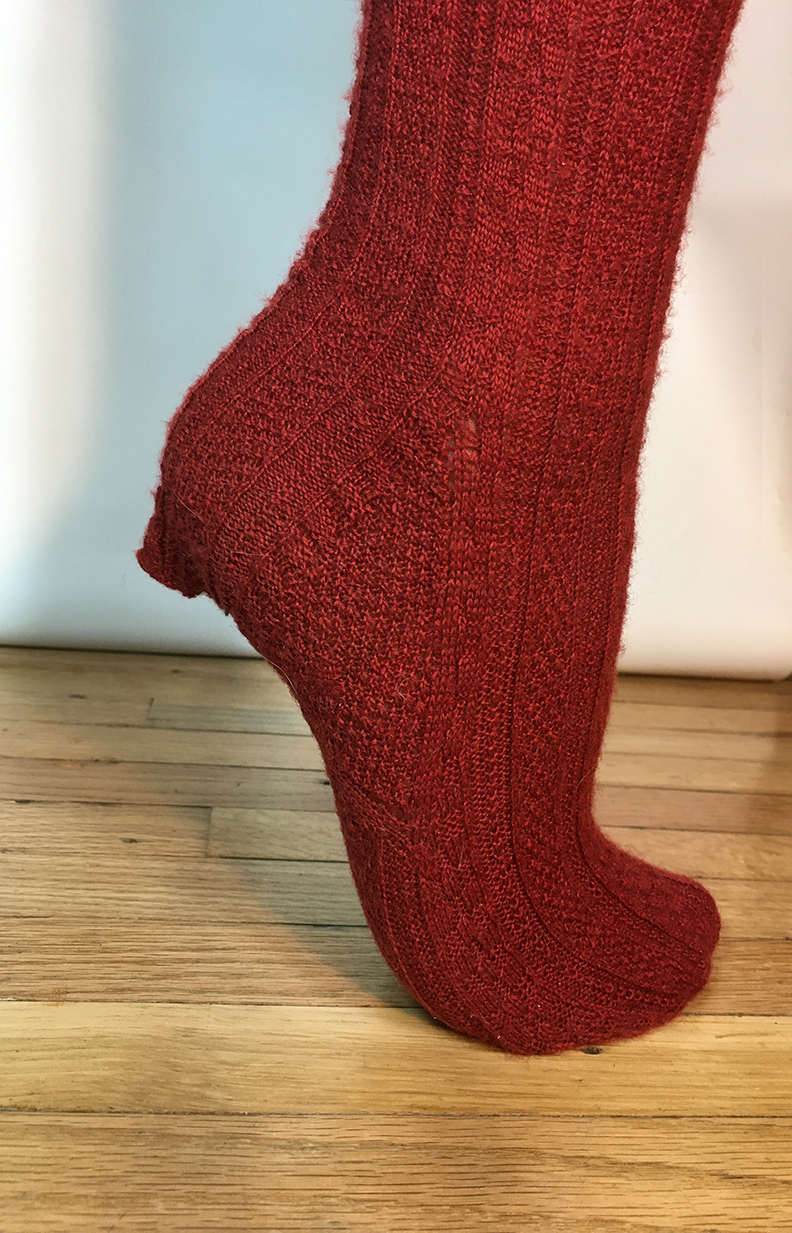
That heel pattern has an odd little quirk – since the heel flap is rectangular, there’s a small nub left sticking out when it’s worn. My daughter, who modelled the stockings for the pics, tells me she didn’t even feel it. It’s kinda cute, though I expect it’ll eventually flatten & felt into the sole with wear & sweat.

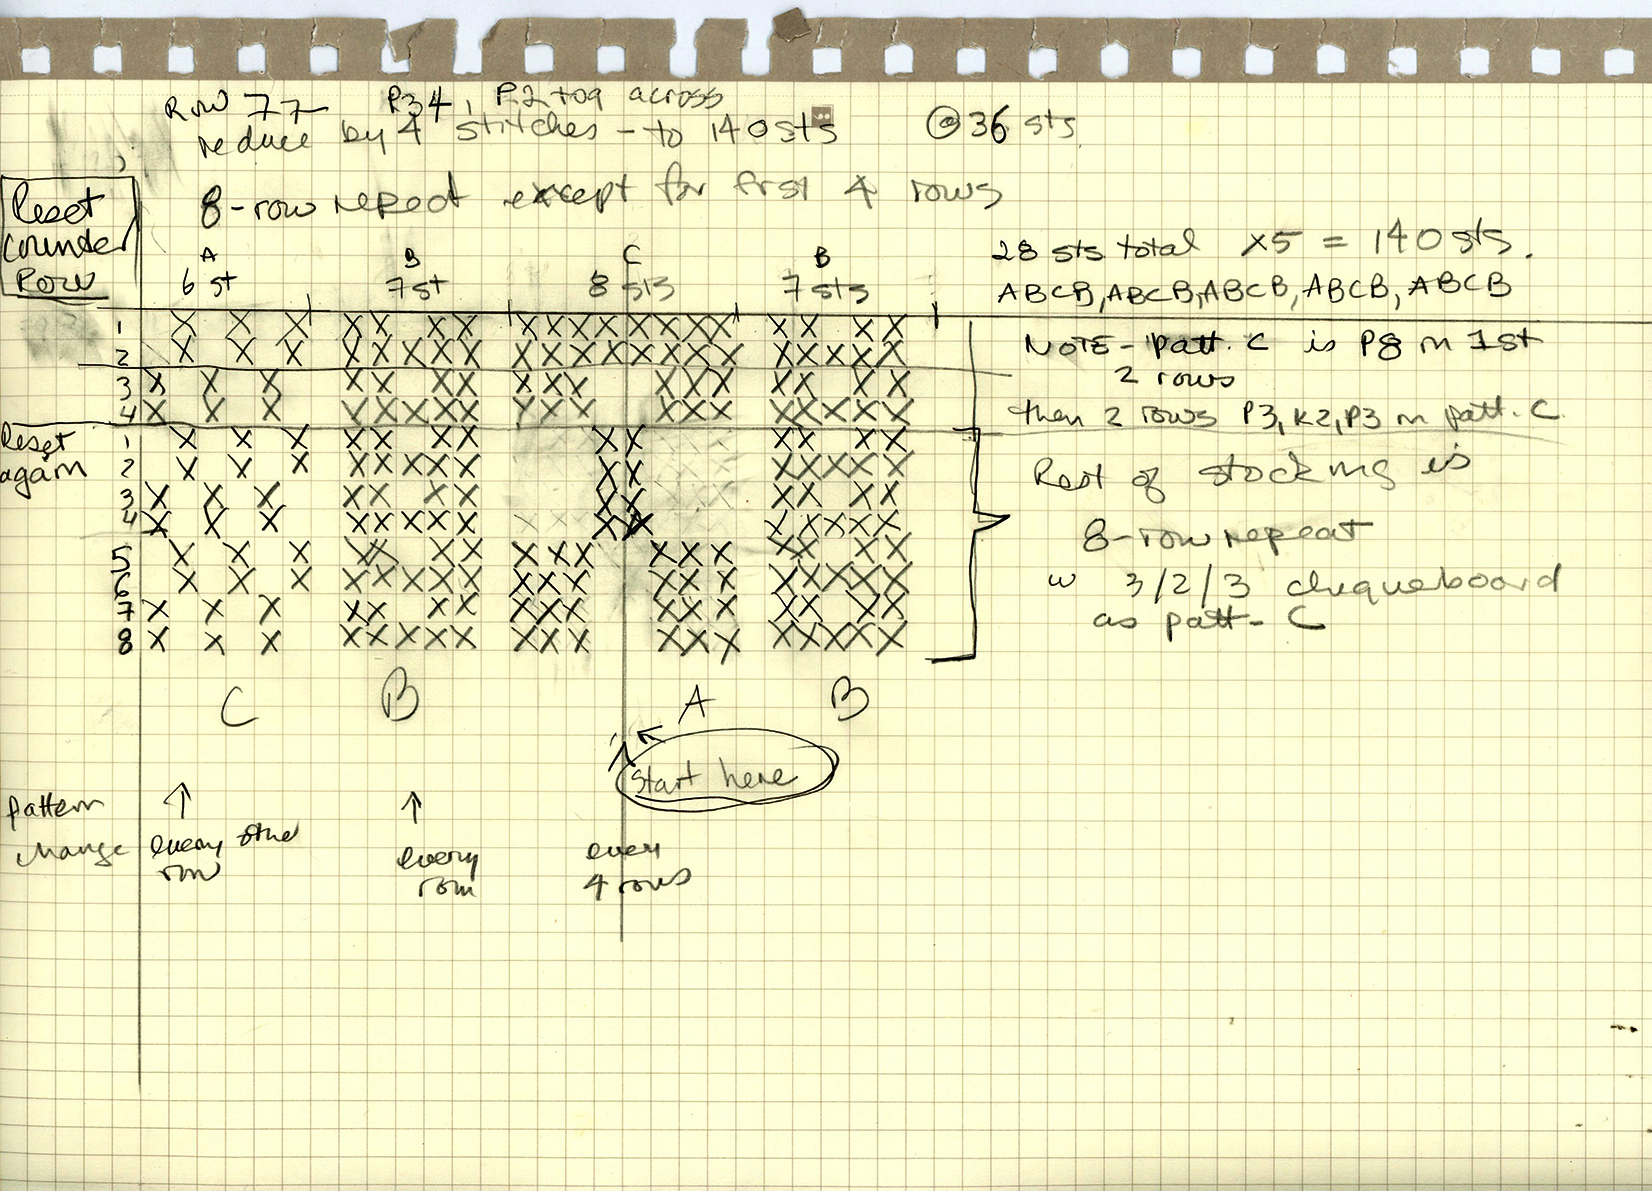
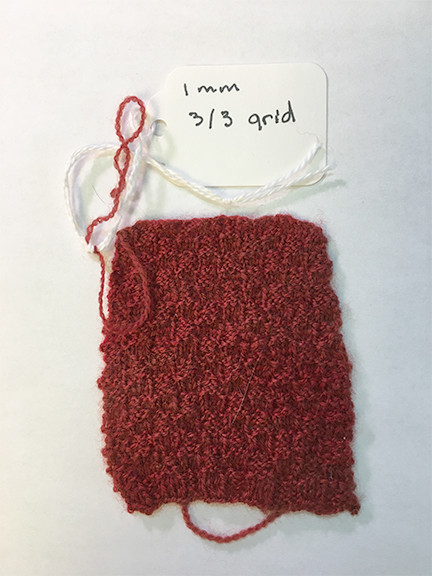
From the Medici Archive images of the stockings, I guesstimated that the originals were knit at ~18-20 stitches per 2.5cm, and found a cobweb-weight yarn in wool white that knits up at 18st/2.5cm on 1mm needles over one of the leg patterns.

I scoured the yarn, dyed it with madder, then overdyed it with cochineal, made a gauge swatch and started knitting.

The first stocking went smoothly. It took about six months, which I felt pretty good about, seeing as I was knitting a complicated pattern on tiny needles in my “spare” time.

With the second stocking, the “adventure” set in.

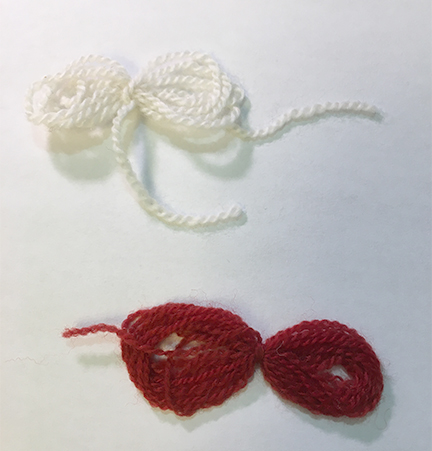
First of all, when I got the yarn out, I discovered that, for some reason that still eludes me, about half the remaining yarn was darker than the yarn I’d knit the first stocking with. No idea how or why – it was the same dye lot of the same yarn, scoured and dyed at the same time, and had looked the same when I started knitting.

Rather than have an abrupt colour change somewhere, I decided to knit alternating the two shades throughout the stocking, even though it would make the second stocking a bit darker than the first one.

Then I went in for foot surgery, and continued knitting while convalescing.

Big mistake.

Never, ever, work on anything more complex than a garter stitch dishcloth when under the influence of heavy-duty painkillers! I’d nearly finished the second stocking when I realized I’d knit the foot off the wrong side – since the stocking is shaped at the calf, it matters which side the foot comes off of! I ripped it back, reestablished the pattern, and decided to put it away until I was less annoyed with myself.

Life happened, and it was a couple of years before I picked the project up again. At which point I discovered that, though I thought I’d packed it away carefully, moths had gotten at it. I wrapped it up & stuck it in the freezer, where it sat for a year or so.

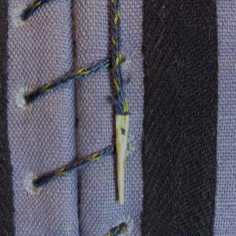
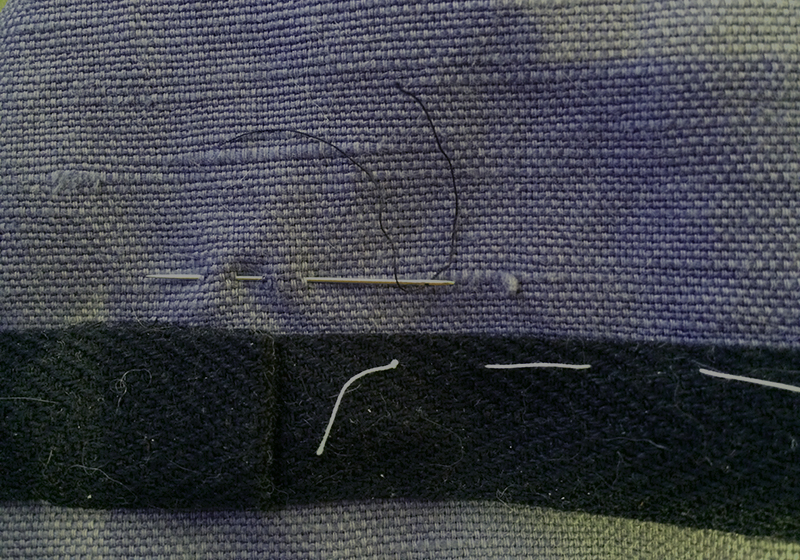
Finally, I picked it up a couple of months ago, and started darning the moth holes. That took a while – darning many, many, moth holes can be tiresome. Luckily, the surface pattern is so busy that the darns barely show!

When the darning was done, I started knitting the foot again, and discovered that my notes from the first stocking were vague in spots, so I had to reinvent the toe decreases.

My daughter modelled the stockings so that I could take the pics. In the process, a couple more moth-weakened strands gave way, so there was some more darning.

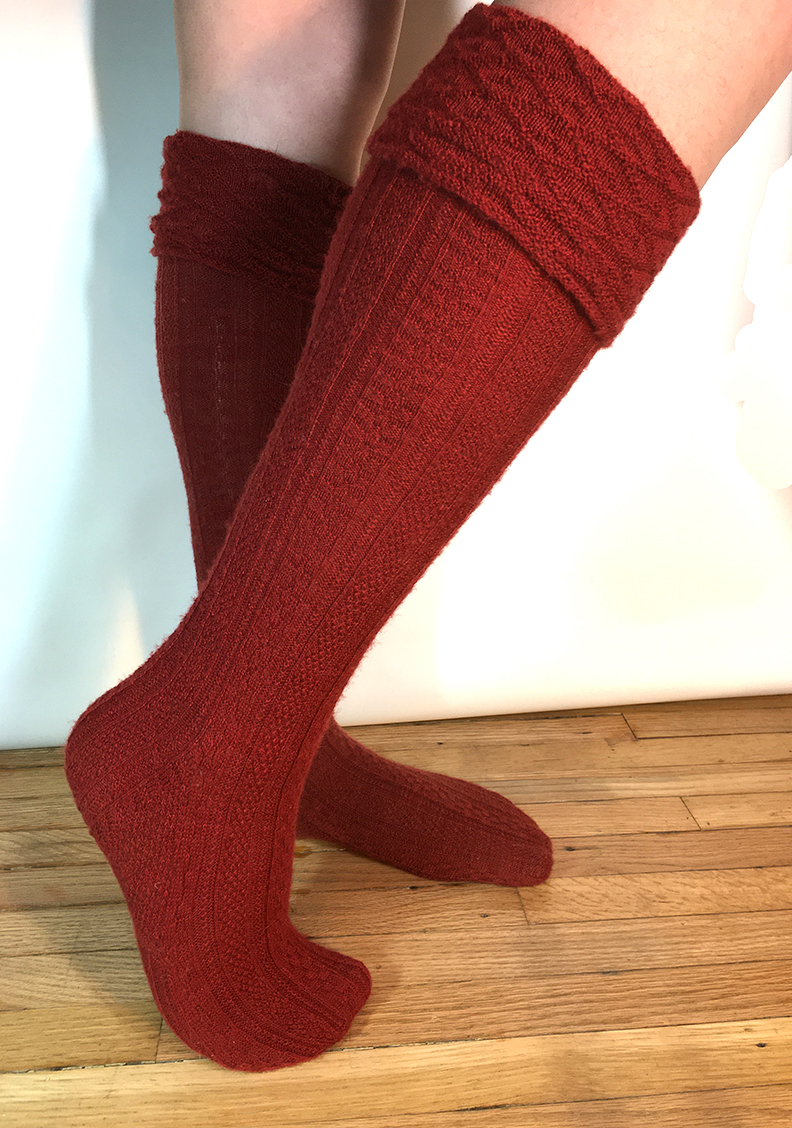
And now the stockings are done. Despite all the mistakes, mends and imperfections, I’m thoroughly pleased with them and  eagerly waiting for a suitable SCA[6] event to wear them to!

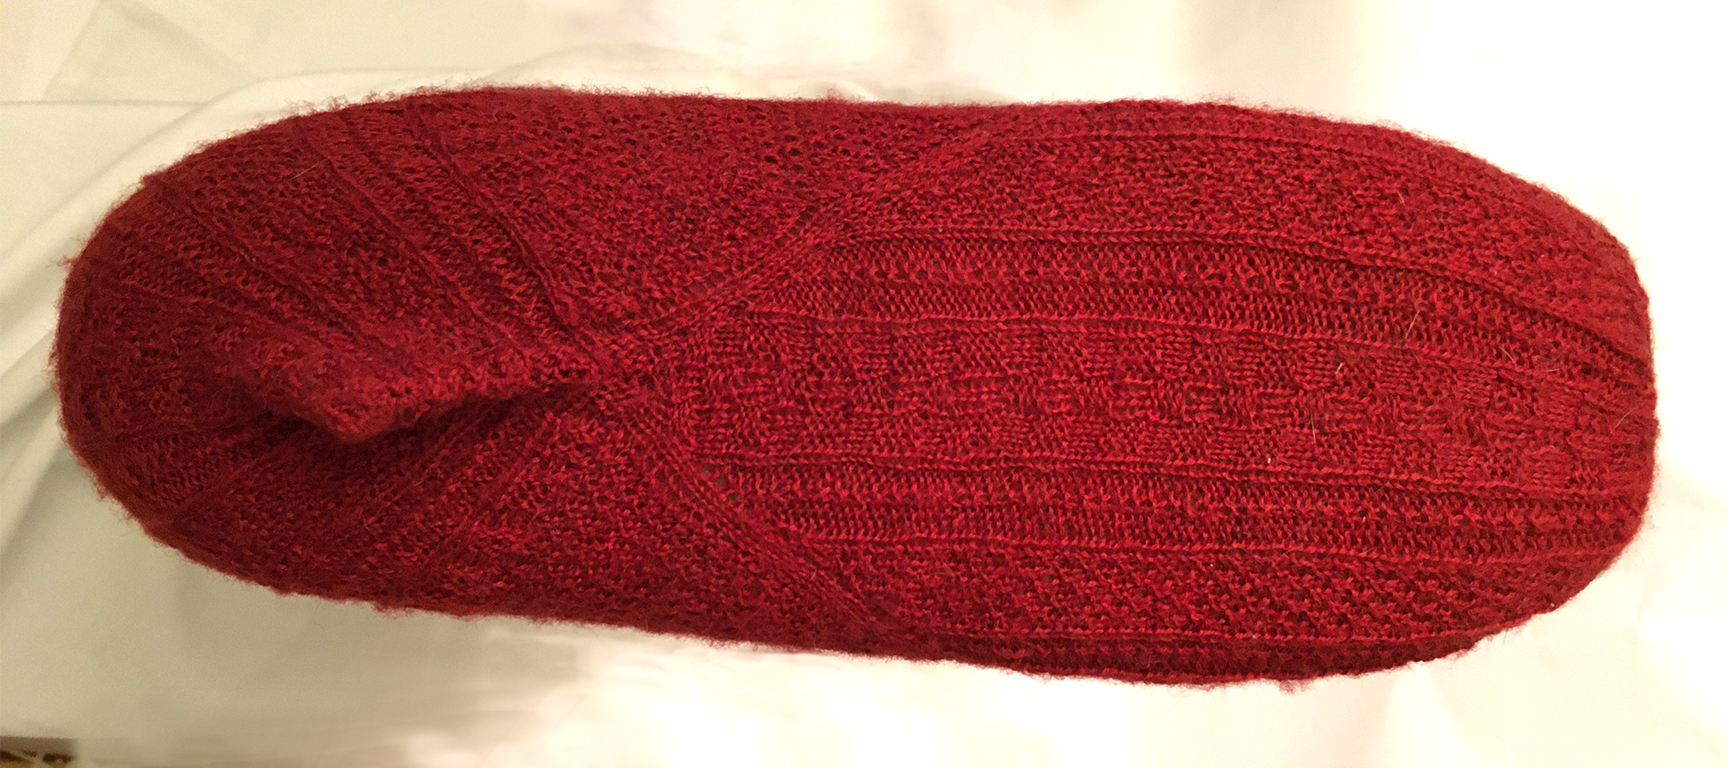
And just for the fun of it, here’s a pic of the sole. Turned out that the stitch count worked out so that I was able to continue the pattern all the way around the foot!


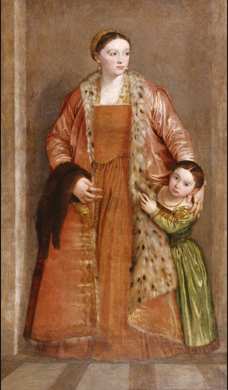
[1] Because of copyright concerns, I haven’t included an image of the original Eleonora of Toledo stockings. If you want to see an image, and more information, have a look at this article; they’re on page four: https://kemeresearch.com/files/ATR_60_2018_pp3-9_Malcolm-Davies_FINAL.pdf

[2] https://www.ravelry.com/patterns/library/eleonora-di-toledo-stockings-first-edition

[3] The images I used are no longer available on the Medici Archive project at https://www.medici.org/ . I have no idea why.

[4] Currently, there doesn’t seem to be information available on some details of the stockings, including what the gauge is, how the feet were made, and whether they were knit flat or in the round. So, while it’s not 100% certain that they were knit flat, the interpretive text at the Palazzo Pitti, where they’re displayed, said “The closure seam is at the centre back”, and Richard Rutt’s text indicates that 16th century stockings were sewn up the back, so I went with that. Or rather, decided not to go with that.

[5] Richard Rutt, A History of Hand Knitting, Loveland, Colorado, Interweave Press, 1987, p.74

[6] Society for Creative Anachronism

By | April 21st, 2021|clothes moths, cochineal, damage, dyes, fibers, knitting, madder, mistakes, Pent, repairs, SCA, scouring, wool|Comments Off on At last, The Stockings

The Fustian Chronicles – part one

In the late middle ages and Renaissance, “fustian” meant an affordable fabric woven of two kinds of fibre – cotton & linen, or cotton & wool, or linen & wool.[1]

A lot of historical novels I’ve read mentioned fustian. It’s one of those words, like “curricle” or “cotehardie” that writers use to position their work in past time. It’s not something you’ll find in a present-day fabric shop unless it’s one that specializes in textiles for historical reenactors.

Last summer at Pennsic, a reenactment event that features a marketplace full of supplies for reenactors, I found a generous remnant of cotton/linen fustian and decided to make an “everyday” sottana of it, loosely based on what the women in Vincenzo Campi’s  lively kitchen scene are wearing.

All of the materials I used would have been available in the late Renaissance, aside from a package of olive green iDye and a meter or so of synthetic whalebone.[2]

The materials:

  • blue fustian fashion fabric
  • “natural” cotton canvas interlining
  • “natural” cotton muslin bodice lining
  • lightweight linen for the skirt lining, dyed olive green [3]
  • synthetic whalebone to reinforce the front edges of the bodice
  • a small remnant (aka cabbage)[4] of silk for reinforcing the corners of the front neckline
  • 21 brass aiglets. 20 are for the points tying the sleeves on, and the 21st is a tiny one for the lacing cord. I made that one myself . It’s my first attempt at making an aiglet, and I’m quite pleased with it. The lacing holes came out very, very small, and the purchased aiglets I have are too big to pass through them without using pliers
  • a largish piece of cabbage of lightweight olive green wool for the sleeves
  • cotton and linen threads for assembly, and, for touch of luxury, silk threads to make the eyelets and the lacing cord
  • two kinds of black cotton braid – herringbone-patterned for the trim, and plain tabby weave for the sleeve points. Sewing the herringbone braid on, I discovered it has a tendency to pick up dust & cat hair. Luckily, it cleans up easily with a lint roller!

Except for the fustian and the braids for trim, all of the materials, including the packet of iDye, were from my stash! (Though I did have to buy some salt to add to the dye.)

For the bodice pattern, I used one that I had drafted a while ago. It was designed to side lace, but that was an easy fix – I turned the lacing edges into seams and created a centre-front opening. Then I made a muslin out of sturdy cotton canvas, tweaked the fit, and used the muslin as the underlining of the bodice.

Instead of bag-lining the bodice, I assembled it Renaissance-style. To minimize bulk at the shoulders, I sewed the shoulder straps in position and trimmed the excess fabric. Then I catch stitched the seam allowances over the canvas underlining, and slip stitched the lining in.

Once that was done, I whip stitched the pieces together and made the eyelets.

There’s no pattern for the skirt – it’s two full widths of the fustian, flat-lined, seamed at the centre front and back, and with the front seam left open for about thirty centimeters at the top so that I can get into the garment.

On the right hand side of the skirt I’ve made a fitchet – an opening so that I can reach my tie-on pocket. The edges of the fitchet are bound with a piece of navy blue linen from my cabbage basket.

To gather the skirt to fit the bodice, I used cartridge pleats. I like cartridge pleats a lot, and use them whenever they’re appropriate.

For the hem, I tried an experiment. I like padded hems; I like the way they make a skirt hang & move. For padding, I usually use wool felt. This time, because I want this sottana to be washable, and wool felt shrinks and gets lumpy, I used multiple layers of the fustian – seven if I remember correctly. It works as well as the felt!

The sottana is fully lined, and, aside from the long seams on the skirt and sleeves, it’s hand-sewn. Up to and including flat-felling the sleeve seams and the skirt seams where the raggedy shuttleless loom selvedges showed.

Between catch stitching the seam allowances, sewing in the linings, whip stitching the pieces together, clean-finishing the seams, hemming the top&bottom of the sleeves, making the eyelets, making the points, and sewing on the trim, it was a LOT of hand sewing!

Luckily, I enjoy hand sewing, and, all in all, I’m satisfied with how this project turned out!


[1]the meaning of “fustian” has changed with time – in the late middle ages/Renaissance it meant a fabric woven of two kinds of fibre. By the nineteenth century, “fustian” meant cotton fabrics with a short, brushed pile, like corduroy. By the late 20th century, the word had become an archaism.

[2] I’m ignoring the fact that the materials were made with present-day processes rather than being organically grown, hand-harvested, plant dyed, etc. etc. And, though I’m not against all use of animal products, hunting whales is inexcusable in today’s world – therefore the synthetic whalebone.

[3] originally, this lining linen was bright egg yolk yellow. Linen is heavy, so when I found this cheap & lightweight linen, I bought a lot of it even though it’s a colour I wouldn’t usually choose – yellow is easy to overdye. Which I did. With iDye. In the washing machine.

[4] “cabbage” was the medieval/renaissance term for the fabric left over from making a garment, and the tailor got to keep it!

By | March 27th, 2020|costume, cotton, Italy, linen, Renaissance, SCA, the stash|1 Comment

Italian Renaissance Costume Challenge – Day 1

This year I’ve entered the Realm of Venus’s Italian Renaissance Costume Challenge (IRCC). The start date is the first of April – today.

The rules: the IRCC is a four-month long challenge to create a complete man’s, woman’s or child’s late Italian Renaissance outfit, from the skin out, of a style circa 1480 to 1600. The outfit can be of any social class and needs to include at least one accessory, with a maximum of four accessories allowed.

What I’ve proposed to make is:

  • a camicia
  • an underskirt
  • a gown based on the extant diamond twill half-gown held in Pisa
  • a headdress or cap

Depending on how things go, I may add one or two of the following

  • an apron
  • a belt
  • a pearl necklace with matching earrings
  • a vest or short cape

Entries started a month ago. That first month was to be dedicated to deciding on what to make and gathering materials.

Deciding what to make was easy; ever since I found out about the wool/linen diamond twill half dress that’s in Pisa, I’ve wanted to make a gown based on it, using the diamond twill I found when King Textiles – one of our local fabric shops – had to move when their building was sold to a condo developer.

I’ve also wanted to try needle lace, so, if all goes well, the “headdress” will be a needle lace cap.

And my current White Wolf Fian challenge is a carved busk. So far all I’ve done on it is taking a carving class at Lee Valley and assembling the tools & materials, so, since I haven’t started on the actual busk, it works with the timing rules. Though, since it’s woodwork rather than textile, I’m not sure it fits in the criteria – I’ll have to check before adding it to the entry.

As for gathering materials, that’s pretty much done:


The materials for my IRCC 9 entry

The fabrics:

The right stack:

  • white lightweight cotton for the camicia
  • blue wool/linen diamond twill for the gown
  • black wool twill for the gown’s guards

The left stack:

  • red lightweight wool for the petticote
  • lightweight yellow linen for the linings (lightweight linen is usually expensive, so when I found this one cheap at Pennsic*, I bought lots of it even though it’s not a colour I’d usually choose for linings)
  • cotton canvas, heavy linen & various interfacings for the bodice

The odds & ends:

  • 50/3 linen thread for my super-ambitious lace cap plus the images & plastic to cover them (it might wind up as a lace-edged cap)
  • Mathew Gnagy’s Modern Maker volumes and the bara tapes I made following his instructions
  • a sample of the smocking for the camicia
  • my faithful roll of butcher paper that’s seen me through many patterning adventures
  • a piece of basswood and some carving tools for the busk
  • and, of course, the obligatory furry assistant.

I’m not sure I’ll use all of this, and will probably find I’m missing some odds & ends.

Today’s project: drafting the basic bodice pattern:

Pattern draft for 16th century woman's bodice

…to be continued


  • Pennsic is an annual Society for Creative Anachronism event that’s held in Pennsylvania and usually draws 10,000 or more attendees. One of its features is a market with lots of merchants who specialize in reenactment-related stuff.
By | April 1st, 2019|cat, costume, IRCC, Italy, Renaissance, SCA, smocking|Comments Off on Italian Renaissance Costume Challenge – Day 1

The Viking coat – Part 1

My Viking coat is finished!

Blue Viking coat with green bordersIt’s been a journey; I’ve been working on the coat since spring. It came together from three sources: weather, a stalled project, and a pattern I bought so long ago that it now turns up in listings of vintage patterns on Etsy and eBay.

The weather:

Several years ago I was horribly cold at an SCA * camping event. There was frost overnight and, while daytime was warmer, it was still crisp.

It wasn’t the first time I had been cold at an event, just the worst, and I thought it would be nice to have a seriously warm Viking-style coat.

The stalled project:

During the years people were donating their furs to Goodwill, I got a full-length black mink coat that I intended to use to line a cloth winter coat. I found the ideal tweed for the coat shell, got the interlining fabric and studied much information on how to sew furs. And stalled there, intimidated by the idea of cutting into a fully-functional mink coat.

That was more than ten years ago. Finally, I figured this was ridiculous and decided to take the indirect route – to make a fur-lined Viking coat to get experience in handling that much fur.

Due largely to the lack of surviving physical evidence, there’s been a lot of discussion on whether the Vikings used much fur and whether they used it for linings. I think they did, and I agree with archaeologist Tuija Kirkinen. In her paper on the ritual use of fur, she stated that “the use of pelts and furs for clothing is self-evident in a region at the edge of the taiga”. ** While I don’t live at the edge of the taiga, the weather, even in southern Canada, can get ridiculously cold, and I’ve found that furs (and I include sheepskin) are best at keeping me warm when the temperature dips below -30C (-22 Fahrenheit).

The pattern:

The Turkish Coat is one of the first patterns Folkwear published. I don’t remember exactly when I bought it – sometime around 1974. And I’ve been meaning to make it ever since.

The Viking coat was the perfect opportunity. From surviving fragments and images, it appears the coats Viking men wore might have been constructed in a similar way.Folkwear Turkish Coat back view drawing

Granted, it’s a “male” garment, and the existing evidence shows women mainly in shawls. Which I’ve tried, and discovered that to keep warm in seriously cold weather, I’d have to wrap myself up in many, many layers.

Nope. For the sake of sanity and mobility, I decided on a coat.

The materials:

The fabrics: since this was going to be an experiment, I wanted to spend as little as possible on it, so I dug through my stash and found two yardages that worked well together – a medium“indigo” blue  and a vivid apple green  wool.

Apple green fulled wool swatch


While they’re both commercially dyed, both are colours that are possible with natural dyes that were available to the Vikings.

The blue is easy – woad, which contains indigotin. Woad seeds were found on the Oseberg ship.

On the other hand, green can be dyed many different ways, so the possible dye sources are guesswork. Maybe woad plus weld or broom – or one of the many other sources of yellow.

Coincidentally, a friend – textile artist Jaclyn Paltanen – just did an experiment on dyeing woad-based greens on wool and got a lovely range, including that apple green!

Both fabrics are pure wool, and they’re fulled. The apple green is a lightly-fulled 2/1 twill; the blue is more heavily fulled so I’m not sure what the weave is.

There’s still occasional discussion about whether Vikings fulled their wools, but apparently archaeologist Inga Hägg has documented the existence of fulled wools in Viking-era finds in Hedeby in her Die Textilfunde aus dem Hafen von Haithabu***.  Fulled wool is not appropriate for every kind of garment – but for a coat intended for Canadian winters it most definitely is!

The lining: this is where I spent some money – $35 if I remember correctly. When I bought the donor coat for the lining, I wasn’t sure what the fur was (and neither was the man who owns the secondhand shop where I bought it). We guessed it was some sort of water critter – maybe beaver or otter – or maybe marten, all of which were available to the Vikings **.

To my surprise, when I took out the lining, I discovered it was fur seal."fur seal" stamp on skin side of fur coat used for lining It’s not at all like what I know as seal!

Turns out the fur seal is a southern hemisphere beastie, so it’s improbable that a Viking-era coat maker would have had access to it. However, I’m taking a pass on “authenticity” here; the furs I thought it might be – beaver or otter or marten – would all have been available. We do the best we can!

Making the coat:

The first step was figuring out how to allow for the thickness of the fur lining. While I got over 48 million hits the last time I googled “fur sewing”, the vast majority handled fur in the present-day convention – as something to show on the outside of the garment. Finding information on working out how to allow for a fur lining took some digging. The clearest I found was on a Threads Magazine forum post from 2010:

“Take a length of the fur and wrap it around your middle with the fur facing inward, safety pinning it closed. Using a tape measure, measure around the outside of the fur. Take off the fur and measure around at the same spot. The difference between the two measurements will be your “fur adjustment.”

So that’s what I did, and it worked!

Viking coat muslinTo check the size and length, I made a muslin ****, trying it on over a wool Viking-style gown and a heavy sweater.

After I cut and assembled the shell fabrics I gathered my courage and started on the fur coat.

Taking it apart, I was reminded of the amazing amount of hand work that goes into furs! Even though the pelts are now sewn together by machine, the garment assembly is largely manual. hand stitching on inside of fur coat used for liningThe edgings and the lining were sewn in by hand, and there was a grid of long, loose hand stitches anchoring the pelts to the underlining throughout the coat.

Once I’d disassembled the coat, I realized I’d been lucky. The body of the coat was very close to the shape & size of the body of the Folkwear pattern, with only one significant difference: the original fur coat had a straight up-and-down overlap, while the pattern’s fronts are at an angle that’s supposed to keep the coat closed without fasteners. All I needed to do was stitch in two triangular sections at the centre fronts to add the overlap – and luckily again, the front facings which I had removed were big enough to cut the triangles from.

The sleeves were another matter. Originally, I intended to use the fur sleeves to line the fabric wool twill sleeve liningssleeve, but I found that the combination of the fur and the fulled wool fabric was too bulky for comfort. So back to the stash, where I found a medium-light woolen twill remnant that worked to line the sleeves.

pocketRegarding authenticity, I made two decisions to be deliberately inauthentic, and the first was pockets. The Folkwear pattern has no pockets – just pocket slits, which are probably Viking-appropriate. But with a fur-lined coat intended for brutally cold weather, making pocket slits that would have been convenient openings for weather to get in seemed self-defeating. So I added pockets. Gotta have somewhere to stash those kleenexes!

My other “inauthentic” decision was to underline the coat with a lightweight cotton, much as the underlinigpresent-day fur coats are. I wanted to make this coat look good and last as long as possible, and the underlining helps with both. It keeps the internal stitching – and there’s a lot of it – from pulling on the outer fabric and showing through to the right side.

If cotton made it to Scandinavia at all during the Viking era it would have been a wildly exotic fibre, and way too expensive to use as an underlining.

I could have used linen, which was available then, but the 3.5oz linen I have in my stash would have added a lot of weight – and the coat is heavy enough as it is. There may be some super-fine linens that wouldn’t have been so heavy, but from what I’ve seen on the web they’re also super-expensive. Which is where reality cuts in – this is a coat to wear, not a museum-quality interpretation.

Final details and a decison:

Once the coat was “finished” and wearable, I decided that, having put so much thought and work into, it would be worth going the extra mile and spending a bit more time and money on trim and fasteners.

Which is another post!

* Society for Creative Anachronism – a world-wide reenactment group that focuses on pre-1700 CE history

** Tuija Kirkinen The role of wild animals in death rituals: furs and animal skins in the late iron age inhumation burials in southeastern Fennoscandia. Fennoscandia archaeologica XXXII, 2015

*** Inga Hägg Textilfunde aus dem Hafen von Haithabu (The textile finds from the harbour of Hedeby) Neumünster, K. Wachholtz, 1984, ©1985

****I use 1/4″ gingham for muslins – the gridded weave of gingham makes the grain lines obvious. (And yes, there’s only one sleeve – I took the other one off to use as a pattern for the sleeve lining.)

By | October 19th, 2018|costume, dyes, fibers, fur, indigo, SCA, the stash, Viking costume, woad, wool|1 Comment

Mining the stash part 2

LiviaDaPortoThiene&Daughter4webTurns out my Mining the stash project is going to be delayed. For the best of reasons: I’m going to Italy with my sister next spring – and the dates are just too close to do both justice.

Much as I enjoy the annual SCA* Arts & Science comptetition, it’s no contest – I’m off to Italy!

A great opportunity to look at lots of art and at any historical textiles I can find.

With luck, I’ll be able to see stuff I’ve never met before and gather lots of information on colour, details and those visual elements that translate poorly at a resolution of 72dpi, or even in book-size photos.

In the meantime, I’ve gone through the stash & chosen the main fabrics for the gown and coat and the fur for the lining and the zibellino (the furpiece the countess is holding over her arm).

fabrics & furs for the Livia di Porto Thiene outfit project


  • The coat fabric is a grey/taupe cotton velveteen – apparently cotton velveteen is closer to what Renaissance velvets were than 21st century velvets. I’m hoping to be able to check this out while in Italy!
  • The gown fabric is dark green silk damask – to show the detail, I’ve made the scale bigger in the sketch than it is in real life
  • The fur lining will come from an tawny mink coat a friend found when clearing out his mother’s estate
  • The zibellino is a red fox fur I bought in a second-hand shop in Toronto’s Kensington Market.

Tempting as it is to get started making the outfit, this is as far as I’m going to go with the project until I come back from Italy!

Actually, that not quite true –  I’ve made the zibellino and am working on a detail that doesn’t show: stockings. As the countess is dressed for winter, she’s almost certainly wearing stockings.

I’ve used my imagination and am making a pair of knit red silk stockings in the style of the pair found in the tomb of Eleanora of Toledo. I dyed the yarn with cochineal and am waiting for it to dry. It looks like it’s going to be more towards purple than the red I was aiming for, so it’s going back in the dyepot tomorrow.

Stay tuned

* SCA – Society for Creative Anachronism


By | November 6th, 2014|costume, cotton, fur, Italy, SCA, silk, the stash, travel|Comments Off on Mining the stash part 2

Mining the stash

I’m mining my fabric stash for next spring’s Ontario Society for Creative Anachronism Arts & Science competition. The plan is to use mostly what I have on hand, only buying new materials when there just isn’t anything in the stash that’s suitable.

A bit of background: the Society for Creative Anachronism (SCA) is an international organization dedicated to researching and recreating pre-17th century arts and skills, and the Arts & Science (A&S) competitions include all of those except the martial arts.

A&S costuming competition gets into some pretty extreme authenticity, using only natural materials like silk, linen and wool. Which can be financially challenging – hence the mining of the stash. Luckily, over the years I’ve run into some irresistible bargains that I figured would come in useful “someday”.

Well, “someday” is here!

I’m basing my entry on this 1552 Veronese portrait of Countess Livia da Porto Thiene which is now in the Walters Art Museum in Baltimore, Maryland:

1552 Veronese portrait of Countess Livia da Porto Thiene currently in the Walters Art Museum in Baltimore, Maryland.
It’s not going to be an exact copy; for one thing, the colours that suit the Countess look dreadful on me, and for another, my local second-hand stores don’t run to sable, which is what the fur draped over her arm is. Or lynx, the lining in her coat.

So the excavation begins!

By | May 4th, 2014|costume, fur, medieval, museums, SCA, the stash|Comments Off on Mining the stash

May I please grope your houppelande?

Medieval statue of a man wearing a long houppelande…a question I asked a gentleman wearing a houppelande made of luscious-looking fabric at the Pennsic War, a Society for Creative Anachronism event last summer.

It came out more suggestive than I intended, but luckily the gentleman was also a fabric geek so he understood!

However, it once more made me aware that the English language needs a word that accurately describes that cloth-feeling gesture so familiar to every fabriholic – that gentle touch/rub/squeeze that tells so much about a fabric.

While there is something sensual about fabric, both “grope” and “fondle” – with their unfortunate associations with unwanted sexual touching – miss the boat.

In Czech – my first language – there’s a word that does the job nicely. In English it transcribes as “shmatat” and it specifically implies touching. Not groping, not fondling. At worst, pawing – as in “get your paws off that yardage”.

And I’ve often wondered whether there’s a connection between “shmatat” and “shmata”, the Yiddish word for rag – as in “rag trade”, aka the clothing industry. I’d be very surprised if it were a coincidence.

Any etymologists of Yiddish out there who can help with this one?

The image is a statuette of a Dutch count in a long houppelande from the Dam chimney-piece, Amsterdam, ca. 1475. From ‘A History of Costume in the West’ by Francois Boucher.(photo Giraudon)

By | January 28th, 2014|costume, language, medieval, SCA|Comments Off on May I please grope your houppelande?